# History and Background

History and Background

The Mifos Initiative is a global 501(c)3 fintech non-profit leveraging the cloud, mobile & open source community to democratize financial services worldwide and digitally transform the world’s 3 billion poor and underbanked. Mifos has pioneered open-source banking technology for the past fifteen years transforming the entire sector at each major stage of evolution from microfinance to financial inclusion to digital financial services and now embedded finance. Mifos guides the open-source community, steers the roadmap, and stewards the vibrant ecosystem of organizations building solutions on its open platform. Their building blocks for banking, recognized as digital public goods, make core banking commoditized infrastructure, empowering any organization, anywhere to embed any financial service to any customer via any channel. These building blocks provide the common functionalities for creating customers, managing wallets, savings, and loan accounts, orchestrating payments, and maintaining the financial ledger  & reports. More than 20 million clients are reached by 500+ financial institutions across 41 countries using solutions powered by its APIs.


# Mifos Vision, Mission & Values

## Our Vision

We aim to create a world of 3 Billion Maries where each of the 2 billion poor and unbanked has access to the financial resources needed to create a better life for themselves and their family. 3 Billion Maries is the shared vision that unites our community and what the Mifos Initiative works towards each day.

## Our Mission

To speed the elimination of poverty by coordinating a global community that builds, supports, and uses Mifos X, a free and open source platform that enables financial service providers to more effectively and efficiently deliver responsible financial services to the world’s 2 billion poor and unbanked.


# Who Mifos is For


# How Mifos is Used


# The Mifos Stack

![](https://lh4.googleusercontent.com/tdt0c1GN2H4bNsPbI7SEJZB_mD0vKwU8DZ0GRaNcTwMQLf8pRXa2lM4Tl8L8UAmbGpL4g5vByL47VolUEBvSYVGfDmZbIw3x8trEvN4c71dOwyeOTPxCu-lNMWKEqsUclxoVI1dD)

The Mifos technology stack provides complete banking infrastructure that is cloud-ready, mobile-enabled, and scalable to the billions in need of cost-effective financial services.


# Overview


# Mifos v/s Fineract

Simply, **Mifos** are open source non-profit organization that provides financial institution services for financial inclusion around the world, and one of those products is Mifos X that now is part of Apache **Fineract** under the Apache Software Foundation, So, The Mifos Initiative is the organization that originally helped move Mifos X to the Apache Foundation, and which continues to actively support the Apache Fineract project in many ways.

For more detail about this, please access into [FAQ difference between Mifos and Fineract](https://docs.google.com/document/d/1nRKgp5eRVt14X7QU7oD8iObRfXjLJyq_dH3vo4OzpDA/edit?usp=sharing).


# Community app v/s Webapps


# Upstream Development Approach

Early committer status and individual merit are some incentives we want to encourage upstream development. We should return to the Apache Way and how this is one type of contribution that helps to build merit.

We also need to better communicate the process of contributing upstream through this section, rather than just developing off-list and throwing it over the fence.


# Contribution Process


# The Apache Way

Apache Software Foundation is a voluntary organization of developers and users that collaborate on more than 150 open source projects.&#x20;

**The Apache Way** is a set of principles that we can free to communicate into the community and get transparency to collaborate into the software development process.

The part of ASF concepts is pragmatic, transparent, collaborative, Meritocratic, and Charitable.


# Contributors Guide

## Getting Started to contribute to the Mifos Initiative

Mifos X is an extended platform for delivering the complete range of financial services needed for an effective financial inclusion solution. Mifos X is based on Apache Fineract. Apache Fineract is an open source software for financial services.

Fineract provides a reliable, robust, and affordable solution for entrepreneurs, financial institutions, and service providers to offer financial services to the world’s 2 billion underbanked and unbanked. Fineract is aimed at innovative mobile and cloud-based solutions, and enables digital transaction accounts for all.

Fineract 1.x is a mature platform with open APIs, while Fineract CN is a cloud native, microservice architecture also supporting open banking APIs.

Mifos Mobile CN is based on Apache Fineract CN. Apache Fineract CN is an Application Framework for Digital Financial Services. It is a system to support nationwide financial transactions and to support the creation of an inclusive, interconnected digital economy for every nation in the world.

You can set up fineract locally by visiting

* For [Windows](https://cwiki.apache.org/confluence/display/FINERACT/Fineract-platform+Installation+on+Windows)
* For [Linux](https://cwiki.apache.org/confluence/display/FINERACT/Fineract+Installation+on+Ubuntu+Server)

You can find all of the Mifos' repository [here.](https://github.com/openMF) The active projects at the Mifos Initiative are:

* [Mifos X (Community App)](https://github.com/openMF/community-app)
* [Mifos X Android Client](https://github.com/openMF/android-client)
* [Mifos X Web App](https://github.com/openMF/web-app)
* [Mifos Mobile](https://github.com/openMF/mifos-mobile)
* [Mifos Mobile CN](https://github.com/openMF/mifos-mobile-cn)
* [Mifos Pay](https://github.com/openMF/mobile-wallet)

## Installing Git Bash

The first step would be to [download](https://git-scm.com/downloads) Git Bash. You can also use [Github Desktop](https://desktop.github.com/). After you've installed Git Bash, go ahead and log your Github account in Git Bash.

## Forking the repository

The next step would be to fork the repository you want to contribute to.

Its important to learn that you have to make changes to your fork. After you've formed the repository, you have to clone it.

## Cloning the repository

You can do that by typing `git clone [respository link]` in Git Bash. Replace `[repositorylink]` with the repository's link.

## Working on your local repository

Now that you've created a local repository, the next thing to do is to choose an issue that you'll be working on. Keep in mind that for every different pull request that you post, you need to work on a different branch. First, create a branch by opening Git Bash inside you local repository. That can be done by right clicking inside the folder.

Type `git branch [branchname]` and then `git checkout [branchname]`. Make the changes to the files that will solve the issue according to you.

## Performing a Gradle Check (for Android Projects)

It is always advised to run a gradle check before you create a pull request. You can do this by typing `./gradlew check` in your terminal of Android Studio. If the check is failing, please fix all the errors.

## Committing your changes

When you're done with the changes, type these commands in the Git Bash.

* `git add .`
* `git commit -m "commit message"`
* `git push`

Make sure you're in the branch that you created.

## Making a Pull Request

When you're done with all the steps above, you're finally ready to make a pull request. A pull request is you requesting the org maintainers to merge your changes to the actual project. You can make one by visiting the Github repository of the organization. Click on `Pull Requests` and then `New Pull Requests`. Click on `compare across forks`.

Choose `base` as the org's project's main branch and `compare` as the branch that you just created. Fill all the details in the Pull Request template and finally post the Pull Request.

## Squashing your commits

It is very common that a PR doesn't get approved on the first try and you are told to do some edits to your code. In a situation like this, your PR is obviously going to have a lot of commits. That's when squashing is going to help you combine all the commits into one single one. You can squash your commits by typing these commands in the Bash:

`git rebase -i HEAD~x` Please note that x is the number of commits you want to merge.

For example: `git rebase -i HEAD~3` opens rebase for the last three commits.

You'll now see the commits that you've done in the branch with `pick` as the prefix. Change `pick` to `s` for every commit except the topmost one. Once you've done that, you'll need to save that. You can do this by pressing `esc` key and then typing `:wq` and pressing `enter` key. Then you'll see a screen which shows the commit messages for the new changes that you've just done. Type `:wq` again. Now that it's saved, you'll need to again push your changes. You can do this by typing `git push --force` in the Bash.

## Editing your commits

Often times you'll be told to edit your commit message to the one suggested by the org maintainers. You can do this by typing `git commit --amend`.


# Contribution Guidelines: Android Project


# Contribution Guidelines: Web Project


# Getting started with Git & Github

Getting started with Git, Github


# Postman integration with Gitbook for testing

## Get Cakes

<mark style="color:blue;">`GET`</mark> `https://api.cakes.com/v1/cakes/:id`

This endpoint allows you to get free cakes.

#### Path Parameters

| Name | Type   | Description                                |
| ---- | ------ | ------------------------------------------ |
| id   | string | ID of the cake to get, for free of course. |

#### Query Parameters

| Name   | Type    | Description                                                           |
| ------ | ------- | --------------------------------------------------------------------- |
| recipe | string  | The API will do its best to find a cake matching the provided recipe. |
| gluten | boolean | Whether the cake should be gluten-free or not.                        |

#### Headers

| Name           | Type   | Description                                                    |
| -------------- | ------ | -------------------------------------------------------------- |
| Authentication | string | Authentication token to track down who is emptying our stocks. |

{% tabs %}
{% tab title="200 Cake successfully retrieved." %}

```
{    "name": "Cake's name",    "recipe": "Cake's recipe name",    "cake": "Binary cake"}
```

{% endtab %}

{% tab title="404 Could not find a cake matching this query." %}

```
{    "message": "Ain't no cake like that."}
```

{% endtab %}
{% endtabs %}


# Testing framework-Web

Testing framework we are using in our Web projects


# Testing framework-Android

Testing framework we are using in our Android projects


# Mifos CI/CD tools and instructions


# Pentaho Reporting Plugin

Pentaho Reporting Plugin for Apache Fineract

see <https://github.com/vorburger/fineract-pentaho> for source code.

This is a [*Plugin* for Apache Fineract](https://github.com/apache/fineract/blob/develop/fineract-doc/src/docs/en/deployment.adoc). (This code lives here instead of being part of the core Apache Fineract repository because of [software licenses](https://github.com/openMF/fineract-pentaho#license).)

see [TODO](https://github.com/openMF/fineract-pentaho/blob/develop/TODO.md) for possible future follow-up enhancement work.


# Payment Hub

The payment hub is Repository for the payment hub for integration with external payment platforms like Mojaloop

Repository to house the payment hub for integration with external payment schemas like Mojaloop, GSMA and MTN Uganda.

Payment Hub is the component, which connects DFSPs to switches. In our case, it connects Fineract CN to Mojaloop, and Fineract v1.2 to Mojaloop. The Payment Hub communicates with the Fineract versions via REST API. To support the calls and actions, both Fineract versions had to be upgraded.


# Overview

Mifos X is an extended platform for delivering the complete range of financial services needed for an effective financial inclusion solution. It contains the web platform, web client  and mobile client on Fineract (which is an open technology platform for financial inclusion that provides the core banking functionality needed to deliver financial services to the 2 billion poor and unbanked). It can be deployed in any environment: cloud or on-premise, on or offline, mobile or PC; it’s extensible enough to support any organizational type or delivery channel and flexible enough to support any product, service or methodology. For any organization, big or small, it will provide the client data management, loan and savings portfolio management, integrated real time accounting and social and financial reporting need to bring digital financial services in a modern connected world.

![](/files/-LbNBsOxkYz-UibibMa6)


# User Manual

The Mifos X user manual comprises three user guides:

1. [For All Users:](/mifosx/user-manual/for-all-users)[<br>](https://mifosforge.jira.com/wiki/display/docs/For+All+Users)Information about logging in and out, navigating, and generating reports in Mifos X.
2. [For Administrators ](/mifosx/user-manual/for-administrators-mifos-x-platform)(Mifos X Platform)[<br>](https://mifosforge.jira.com/wiki/display/docs/For+Mifox+X+Community+App+Administrators)Information for Mifos X administrators about setting up and configuring Mifos X for the specific needs of your organization.  &#x20;
3. [For Operational Users](/mifosx/user-manual/for-operational-users-mifos-x-web-app) (Mifos X Web App)[<br>](https://mifosforge.jira.com/wiki/display/docs/For+Mifos+X+Community+App+Operational+Users)Information for day-to-day use for creating and managing account entries, transactions, and account products in Mifos X.&#x20;

**Table of Contents**

[**How to Use This Manual**](/mifosx/user-manual/how-to-use-this-manual)

[**For All Users**](/mifosx/user-manual/for-all-users)

* [General Navigation](/mifosx/user-manual/for-all-users/untitled)
* [Reports](/mifosx/user-manual/for-all-users/reports)

[**For Administrators (Mifos X Platform)**](/mifosx/user-manual/for-administrators-mifos-x-platform)

* [Initial System Set Up](/mifosx/user-manual/for-administrators-mifos-x-platform/initial-system-set-up)
* [Administration](/mifosx/user-manual/for-administrators-mifos-x-platform/administration)
* [Clients, Groups and Centers](/mifosx/user-manual/for-all-users/untitled/clients-groups-centers-navigation)
* [Accounting](/mifosx/user-manual/for-administrators-mifos-x-platform/accounting)
* [Configure Notifications](/mifosx/user-manual/for-administrators-mifos-x-platform/configure-notifications)

[**For Operational Users (Mifos X Web App)**](/mifosx/user-manual/for-operational-users-mifos-x-web-app)

* [Accounting operations](/mifosx/user-manual/for-operational-users-mifos-x-web-app/accounting-operations)
* [Accounts and Transactions](/mifosx/user-manual/for-operational-users-mifos-x-web-app/accounts-and-transactions)
* [Checker Inbox & Tasks](/mifosx/user-manual/for-operational-users-mifos-x-web-app/checker-inbox-and-tasks)

[**Side Bar - Features**](/mifosx/user-manual/side-bar-features)

* [Checker inbox and tasks](/mifosx/user-manual/side-bar-features/checker-inbox-and-tasks)
* [Collection sheet](/mifosx/user-manual/side-bar-features/collection-sheet)
* [Help.](/mifosx/user-manual/side-bar-features/help.)
* [Individual collection sheet](/mifosx/user-manual/side-bar-features/individual-collection-sheet)
* [Keyboard short-cuts](/mifosx/user-manual/side-bar-features/keyboard-short-cuts)
* [Navigation](/mifosx/user-manual/side-bar-features/navigation)

[**Others - mifos dropdown**](/mifosx/user-manual/others-mifos-dropdown)

* [Help](/mifosx/user-manual/others-mifos-dropdown/help)
* [Profile](/mifosx/user-manual/others-mifos-dropdown/profile)
* [Settings](/mifosx/user-manual/others-mifos-dropdown/settings)
* [Signout](/mifosx/user-manual/others-mifos-dropdown/signout)

[**Data Import Tool**](/mifosx/user-manual/data-import-tool)

* [Getting started with - Data Import Tool](/mifosx/user-manual/data-import-tool/getting-started-with-data-import-tool)
* [Installing Data Import Tool](/mifosx/user-manual/data-import-tool/installing-data-import-tool)

[**Glossary of Terms**](/mifosx/user-manual/glossary-of-terms)

[**Index**](/mifosx/user-manual/index)

[**Reporting Documentation**](/mifosx/user-manual/reporting-documentation)

[**Mobile Money Tool**](/mifosx/user-manual/mobile-money-tool)

[**Online Banking App 2.0 User Manual**](/staff-ui-platforms/fineract-1.x/web-self-service-app/online-banking-app-2.0-user-manual)

* [Developer Environment Setup for Online Banking App 2.0](/staff-ui-platforms/fineract-1.x/web-self-service-app/online-banking-app-2.0-user-manual/developer-environment-setup-for-online-banking-app-2.0)


# How to Use This Manual

### About the Manual

This manual provides instructions and information on Mifos X Platform. You can skip to any topic using the sidebar navigation panels, related articles at the end of the page, or hypertext links within the current topic.

The [Mifos X Platform User Manual](/mifosx/user-manual) comprises three user guides:

1. [For All Users](/mifosx/user-manual/for-all-users)\
   Information about **logging in and out**, **navigating**, and **generating reports** in Mifos X.
2. [For Administrators](/mifosx/user-manual/for-administrators-mifos-x-platform) (Mifos X Platform)[<br>](https://mifosforge.jira.com/wiki/display/docs/For+Mifox+X+Community+App+Administrators)Information for Mifos X **administrators** about **setting up** and **configuring** Mifos X for the specific needs of your organization.   &#x20;
3. [For Operational Users](/mifosx/user-manual/for-operational-users-mifos-x-web-app) (Mifos X Community App)[<br>](https://mifosforge.jira.com/wiki/display/docs/For+Mifos+X+Community+App+Operational+Users)Information for day-to-day use for **creating and managing account entries, transactions**, and **account products** in Mifos X.

![](https://mifosforge.jira.com/wiki/download/thumbnails/80609360/mifos%20x%20manuals.png?version=1\&modificationDate=1419219363873\&cacheVersion=1\&api=v2\&width=452\&height=400)

**Structure of the Manual**

The structure of the Mifos X user guides is as follows:

* [For All Users](/mifosx/user-manual/for-all-users)
* [For Mifos X Community App Administrators](/mifosx/user-manual/for-administrators-mifos-x-platform)
* [For Mifos X Community App Operational users.](/mifosx/user-manual/for-operational-users-mifos-x-web-app)

#### **Symbols Used in this Manual**

The following symbols are used in this manual:

{% hint style="warning" %}
This symbols indicates an error message.
{% endhint %}

{% hint style="info" %}
This symbol indicates information about the related operation.
{% endhint %}

{% hint style="success" %}
This symbol indicates information that helps the user apply the procedure or information that suggests an alternative method to perform the task.
{% endhint %}

### Abbreviations and Acronyms Used in this Manual

| Abbreviation or Acronym | Description                            |
| ----------------------- | -------------------------------------- |
| APR                     | Annual Percentage Rate                 |
| CSV                     | Comma Separated Values                 |
| FORM                    |                                        |
| GL                      | General Ledger                         |
| HTML                    | Hypertext Markup Language              |
| HTTP                    | Hypertext Transfer Protocol            |
| ID                      | Identification                         |
| JDBC                    | Java Database Connectivity             |
| JLG                     | Joint Liability Group                  |
| JSON                    | JavaScript Object Notation             |
| MIX                     | Microfinance Information Exchange      |
| OLAP                    | Online Analytical Processing           |
| PDF                     | Portable Document Format               |
| RD                      | Reoccurring Deposit                    |
| SMS                     | Short Message Service                  |
| SQS                     | Structured Query Language              |
| URL                     | Uniform Resource Locator               |
| XBRL                    | Extensible Business Reporting Language |
| XML                     | Extensible Markup Language             |

### Terms Used in this Manual

| Term                  | Description                                                                                                                                                                                                                           |
| --------------------- | ------------------------------------------------------------------------------------------------------------------------------------------------------------------------------------------------------------------------------------- |
| Accrual               | The accumulation of interest/investments/payments/benefits over time. Also refers to expenses that haven't been invoiced yet, for which provisions are made at the end of a financial period.                                         |
| Audit Trail           | Chronological documentation that traces detailed transactions related to any item in accounting records.                                                                                                                              |
| Cache                 | Memory that stores data so that future requests for that data can be served faster.                                                                                                                                                   |
| Chart of Accounts     | A chart of accounts (COA) is a financial organizational tool that provides a complete listing of every account in an accounting system. An account is a unique record for each type of asset, liability, equity, revenue and expense. |
| CSV                   | Comma Separated Values                                                                                                                                                                                                                |
| Fund                  | A fund is a source of money that is allocated for a specific purpose.                                                                                                                                                                 |
| Hook                  |                                                                                                                                                                                                                                       |
| Loan                  | Lending of money from one entity to another, wherein the recipient incurs a debt and is liable to repay the principal amount along with additional interest.                                                                          |
| Nominal Interest Rate | Rate of interest before adjusting for inflation.                                                                                                                                                                                      |
| Parent                |                                                                                                                                                                                                                                       |
| PDF                   | Portable Document Format                                                                                                                                                                                                              |
| Tag                   |                                                                                                                                                                                                                                       |

**Where to Find Additional Help**

If you have questions or need help, you can browse questions and answers on [Mifos Connect](http://mifos.cloud.answerhub.com/), or ask your own question.

Related articles

* Page: [User Manual](/mifosx/user-manual)
* Page:[ For All Users](/mifosx/user-manual/for-all-users)


# For All Users

### **Table of Contents**

[**General Navigation**](/mifosx/user-manual/for-all-users/untitled)

* [Sign In Page](/mifosx/user-manual/for-all-users/untitled/sign-in-page)
* [Welcome Page](/mifosx/user-manual/for-all-users/untitled/sign-in-page)
* [Dashboard Page](/mifosx/user-manual/for-all-users/untitled/untitled)
* [List Page](/mifosx/user-manual/for-all-users/untitled/list-page)
* [Menu Page](/mifosx/user-manual/for-all-users/untitled/menu-page)
* [Form Page](/mifosx/user-manual/for-all-users/untitled/form-page)
* [Clients-Groups-Centers Navigation](/mifosx/user-manual/for-all-users/untitled/clients-groups-centers-navigation)
* [Navigation Tool](/mifosx/user-manual/for-all-users/untitled/navigation-tool)
* [Global Search](/mifosx/user-manual/for-all-users/untitled/global-search)
* [Loan Product and Accounting with Mifos](/mifosx/user-manual/for-all-users/untitled/loan-product-and-accounting-with-mifos)

[**Reports**](/mifosx/user-manual/for-all-users/reports)

* [Standard Reports Shipped in Mifos X](/mifosx/user-manual/for-all-users/reports/standard-reports-shipped-in-mifos-x)
* [Standard Reports Field Descriptions](/mifosx/user-manual/for-all-users/reports/standard-reports-field-descriptions)
* [Custom Reports](/mifosx/user-manual/for-all-users/reports/custom-reports)
* [XBRL Reporting](/mifosx/user-manual/for-all-users/reports/xbrl-reporting)


# General Navigation

This section of the User Manual describes the main page layouts you will encounter using Mifos X and how to work with them. The page layouts described are:

**Table of Contents**

[**Sign In Page**](/mifosx/user-manual/for-all-users/untitled/sign-in-page)

[**Welcome Page**](/mifosx/user-manual/for-all-users/untitled/welcome-page)

[**Dashboard Page**](/mifosx/user-manual/for-all-users/untitled/untitled)

[**List Page**](/mifosx/user-manual/for-all-users/untitled/list-page)

[**Menu Page**](/mifosx/user-manual/for-all-users/untitled/menu-page)

[**Form Page**](/mifosx/user-manual/for-all-users/untitled/form-page)

[**Clients-Groups-Centers Navigation**](/mifosx/user-manual/for-all-users/untitled/clients-groups-centers-navigation)

[**Navigation Tool**](/mifosx/user-manual/for-all-users/untitled/navigation-tool)

[**Global Search**](/mifosx/user-manual/for-all-users/untitled/global-search)

[**Loan Product and Accounting with Mifos**](/mifosx/user-manual/for-all-users/untitled/loan-product-and-accounting-with-mifos)


# Sign In Page

The Sign In page is displayed in a web browser at the link provided by your Administrator. The page allows individuals to access Mifos X platform.

In addition, the Sign In page has the following features:

* Language selector menu&#x20;
* Mifos X version and product information
* Resource links&#x20;
* Community links
* Contribute links

### *How to Change Language of Mifos X* **:**

To change the language, simply click on the drop-down menu next to **Language**, and select the language of your choice.

<figure><img src="/files/g3zr5WTBy1vxQcz3EMys" alt=""><figcaption></figcaption></figure>

### *How to Sign into Mifos X* **:**

Your system administrator will provide you with your username, password, and the URL required to access your financial institution's implementation of Mifos X. Once you have your username and password, you are ready to sign in to the Mifos X platform.

1. Open a new window in any internet browser (e.g., Firefox, Chrome, Internet Explorer)
2. Enter the URL in the address bar\
   The [Mifos X Sign in page](/mifosx/user-manual/for-all-users/untitled/sign-in-page) will be displayed, as shown in the picture above.
3. Enter your username in the username field (Default user name - **mifos**)
4. Enter your password in the password field (Default password - **password**)&#x20;
5. Click **Sign In** to login as super user for the first time with mifos as user name.\
   Once you sign in, the [Mifos Welcome page](/mifosx/user-manual/for-all-users/untitled/welcome-page) is displayed.

### *How to Log Out of Mifos X* **:**

<figure><img src="/files/Q05wGoYarOyQ9H3Yktum" alt=""><figcaption></figcaption></figure>

From any page in the Mifos X application:

1. Click on the **User Icon,** which is on the top-right corner of the page.
2. Click on the **Sign Out** option.\
   You will be logged out of the system and the Sign In page will be displayed.


# Welcome Page

The **Welcome Page** is displayed when you sign in to Mifos X.&#x20;

<figure><img src="/files/jb2jICc6jpbkrznbQTaX" alt=""><figcaption></figcaption></figure>

<figure><img src="/files/pTkengn4zuPvaU8uyTD4" alt=""><figcaption></figcaption></figure>

The **Menu Bar** displayed on the top of the Welcome Page is displayed on every page in the Mifos X platform. The menu bar includes:

* **Mifos** logo\
  Access the Welcome Page from anywhere in the Mifos X platform
* **Institution** menu\
  Access [Clients](/mifosx/user-manual/for-administrators-mifos-x-platform/clients-groups-and-centers/manage-clients), [Groups](/mifosx/user-manual/for-administrators-mifos-x-platform/clients-groups-and-centers/manage-groups), and[ Centers ](/mifosx/user-manual/for-administrators-mifos-x-platform/clients-groups-and-centers/manage-centers)
* **Accounting** menu\
  Access the [Accounting](/mifosx/user-manual/for-administrators-mifos-x-platform/accounting) activities pages&#x20;
* **Reports** menu\
  Access Clients, Loans, Savings, Funds, Accounting, and XBRL Reports
* **Admin** menu\
  Access the [Administration](/mifosx/user-manual/for-administrators-mifos-x-platform/administration) menu
* **Search** tool\
  System-wide[ Search Tool](/mifosx/user-manual/for-all-users/untitled/global-search)—use the search tool to search for clients, groups, and centers&#x20;
* **mifos** menu \
  Access to **Help** (*redirects to the User Manual*), **Profile** (*your user profile, including an option to change your password*), **Settings** (*to change user language and date format*), and **Log Out** button

The **Dashboard** toggle switches between this page (Welcome page) and the [Dashboard page](/mifosx/user-manual/for-all-users/untitled/untitled).

Your username will appear beside the word **Welcome**. If your username is not displayed, contact your administrator.

The **activity search** tool is a quick method to find and navigate to activities / pages in the Mifos X platform. For example, if you want to access an activity related to loans, type "loan" into the activity search field. Loan-related activities will be listed (i.e create loan product, loan products, bulk loan reassignment). You can then click on the desired loan activity. Similarly, you can access activities related to clients, savings products, groups, and more.

The **navigation hints** point out navigation methods that are available to you wherever you are in Mifos X, including:

* Shortcut menu (sidebar)
* Mifos menu bar
* Search tool (located on the Mifos menu bar)

The [**Shortcut**](/mifosx/user-manual/side-bar-features) menu is a sidebar menu of your favorite / most frequently used Mifos X activities. You can configure the Shortcut sidebar to suit your work style. The Shortcut sidebar will pop out when you hover the mouse over the menu area. The Shortcut sidebar is available on every page in the Mifos X system.

<figure><img src="/files/Nfpn5MIZSNJtdnKhS01o" alt=""><figcaption></figcaption></figure>

Related articles

* Page:[Navigation](/mifosx/user-manual/side-bar-features/navigation)
* Page:[Initial System Set Up](/mifosx/user-manual/for-administrators-mifos-x-platform/initial-system-set-up)
* Page:[Global Search](/mifosx/user-manual/for-all-users/untitled/global-search)
* Page:[Welcome Page](/mifosx/user-manual/for-all-users/untitled/welcome-page)
* Page:[Sign In Page](/mifosx/user-manual/for-all-users/untitled/sign-in-page)


# Dashboard Page

The Dashboard page is displayed when you click **Dashboard** on the Welcome page.&#x20;

The Dashboard contents will be unique to each user. The page content is based on your recent/frequent activities and your job responsibilities.

<figure><img src="/files/S2LMte9fa10BB1gxOAPD" alt=""><figcaption></figcaption></figure>

<div align="center"><figure><img src="/files/VCZ62lZTQBvHbX3HFHPu" alt=""><figcaption></figcaption></figure></div>

To launch an activity listed under **Recent Activities** and **Frequent Activities**, click on it.&#x20;

Related articles

* Page:[Navigation](/mifosx/user-manual/side-bar-features/navigation)
* Page:[Initial System Set Up](/mifosx/user-manual/for-administrators-mifos-x-platform/initial-system-set-up)
* Page:[Global Search](/mifosx/user-manual/for-all-users/untitled/global-search)
* Page:[Welcome Page](/mifosx/user-manual/for-all-users/untitled/welcome-page)
* Page:[Sign In Page](/mifosx/user-manual/for-all-users/untitled/sign-in-page)


# List Page

The List page layout is used throughout Mifos X and is a method to view and access information.

The **Mifos menu bar** and the **Shortcut** sidebar menu are available on list pages.

The grey bar under the Mifos menu bar identifies the **type of information** presented in the list.

One or more bright blue **Activity buttons** may be present below the grey bar. The label on the button tells you the activity that will be launched when you click it.

The **Filters** allow you to narrow the listed information on the page.  The text in the filter field informs you which fields will be filtered when you enter a filter.

**Page navigation** buttons (<–Prev, Next –>) at the bottom of the page are used to scroll forward and backward through the list.

To view the complete information for one of the rows displayed in the list, click on it.

<figure><img src="/files/1zLshQZO6QxmObM7LEbZ" alt=""><figcaption></figcaption></figure>

<figure><img src="/files/7zR9OMIWw3WiC0OK4oxZ" alt=""><figcaption></figcaption></figure>

Related articles

* Page:[Navigation](/mifosx/user-manual/side-bar-features/navigation)
* Page:[Initial System Set Up](/mifosx/user-manual/for-administrators-mifos-x-platform/initial-system-set-up)
* Page:[Global Search](/mifosx/user-manual/for-all-users/untitled/global-search)
* Page:[Welcome Page](/mifosx/user-manual/for-all-users/untitled/welcome-page)
* Page:[Sign In Page](/mifosx/user-manual/for-all-users/untitled/sign-in-page)


# Menu Page

The Menu page layout displays activities (spanning across 2 columns) with a description of what each activity does. To launch an activity, click on its name.

The **Mifos in blue on the menu bar** and the [**Shortcut** sidebar menu](/mifosx/user-manual/side-bar-features) are available on menu pages.

<figure><img src="/files/QMfU96KRyUjM5JojPciR" alt=""><figcaption></figcaption></figure>

Related articles

* Page:[Navigation](/mifosx/user-manual/side-bar-features/navigation)
* Page:[Initial System Set Up](/mifosx/user-manual/for-administrators-mifos-x-platform/initial-system-set-up)
* Page:[Global Search](/mifosx/user-manual/for-all-users/untitled/global-search)
* Page:[Welcome Page](/mifosx/user-manual/for-all-users/untitled/welcome-page)
* Page:[Sign In Page](/mifosx/user-manual/for-all-users/untitled/sign-in-page)


# Form Page

The **Form Page** layout is used to fill in the field values related to a single occurrence of a type of information in the Mifos X platform. The Form Page is used when creating or editing information.

The **mifos** button (*in blue*) on the menu bar ![](https://mifosforge.jira.com/wiki/download/thumbnails/81166393/mifos_top_right.PNG?version=1\&modificationDate=1553622168269\&cacheVersion=1\&api=v2\&width=50\&height=27) and the [**Side Bar Menu**](/mifosx/user-manual/side-bar-features) are available on form pages.

The grey bar under the Mifos menu bar provides context for the form fields displayed under it.

The remainder of a form page displays labels and fields, action buttons, and (*optionally*) links to additional information.

Labels are static and are paired with a field, or are used as headers to tie together a group of related fields.

The type of data that can be entered into a field determines the appearance of the field on the form:

* **List fields** display a single down arrow or a pair of up/down arrows on the right side of the field. When you click a list field, a list of available and allowable values pop-up. To select the desired value, click on it.
* **Date fields** and **free form entry fields** appear the same on a form page. However, when a date field gets focus *(by tabbing or clicking on it)*, a calendar will pop up. Navigate the calendar pop-up to select the correct date value.&#x20;
* **Free form entry fields** are used to fill in values using a combination of letters and numbers. Some fields, however, are restricted to numbers only. If letters are typed into a number-only field, an error will be displayed after the **Submit** button is clicked.
* **Check boxes** are small square boxes. Check boxes are either turned on (checked) or off (not checked). When you tab on a check box, its border will turn blue indicating that it has focus. \
  If a check box is unchecked, clicking on it or pressing the space bar (*when it has focus*) will turn it on.\
  If a check box is checked, clicking on it or pressing the space bar (*when it has focus*) will turn it off.&#x20;

Fields that are *mandatory* must have a value in them in order to save the form. These are indicated by a red  "\*" (asterisk) beside their labels.

Like other page formats, forms use a bright blue color to indicate actions. Form pages usually have at least a bright blue **Submit** action button. To save the information entered into a form, click the **Submit** action button. The grey (or sometimes orange) **Cancel** button exits the form without committing any changes.

![](https://mifosforge.jira.com/wiki/download/thumbnails/81166393/Capture%209.PNG?version=1\&modificationDate=1484324790005\&cacheVersion=1\&api=v2\&width=1080)

![](https://mifosforge.jira.com/wiki/download/thumbnails/81166393/Capture%209.1.PNG?version=1\&modificationDate=1484324822189\&cacheVersion=1\&api=v2\&width=1080)

Related articles

* Page:[Navigation](/mifosx/user-manual/side-bar-features/navigation)
* Page:[Initial System Set Up](/mifosx/user-manual/for-administrators-mifos-x-platform/initial-system-set-up)
* Page:[Global Search](/mifosx/user-manual/for-all-users/untitled/global-search)
* Page:[Welcome Page](/mifosx/user-manual/for-all-users/untitled/welcome-page)
* Page:[Sign In Page](/mifosx/user-manual/for-all-users/untitled/sign-in-page)

<br>


# Clients-Groups-Centers Navigation

1. To view information related to Clients, Groups and Centers, click on the '**Institution**' tab to see the following drop down menu which shows **Clients**, **Groups,** and **Centers** sub-menu tabs.
2. **Clients Navigation:**

<figure><img src="/files/Nv3IgnS9vPH6vsNc503T" alt=""><figcaption></figcaption></figure>

\
i.  Click on **Clients** sub-menu under the [Clients](/mifosx/user-manual/for-administrators-mifos-x-platform/clients-groups-and-centers/manage-clients) tab to see the list of clients (*as shown below*).&#x20;

<figure><img src="/files/Vv1CNY4kvcGiPvNQVJOl" alt=""><figcaption></figcaption></figure>

&#x20;ii. It shows a list of clients with their name, account number(client #), status, office and staff.\
&#x20;iii. It has a **Search** menu where you can search clients by typing their names. \
&#x20;iv. You can create a new client by clicking on '+**Create Client**' button

<div align="left"><img src="https://mifosforge.jira.com/wiki/download/thumbnails/82706657/create_client.PNG?version=1&#x26;modificationDate=1555191475962&#x26;cacheVersion=1&#x26;api=v2&#x26;width=100" alt=""></div>

&#x20;([Click here](/mifosx/user-manual/for-administrators-mifos-x-platform/clients-groups-and-centers/manage-clients) to see how to create client). \
&#x20;v. You can import a client by clicking on '**Import Client**' button&#x20;

<div align="left"><img src="https://mifosforge.jira.com/wiki/download/thumbnails/82706657/import_client.PNG?version=1&#x26;modificationDate=1555191533282&#x26;cacheVersion=1&#x26;api=v2&#x26;width=100" alt=""></div>

&#x20;which allows you to upload an Excel file containing the client's information from your computer. The following window appears when you click on '**Import Client**':

<figure><img src="/files/gSlQlWHtB7OM1tJP8VRs" alt=""><figcaption></figcaption></figure>

&#x20;vi. **Client Status** may be **Active**, **Pending,** or **Closed**. \
&#x20;vii. To see the information regarding any client – that is his/her personal profile, loan accounts and saving accounts, click on the client name and the following window will appear:

<figure><img src="/files/oMytJPLomB2w8u9G5VTI" alt=""><figcaption></figcaption></figure>

<figure><img src="/files/wVeBEuKc6KUQBiqMtyUt" alt=""><figcaption></figcaption></figure>

**3. Groups Navigation:**

&#x20;i. Click on **Institution** main menu and then click on **Groups** sub-menu to see the list of groups as shown below.

<figure><img src="/files/eBfwyTQYT8L7vO5alUFe" alt=""><figcaption></figcaption></figure>

&#x20;ii.  It shows list of groups with their names, group status and their associated offices.\
&#x20; iii. Using the **Search** menu on the top of the page, you can search for specific groups by typing their name in the text field provided.

<figure><img src="/files/30xTa49S1OTNXZuDnLdC" alt=""><figcaption></figcaption></figure>

<figure><img src="/files/nysw49dwhfcRcifehWJc" alt=""><figcaption></figcaption></figure>

iv. To create a new group, click on +**Create Group** tab

![](https://mifosforge.jira.com/wiki/download/thumbnails/82706657/create_group.PNG?version=1\&modificationDate=1555191835541\&cacheVersion=1\&api=v2\&width=100)

&#x20;([Click Here](/mifosx/user-manual/for-administrators-mifos-x-platform/clients-groups-and-centers/manage-groups) to see how to create a group)\
&#x20;v. To see the information regarding any group, click on the name of the group.

<figure><img src="/files/puUKI3327Rv7za5wmTSh" alt=""><figcaption></figcaption></figure>

&#x20;vi.  This shows a list of clients in the Group, Group Meeting information and Group profile.\
&#x20;vii. You can create JLG (Joint Liability Group) Loan Application for each client by clicking on '+**JLG Loan Application**' or for multiple clients by clicking on '**Bulk JLG Loan Application**' ([Click here](/mifosx/user-manual/for-operational-users-mifos-x-web-app/accounts-and-transactions/loan-accounts/how-to-process-bulk-jlg-loan-application) to see how to create JLG Loan Application)\
&#x20;viii. You can create 'Group Saving Application' and 'Group Loan Application' on this page. \
&#x20; ix.  [Click Here](/mifosx/user-manual/for-operational-users-mifos-x-web-app/accounts-and-transactions/saving-accounts/how-to-create-group-saving-account) to see how to create Group Saving Application\
&#x20; x.   [Click Here](/mifosx/user-manual/for-operational-users-mifos-x-web-app/accounts-and-transactions/loan-accounts/how-to-create-group-loan-account) to see how to create Group Loan Application.\
4\. **Centers Navigation:**

&#x20; i.  Click on **Institution** main menu and then click on **Centers** sub-menu to see the list of centers as shown below.  &#x20;

<figure><img src="/files/xPaHrRn7oqm0tUenayLH" alt=""><figcaption></figcaption></figure>

<figure><img src="/files/bZCJDR3m2NF1y7ewMs0d" alt=""><figcaption></figcaption></figure>

ii.  It shows list of centers with their name, center status and the office it belongs to. \
iii. Using the Search menu, you can search the center by typing its name.\
iv. To create a new center, click on '+**Create Center**'( [Click Here](/mifosx/user-manual/for-administrators-mifos-x-platform/clients-groups-and-centers/manage-centers) to see how to create center). You can import a center by clicking on '**Import Centers**' button which allows you to upload an Excel file containing the center's information from your computer. The following window opens when you click on '**Import Centers**':

<figure><img src="/files/k77t7SnSUEnxfxTIuEUm" alt=""><figcaption></figcaption></figure>

v. To see the information regarding any center, click on the name of the center.   &#x20;

<figure><img src="/files/4e7UvsvR1nW4PrxZqp8Z" alt=""><figcaption></figcaption></figure>

vi.  This shows a list of Groups in the Center, Center Meeting information and Center profile.\
vii. To create a new Group under center, click on '+**Add Group**'.

![](https://mifosforge.jira.com/wiki/download/thumbnails/82706657/add_group.PNG?version=1\&modificationDate=1555192267796\&cacheVersion=1\&api=v2\&width=80)

viii. To add existing group to the center, click on '**Manage Groups**'

![](https://mifosforge.jira.com/wiki/download/thumbnails/82706657/manage_groups.PNG?version=1\&modificationDate=1555192304790\&cacheVersion=1\&api=v2\&width=120)

&#x20;.


# Navigation Tool

The **Navigation Tool** enables you to quickly navigate through Offices, Loan Officers, Centers, Groups and Clients within Mifos X. It provides a very efficient mechanism that allows you to quickly filter through and navigate to particular groups or clients under a specific office.

**How To Use the Navigation Tool**

* Click on the **Navigation** option in the [Side Bar Menu](/mifosx/user-manual/side-bar-features).

<figure><img src="/files/XfggOOe7X1plNQ1CDmI0" alt=""><figcaption></figcaption></figure>

<figure><img src="/files/lAw3K4jRj8ROPqrSh8Rv" alt=""><figcaption></figcaption></figure>

OR

<figure><img src="/files/quAQqV1MqNxNQbo5iNtu" alt=""><figcaption></figcaption></figure>

* Once you click on the **Navigation** panel, the following window appears. This window has buttons that allow you to navigate through offices, loan officers, center, groups and clients.

<figure><img src="/files/FE1UF2CComVFaotIvPsj" alt=""><figcaption></figcaption></figure>

* Click on '**Offices (Head Office)**' to see the list of branch offices.

<figure><img src="/files/L4kW4dhBMUcqfEDuey6a" alt=""><figcaption></figcaption></figure>

* Here, click on any office (*for example: Head Office*)  to see the list of loan officers.

![](https://mifosforge.jira.com/wiki/download/thumbnails/82706692/Capture%2020.PNG?version=1\&modificationDate=1484325927161\&cacheVersion=1\&api=v2\&width=1080)

* In this example, there is one loan officer (*Andere, Erick*) under our selected branch office (*Head Office*). Click on the loan officer's name (*Andere, Erick, in this example*) to see the list of centers managed by them.

![](https://mifosforge.jira.com/wiki/download/thumbnails/82706692/Capture%2021.PNG?version=1\&modificationDate=1484326011853\&cacheVersion=1\&api=v2\&width=1080)

* As shown in the screenshot below, there is one center which is managed by our selected loan officer *(Andere, Erick).* Click on any specific center to see the list of groups under that center.

![](https://mifosforge.jira.com/wiki/download/thumbnails/82706692/Capture%2022.PNG?version=1\&modificationDate=1484326112321\&cacheVersion=1\&api=v2\&width=1080)

* You can now see that there are four groups and can also view the center activation date. Click on any group to see the list of clients under that group.

![](https://mifosforge.jira.com/wiki/download/thumbnails/82706692/Capture%2023.PNG?version=1\&modificationDate=1484326183236\&cacheVersion=1\&api=v2\&width=1080)

* There are four clients under the group 123A. In order to see the overview of any particular client, click on the client's name.

![](https://mifosforge.jira.com/wiki/download/thumbnails/82706692/Capture%2024.PNG?version=1\&modificationDate=1484326248631\&cacheVersion=1\&api=v2\&width=1080)

* In this example, the client 'Test Client' has been selected. The following is displayed:\
  1\.  Client's personal profile\
  2\.  List of loan accounts held by the client (and their overview)\
  3\.  List of savings accounts held by the client (and their overview)
* If you click on the Client's name (*Test Client, in this example*), it redirects you to the client's profile.

![](https://mifosforge.jira.com/wiki/download/thumbnails/82706692/Capture%2025.PNG?version=1\&modificationDate=1484326313022\&cacheVersion=1\&api=v2\&width=1080)


# Global Search

Global search allows users to search for Clients, Groups, Centers, Loans, and Deposits by providing any of the following information:

* **Name**\
  *(or)*
* **ID**\
  *(or)*
* **Mobile number**\
  *(or)*
* **External ID**

### **Location of Global Search**

On the [Welcome Page](/mifosx/user-manual/for-all-users/untitled/welcome-page) (displayed after logging in), the search box is available on the top-right corner of the page (*as shown below*).

<figure><img src="/files/HYWETcAgtssyeqcb197U" alt=""><figcaption></figcaption></figure>

<figure><img src="/files/kh4VtspZjLdRwGYvOIq5" alt=""><figcaption></figcaption></figure>

### **How to Use the Global Search**

1. Enter your search query in the search box. The search box allows you to look for existing Clients/Groups/Centers/Loans/Deposits - based on their ID or Name.

   For example: **Client A FN Client A LN** (*Client Name*)
2. Press the Enter button to search (the search can further be filtered with respect to Clients/Groups/Centers/Loans/Deposits).
3. A list of existing Client(s) will be returned based on your search query
4. Select the desired client, and click on the client's name to go to that client's page (*as shown below*):&#x20;

<figure><img src="/files/OpJ1fHNuMTjfDZvZRW7w" alt=""><figcaption></figcaption></figure>


# Loan Product and Accounting with Mifos

Mifos X users can easily create loan products for their clients and do accounting with the provided features. The features can be easily enabled in a few steps. The inputs are also highly customizable.

### **Creating Loan Product**

#### Before you start :

Firstly, you have to enable the module that allows you to add dates to your inputs by using these steps:

1. Go to **Admin** → **System**.

<figure><img src="/files/Ake2Pn0Kdr4DUGYKpnK6" alt=""><figcaption></figcaption></figure>

2\. Select the **Configurations** menu.

<figure><img src="/files/l1Lm3ZEDJmIwWv8aYWRg" alt=""><figcaption></figcaption></figure>

3\. Search for the "**amazon s3**" menu by typing it in the search bar given. Mifos X will automatically filter the options based on what you type in the search bar.

<figure><img src="/files/og1TRyY9Pqlu5MPEuiUS" alt=""><figcaption></figcaption></figure>

<figure><img src="/files/5RF5KpD1XpeKVkpy5n4g" alt=""><figcaption></figcaption></figure>

4\. You can now enable it by clicking the Status menu "**Slider**" next to it.

<figure><img src="/files/FKqoiPorNDGe9nQ6gdp1" alt=""><figcaption></figcaption></figure>

<figure><img src="/files/miJ3AeYUc5iblF6fg4xo" alt=""><figcaption></figcaption></figure>

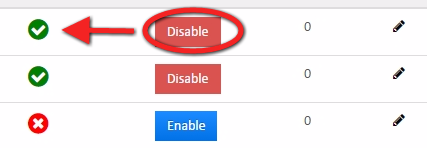
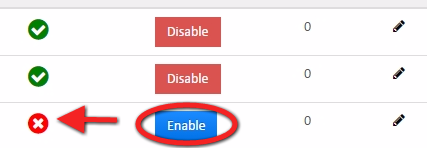
5\. Once it has been enabled, a red "**Disable**" button is displayed next to it.

<figure><img src="/files/fXBmM9jfBSFX9ySEKLYV" alt=""><figcaption></figcaption></figure>

#### Create your first loan product :

1. Go to **Admin** → **Products** from the top menu bar.

<figure><img src="/files/DGMnKEBh52MdJhEtq6Uv" alt=""><figcaption></figcaption></figure>

&#x20; 2\. Here, you can create a variety of products (*Loan Products, Savings Products, Share Products, etc.*). In this example, we will be creating a loan product. Click on "**Loan Products"**.

<figure><img src="/files/PjuWsjs2rvK6ivP6QUNl" alt=""><figcaption></figcaption></figure>

&#x20; 3\. After clicking on **Loan Product**, you can make a new one by clicking on the blue "**Create Loan Product**" button.

<figure><img src="/files/fJPYrKXOWLIqIUmH1hj6" alt=""><figcaption></figcaption></figure>

&#x20; 4\. Now, you can create your own first loan product with your own configurations. Fill in the fields as per your chosen configurations (**NOTE: Fields marked with a red asterisk "\*" are mandatory**).

<figure><img src="/files/dF6zcPNcFOJtnJ4EfiQj" alt=""><figcaption></figcaption></figure>

&#x20; 5\. You can also enable the **Accounting** function at the end of the procedure (*optional*).

#### Creating loan product for your clients :

After creating your loan product, you can add it directly into your client's data. To do so, follow these steps:

1. Go to **Institutions** → **Clients** from the top menu.

<figure><img src="/files/b3kj5KAkD4hsZQSWeQD0" alt=""><figcaption></figcaption></figure>

&#x20;   2\. Select the Client you want the loan product to be added to (*for this example, we are selecting Client A FN Client A LN.*).

<figure><img src="/files/BUTFqU2DIEeWoWEVEpfw" alt=""><figcaption></figcaption></figure>

<figure><img src="/files/HOtOY2lOL4koNPcQWvQx" alt=""><figcaption></figcaption></figure>

&#x20;    3\. Here, you can see their loan account overview.

![](https://mifosforge.jira.com/wiki/download/thumbnails/179798020/clients_overview.PNG?version=1\&modificationDate=1553707067846\&cacheVersion=1\&api=v2\&height=400)

&#x20;  4\. You can add a new loan product into your client's data by clicking on the blue "**New Loan**" button on the top of the page.

&#x20;  5\. Now select the loan product you want from the drop-down menu.

![](https://mifosforge.jira.com/wiki/download/thumbnails/179798020/clients_product.PNG?version=1\&modificationDate=1553707178930\&cacheVersion=1\&api=v2\&height=400)

&#x20;   6\. Configure it and finish by clicking on the "**Proceed**" button.

![](https://mifosforge.jira.com/wiki/download/thumbnails/179798020/clients_product_configure.PNG?version=1\&modificationDate=1553707256810\&cacheVersion=1\&api=v2\&height=400)

&#x20;   7\. Once you are done with the above steps, all that's left is to approve the loan product you wish to add.

#### Making repayments for your client's loan product :

To add repayments for your client's loan product, follow these steps:

1. Go to your client's data once more by navigating to **Clients** → **Clients** from the top bar and clicking on your client's name.
2. The loan account you wish to add a repayment for has to be accepted and disbursed first.
3. Select the loan product you want to repay and click on the **dollar sign** to make the repayment.
4. Fill in the required details.
5. Once the repayment is added successfully, it will be shown on the client's repayments list.

#### Rescheduling the client's loan account :

You can also reschedule the client's loan account by going to **More** → **Reschedule** in your client's loan account selections.

<br>


# Reports

In Mifos X, all the data generated while handling Loan Accounts, Saving Accounts, Clients, Accounting, Funds, etc. can be viewed in **Reports**. Standard reports that all financial institutions use are shipped with Mifos X. Most of the standard reports are directly embedded in the Mifos X application via the 'Reports' tab and the other reports are available as part of our Mifos Business Intelligence Suite built on Pentaho, a free open-source business intelligence application.&#x20;

<figure><img src="/files/AlVmAqpfo24iiAvJWOpg" alt=""><figcaption></figcaption></figure>

The following pages discuss the standard reports and custom reports.  With the flexible structure of Mifos X, reports can be designed to fit any specific need.  If you have questions as you are developing reports for your organization, a great place to ask questions is on our user mailing list.  For more information see: <http://mifos.org/resources/community/>


# Standard Reports Shipped in Mifos X

In Mifos X, all the data being generated while handling Loan Accounts, Saving Accounts, Clients, Accounting, Funds etc can be viewed through the **Reports** tab. The most commonly used reports are shipped with the Mifos X download. Other reports are available as part of our Mifos Business Intelligence Suite built on Pentaho, a free open-source business intelligence application.&#x20;

The Standard Reports in MifosX are generally categorized into six groups:&#x20;

1. Clients
2. Loans
3. Savings
4. Funds
5. Accounting
6. XBRL&#x20;

### Running Standard Reports

1. Click on 'Reports' tab and choose the type of report you want to generate.

<figure><img src="/files/4lFpyr5UwlLa1TpsxsPx" alt=""><figcaption></figcaption></figure>

&#x20;  2\. Once you choose the type of report, the next window shows all the reports under that category (in this example, the *Accounting* type is selected):

<figure><img src="/files/tx1ZgY4wQ4m2BeX7Hj6o" alt=""><figcaption></figcaption></figure>

&#x20;  3\. Select the report you want to generate (in this example, *Balance Sheet* is selected):

<figure><img src="/files/IfyoD35xmc7jedVpxocj" alt=""><figcaption></figcaption></figure>

&#x20;    4\. As shown in the image above, the output type of reports can be selected from a drop-down menu. You can generate Reports in any one of the three formats, namely:\
*i. Excel*\
*ii. PDF*\
*iii. CSV*

<figure><img src="/files/dnFp8d1rtMlaR2IgNort" alt=""><figcaption></figcaption></figure>

\
&#x20;    *5.* Click on 'Run Report' to generate the report for viewing in the specified format.&#x20;

### Related articles

* Page:[Manage Funds](/mifosx/user-manual/for-administrators-mifos-x-platform/administration/organization/manage-funds)
* Page:[Manage Reports](/mifosx/user-manual/for-administrators-mifos-x-platform/administration/system/manage-reports)
* Page:[XBRL Reporting](/mifosx/user-manual/for-all-users/reports/xbrl-reporting)
* Page:[Standard Reports Shipped in Mifos X](/mifosx/user-manual/for-all-users/reports/standard-reports-shipped-in-mifos-x)
* Page:[Custom Reports](/mifosx/user-manual/for-all-users/reports/custom-reports)


# Standard Reports Field Descriptions

| Report name                                                                                                                                                                                                                                                                                                                                                                                                                                               | Category     | Description                                                                                                                                                                                                                                                                                           | Format                                                    | Parameters                                                                        |
| --------------------------------------------------------------------------------------------------------------------------------------------------------------------------------------------------------------------------------------------------------------------------------------------------------------------------------------------------------------------------------------------------------------------------------------------------------- | ------------ | ----------------------------------------------------------------------------------------------------------------------------------------------------------------------------------------------------------------------------------------------------------------------------------------------------- | --------------------------------------------------------- | --------------------------------------------------------------------------------- |
| <p><a href="https://mifosforge.jira.com/wiki/download/attachments/70910129/Active%20Loans%20-%20Details(Pentaho)%20(1).pdf?version=1&#x26;modificationDate=1399507185861&#x26;cacheVersion=1&#x26;api=v2">Active Loans</a></p><p><a href="https://mifosforge.jira.com/wiki/download/attachments/70910129/Active%20Loans%20-%20Details(Pentaho)%20(1).pdf?version=1&#x26;modificationDate=1399507185861&#x26;cacheVersion=1&#x26;api=v2"> -Details</a></p> | Loan         | Listing of all active loans and details including principal, interest, and fees outstanding for each loan.                                                                                                                                                                                            | <p>Pentaho (PDF, Excel, CSV)</p><p>HTML</p>               | Currency, Loan Purpose, Fund, Office, Product, Loan Officer                       |
| [Active Loans Summary](https://mifosforge.jira.com/wiki/download/attachments/70910129/Active%20Loans%20-%20Summary\(Pentaho\).pdf?version=1\&modificationDate=1399507185884\&cacheVersion=1\&api=v2)                                                                                                                                                                                                                                                      | Loan         | (*based on each branch*) A summary of the total clients, number of active loans, number of arrears, PAR calculation, as well as the total disbursed, principal, interest, fees, and penalties for each branch.                                                                                        | <p>Pentaho (PDF, Excel, CSV)</p><p>HTML</p>               | Office, Currency, Fund, PAR Calculation, Loan Purpose, Loan Officer, Product      |
| [Active Loans  By Disbursal Period](https://mifosforge.jira.com/wiki/download/attachments/70910129/Active%20Loans%20by%20Disbursal%20Period\(Pentaho\).pdf?version=1\&modificationDate=1399507614968\&cacheVersion=1\&api=v2)                                                                                                                                                                                                                             | Loan         | List of Loans by date of disbursal including loan principal, interest rate, date disbursed, total loan amount, and total repaid.                                                                                                                                                                      | <p>Pentaho (PDF, Excel, CSV)</p><p>HTML</p>               | Office, Currency, Fund, Loan Purpose, Loan Officer, Product, Start Date, End Date |
| [Active Loans in Last Installment](https://mifosforge.jira.com/wiki/download/attachments/70910129/Active%20Loans%20in%20last%20installment\(Pentaho\).pdf?version=1\&modificationDate=1399509994147\&cacheVersion=1\&api=v2)                                                                                                                                                                                                                              | Loan         | List of active loans on their last installment (*as of the day the report is been generated*) listing original loan details, expected maturity date as well as principal, interest, fees, and outstanding penalties.                                                                                  | <p>Pentaho (PDF, Excel, CSV)</p><p>HTML</p>               | Office, Currency, Fund, Loan Purpose, Loan Officer, Product                       |
| [Active Loans in Last Installment (Summary)](https://mifosforge.jira.com/wiki/download/attachments/70910129/Active%20Loans%20in%20last%20installment%20Summary\(Pentaho\).pdf?version=1\&modificationDate=1399510514903\&cacheVersion=1\&api=v2)                                                                                                                                                                                                          | Loan         | List of active loans on their installment (*as of day of report being summarized*) by branch including number of clients, number of active loans and in arrears, total principal, interest, fees, and penalties, and PAR calculation, or loans on their last installment.                             | <p>Pentaho (PDF, Excel, CSV)</p><p>HTML (table)</p>       | Office, Currency, Fund, Loan Purpose, Loan Officer, Product, PAR Calculation      |
| [Active Loans Passed Final Maturity](https://mifosforge.jira.com/wiki/download/attachments/70910129/Active%20Loans%20Passed%20Final%20Maturity\(Pentaho\).pdf?version=1\&modificationDate=1417825683530\&cacheVersion=1\&api=v2)                                                                                                                                                                                                                          | Loan         | It shows a list of clients with their loan details, like Disbursed Date, Expected Maturity Date, for whom the loan has already passed the maturity date.                                                                                                                                              | <p>Pentaho (PDF, Excel, CSV)</p><p>HTML</p>               | Office, Currency, Fund, Loan Purpose, Loan Officer, Product                       |
| [Active Loans Passed Final Maturity Summary](https://mifosforge.jira.com/wiki/download/attachments/70910129/Active%20Loans%20Passed%20Final%20Maturity%20Summary\(Pentaho\).pdf?version=1\&modificationDate=1417825678609\&cacheVersion=1\&api=v2)                                                                                                                                                                                                        | Loan         | It shows the number of loans with arrears (*if any*) which have already passed maturity date with their details.                                                                                                                                                                                      | <p>Pentaho (PDF, Excel, CSV)</p><p>HTML</p>               | Office, Currency, Fund, Loan Purpose, PAR calculation                             |
| [Aging Detail](https://mifosforge.jira.com/wiki/download/attachments/70910129/Aging%20Detail\(Pentaho\).pdf?version=1\&modificationDate=1417825700341\&cacheVersion=1\&api=v2)                                                                                                                                                                                                                                                                            | Loan         | Under a specific office, Aging Detail provides a list of clients having arrears in terms of number of 'Days', 'Weeks' and 'Days in Arrears Band'. Along with this, it provides Client's Original Principal, Original Interest, Principal Paid, Interest Paid, Principal Overdue and Interest Overdue. | <p>Pentaho (PDF, Excel, CSV)</p><p>HTML</p>               | office                                                                            |
| [Aging Summary (Arrears in Months)](https://mifosforge.jira.com/wiki/download/attachments/70910129/Aging%20Summary%20\(Arrears%20in%20Months\)\(Pentaho\).pdf?version=1\&modificationDate=1417825700476\&cacheVersion=1\&api=v2)                                                                                                                                                                                                                          | Loan         | Under a specific office, Aging Summary provides number of loans which are arrears in days (or on Schedule) with the mentioned currency type.                                                                                                                                                          | <p>Pentaho (PDF, Excel, CSV)</p><p>HTML (table)</p>       | Office, Currency                                                                  |
| [Aging Summary (Arrears in Weeks)](https://mifosforge.jira.com/wiki/download/attachments/70910129/Aging%20Summary%20\(Arrears%20in%20Weeks\)\(Pentaho\).pdf?version=1\&modificationDate=1417825699704\&cacheVersion=1\&api=v2)                                                                                                                                                                                                                            | Loan         | Under a specific office, Aging Summary provides number of loans which are arrears in weeks (or on Schedule) with the mentioned currency type.                                                                                                                                                         | <p>Pentaho (PDF, Excel, CSV)</p><p>HTML</p>               | office,currency                                                                   |
| [Branch Expected Cash Flow](https://mifosforge.jira.com/wiki/download/attachments/70910129/Branch%20Expected%20Cash%20Flow.pdf?version=1\&modificationDate=1417825700239\&cacheVersion=1\&api=v2)                                                                                                                                                                                                                                                         | Loan         | At each date for the specific duration, this report provides 'Expected Cash In'(in terms of Principle, Interest, Fees Penalty) and 'Expected Cash Out' (Loan Disbursal) and 'Net Expected Cash Out'. (Expected Cash Out \~ Expected Cash In).                                                         | <p>Pentaho (PDF, Excel, CSV)</p><p>HTML</p>               | Office, Start Date, End Date                                                      |
| [Expected Payments By Date - Basic](https://mifosforge.jira.com/wiki/download/attachments/70910129/Expected%20Payments%20By%20Date%20-%20Basic\(Pentaho\).pdf?version=1\&modificationDate=1417825707329\&cacheVersion=1\&api=v2)                                                                                                                                                                                                                          | Loan         | For all clients under a specific office, it shows Principal/Interest/Fees/Penalties Due and Total Due for the given due date of the client.                                                                                                                                                           | <p>Pentaho</p><p>(PDF, Excel, CSV)</p><p>HTML (table)</p> | Office, Start Date, End Date                                                      |
| [Loans Awaiting Disbursa](https://mifosforge.jira.com/wiki/download/attachments/70910129/Loans%20Awaiting%20Disbursal\(Pentaho\).pdf?version=1\&modificationDate=1417825707977\&cacheVersion=1\&api=v2)l                                                                                                                                                                                                                                                  | Loan         | It shows a list of all the clients and summary of their loans which are approved but not yet disbursed.                                                                                                                                                                                               | <p>PentahoPDF, Excel, CSV)</p><p>HTML</p>                 | Office, Loan Purpose, Fund, Currency                                              |
| [Loans Awaiting Disbursal Summary by Month](https://mifosforge.jira.com/wiki/download/attachments/70910129/Loans%20Awaiting%20Disbursal%20Summary%20by%20Month\(Pentaho\).pdf?version=1\&modificationDate=1417825707840\&cacheVersion=1\&api=v2)                                                                                                                                                                                                          | Loan         | It shows list of loan products which are awaiting for disbursal at each month. It also shows the Principal Amount yet to be disbursed.                                                                                                                                                                | <p>Pentaho (PDF, Excel, CSV)</p><p>HTML (table)</p>       | Office, Loan Purpose, Fund, Currency                                              |
| [Loans Pending Approval](https://mifosforge.jira.com/wiki/download/attachments/70910129/Loans%20Pending%20Approval\(Pentaho\).pdf?version=1\&modificationDate=1417825705448\&cacheVersion=1\&api=v2)                                                                                                                                                                                                                                                      | Loan         | It shows a list of clients and details of their loan accounts which are not yet approved.                                                                                                                                                                                                             | <p>Pentaho (PDF, Excel, CSV)</p><p>HTML</p>               | Office, Loan Purpose, Fund, Currency                                              |
| [Obligation Met Loans Details](https://mifosforge.jira.com/wiki/download/attachments/70910129/Obligation%20Met%20Loans%20Details\(Pentaho\).pdf?version=1\&modificationDate=1417825705569\&cacheVersion=1\&api=v2)                                                                                                                                                                                                                                        | Loan         | For the given duration, this report shows the list of loans (*with details*) that are paid by the customers without any dues before the maturity date.                                                                                                                                                | <p>Pentaho (PDF, Excel, CSV)</p><p>HTML</p>               | Office, Loan Purpose, Fund, Currency , Start Date , End Date                      |
| [Obligation Met Loans Summary](https://mifosforge.jira.com/wiki/download/attachments/70910129/Obligation%20Met%20Loans%20Summary\(Pentaho\).pdf?version=1\&modificationDate=1417825705748\&cacheVersion=1\&api=v2)                                                                                                                                                                                                                                        | Loan         | This report shows the number of loans along with their details (ex: total principal/interest/fees/penalties repaid) which are paid by the customers without any dues before the maturity date.                                                                                                        | <p>Pentaho (PDF, Excel, CSV)</p><p>HTML</p>               | Office, Loan Purpose, Fund, Currency , Start Date , End Date                      |
| [Portfolio at Risk](https://mifosforge.jira.com/wiki/download/attachments/70910129/Portfolio%20at%20Risk\(Pentaho\).pdf?version=1\&modificationDate=1417825706002\&cacheVersion=1\&api=v2)                                                                                                                                                                                                                                                                | Loan         | <p>This report shows portfolio at risk (in %) using the formula:</p><p>Portfolio at Risk = Unpaid Principal balance of all loans with payment past due (by age: 1, 30, 60, 90 days, etc.) / Outstanding Portfolio</p><p>It also shows Interest Due, Fees Due, Penalties, Fees Outstanding, etc.</p>   | <p>Pentaho</p><p>(PDF, Excel, CSV)</p><p>HTML</p>         | Office, Loan Purpose, Fund, Currency, PAR calculation                             |
| [Portfolio at Risk by Branch](https://mifosforge.jira.com/wiki/download/attachments/70910129/Portfolio%20at%20Risk%20by%20Branch\(Pentaho\).pdf?version=1\&modificationDate=1417825705871\&cacheVersion=1\&api=v2)                                                                                                                                                                                                                                        | Loan         | This is similar to the previous one but lists portfolio at risk grouped by branch offices.                                                                                                                                                                                                            | <p>Pentaho</p><p>(PDF, Excel, CSV)</p><p>HTML</p>         | Office, Loan Purpose, Fund, Currency, PAR calculation                             |
| [Rescheduled Loans](https://mifosforge.jira.com/wiki/download/attachments/70910129/Rescheduled%20Loans\(Pentaho\).pdf?version=1\&modificationDate=1417825706150\&cacheVersion=1\&api=v2)                                                                                                                                                                                                                                                                  | Loan         | This report shows a branch-wise list of all rescheduled loans with their details (like Written-off Date, Disbursed Date, Rescheduled Principal/Interest/Fees).                                                                                                                                        | <p>Pentaho</p><p>(PDF, Excel, CSV)</p><p>HTML</p>         | Office, Currency, Start Date and End Date                                         |
| [Txn Running Balances](https://mifosforge.jira.com/wiki/download/attachments/70910129/TxnRunningBalances\(Pentaho\).pdf?version=1\&modificationDate=1417825706929\&cacheVersion=1\&api=v2)                                                                                                                                                                                                                                                                | Loan         | This report shows a list of loan accounts and their transaction type (whether it's in disbursement state or repayment state). Along with this, it shows Principal, Interest, Outstanding Principal and Interest Income with specified currency and loan product.                                      | <p>Pentaho</p><p>(PDF, Excel, CSV)</p><p>HTML</p>         |                                                                                   |
| [Written-Off Loans](https://mifosforge.jira.com/wiki/download/attachments/70910129/Written-Off%20Loans\(Pentaho\).pdf?version=1\&modificationDate=1417825707040\&cacheVersion=1\&api=v2)                                                                                                                                                                                                                                                                  | Loan         | It shows a list of all the loans which are written-off in a given duration.                                                                                                                                                                                                                           | <p>Pentaho</p><p>(PDF, Excel, CSV)</p><p>HTML</p>         | Currency, Office, Start Date, End Date                                            |
| [Client Loans Listing](https://mifosforge.jira.com/wiki/download/attachments/70910129/Client%20Loans%20Listing\(Pentaho\).pdf?version=1\&modificationDate=1417826569896\&cacheVersion=1\&api=v2)                                                                                                                                                                                                                                                          | Clients      | It shows a list of clients and their respective loan accounts with their details like Client Status, Loan Status (Approved, Disbursed, Closed, Rejected, Written-off), Amortization, Loan Frequency, etc.                                                                                             | <p>Pentaho</p><p>(PDF, Excel, CSV)</p><p>HTML</p>         | Office, Currency, Loan Purpose , Fund                                             |
| [Client Listing](https://mifosforge.jira.com/wiki/download/attachments/70910129/Client%20Listing\(Pentaho\).pdf?version=1\&modificationDate=1417823511365\&cacheVersion=1\&api=v2)                                                                                                                                                                                                                                                                        | Clients      | It lists all the clients for a particular branch and the respective Account Number, Client Status, Activation Date and External Id associated with them.                                                                                                                                              | <p>Pentaho</p><p>(PDF, Excel, CSV)</p><p>HTML</p>         | office                                                                            |
| [Funds Disbursed Between Dates Summary](https://mifosforge.jira.com/wiki/download/attachments/70910129/Funds%20Disbursed%20Between%20Dates%20Summary\(Pentaho\).pdf?version=1\&modificationDate=1417825707593\&cacheVersion=1\&api=v2)                                                                                                                                                                                                                    | Funds        | It lists all the funds which are disbursed (*with their currency type*) during a given duration.                                                                                                                                                                                                      | <p>Pentaho</p><p>(PDF, Excel, CSV)</p><p>HTML</p>         | Currency, Fund, Start Date, End Date                                              |
| [Funds Disbursed Between Dates Summary by Office](https://mifosforge.jira.com/wiki/download/attachments/70910129/Funds%20Disbursed%20Between%20Dates%20Summary%20by%20Office\(Pentaho\).pdf?version=1\&modificationDate=1417825707449\&cacheVersion=1\&api=v2)                                                                                                                                                                                            | Funds        | It lists all the funds which are disbursed with their currency type during a given duration and by a specific branch office.                                                                                                                                                                          | <p>Pentaho</p><p>(PDF, Excel, CSV)</p><p>HTML</p>         | Currency, Fund,Office, Start Date, End Date                                       |
| [Income Statement](https://mifosforge.jira.com/wiki/download/attachments/70910129/Income%20Statement.pdf?version=1\&modificationDate=1417825707684\&cacheVersion=1\&api=v2)                                                                                                                                                                                                                                                                               | Accounting   | For a given office and duration, this report shows 'Balance' in each income account (ex: Fees Account, Charges Account) and net balance.                                                                                                                                                              | <p>Pentaho</p><p>(PDF, Excel, CSV)</p><p>HTML</p>         | Office, Start Date, End Date                                                      |
| [Balance Sheet](https://mifosforge.jira.com/wiki/download/attachments/70910129/Balance%20Sheet.pdf?version=1\&modificationDate=1417825699806\&cacheVersion=1\&api=v2)                                                                                                                                                                                                                                                                                     | Accounting   | It provides list of GL accounts (Assets, Liabilities, Equities, etc.) and the remaining balance in each account at a given date under the specific office.                                                                                                                                            | <p>Pentaho (PDF, Excel, CSV)</p><p>HTML (table)</p>       | Office, End Date                                                                  |
| [Trial Balance](https://mifosforge.jira.com/wiki/download/attachments/70910129/Trial%20Balance.pdf?version=1\&modificationDate=1417825707175\&cacheVersion=1\&api=v2)                                                                                                                                                                                                                                                                                     | Accounting   | For a given office and duration, this report shows list of GL accounts with their debit and credit records.                                                                                                                                                                                           | <p>Pentaho</p><p>(PDF, Excel, CSV)</p><p>HTML</p>         | Office, Start Date, End Date                                                      |
| [General Ledger Report](https://mifosforge.jira.com/wiki/download/attachments/70910129/Client%20Loans%20Listing\(Pentaho\).pdf?version=1\&modificationDate=1417826569896\&cacheVersion=1\&api=v2)                                                                                                                                                                                                                                                         | Accounting   | For a given office GL account, it lists all other GL accounts which made debits and credits transactions with that GL account for a specific duration.                                                                                                                                                | <p>Pentaho</p><p>(PDF, Excel, CSV)</p><p>HTML</p>         | Office , GL account number, Start Date, End Date                                  |
| Client Savings Summary                                                                                                                                                                                                                                                                                                                                                                                                                                    | Savings      | For a given Savings Product and Office, it lists a client-wise summary of each savings account (Balance, Activation Date, etc.) for a specific duration.                                                                                                                                              | <p>Pentaho</p><p>(PDF, Excel, CSV)</p><p>HTML</p>         | Office, Savings product, Start Date, End Date                                     |
| [Savings Account Dormancy Report](https://mifosforge.jira.com/wiki/download/attachments/70910129/Savings%20Dormancy.csv?version=1\&modificationDate=1529485220272\&cacheVersion=1\&api=v2)                                                                                                                                                                                                                                                                | Savings      | For a given office, it lists all the savings accounts which are in dormancy state.                                                                                                                                                                                                                    | CSV                                                       | Office, Savings Account Dormancy status                                           |
| [Daily Teller Cash Report](https://mifosforge.jira.com/wiki/download/attachments/70910129/Savings%20Dormancy.csv?version=1\&modificationDate=1529485220272\&cacheVersion=1\&api=v2)                                                                                                                                                                                                                                                                       | Organization | For the given teller and cashier, it displays Cash Allocated vs Cash Settled, Cash-ins (Ex: Repayment) and Cash-outs (Ex: Loan Disburse, Savings Withdrawal).                                                                                                                                         | <p>Pentaho</p><p>(PDF, Excel, CSV)</p><p>HTML</p>         | Office, Currency, Teller, Cashier, As on Date                                     |


# Custom Reports

In Mifos X, apart from using standard reports which are already shipped, you can create your own **Custom Reports** based on your required parameters.

Mifos X currently supports two types of Custom Reports:

&#x20;1\) **Stretchy Reports**

&#x20;2\) **Pentaho Reports**

### **Stretchy Reports:** <a href="#customreports-stretchyreports" id="customreports-stretchyreports"></a>

To create a new custom report, the Developer/Specialist writes the relevant SQL queries, adds it to the reporting metadata and adds any parameters required. **Stretchy Reports** are also known as "Screen Based Reports" or "Table Reports". Stretchy Reports work great for on-screen display and for exporting data to spreadsheets.

### **Creating Stretchy Reports:**

1. Go To **Admin** >> **System** >> **Manage Reports** and Click on **'+ Create Report'** tab to see the following window:

<figure><img src="/files/pOHbkZDqYDsxr4DtHwEK" alt=""><figcaption></figcaption></figure>

<figure><img src="/files/ijPDxhuM33WRjv5BsYHL" alt=""><figcaption></figcaption></figure>

\
The following SQL Query is used as an example:

{% hint style="info" %}
&#x20;Example

Select [c.id](http://www.google.com/url?q=http://c.id\&sa=D\&sntz=1\&usg=AFQjCNHSZf6JsWl5x6ExEydTZr5cOuQuhA) clientId, CONCAT("\\"",c.display\_name,"\\"") clientName, [ounder.name](http://www.google.com/url?q=http://ounder.name\&sa=D\&sntz=1\&usg=AFQjCNEkbfvAPp4nVMz3XO2VRpz2x6oaaA) officeName from m\_office o\
join m\_office ounder on ounder.hierarchy like concat(o.hierarchy, '%')\
join m\_client c on c.office\_id = [ounder.id](http://www.google.com/url?q=http://ounder.id\&sa=D\&sntz=1\&usg=AFQjCNGehIJ3X8KuS4ucCke83faabYMzAA)\
where [o.id](http://www.google.com/url?q=http://o.id\&sa=D\&sntz=1\&usg=AFQjCNGwfHJFcNbyA8foaQ5yRa4lKADBCQ) = ${officeId}

Parameter: Select office
{% endhint %}

2\. The Stretchy Report requires you to fill the following fields before it gets generated:

| Field Name        | Drop-Down Parameters                                                                                                                    | Description                                                                                                                                                                                                                                                                                                                                                        |
| ----------------- | --------------------------------------------------------------------------------------------------------------------------------------- | ------------------------------------------------------------------------------------------------------------------------------------------------------------------------------------------------------------------------------------------------------------------------------------------------------------------------------------------------------------------ |
| Report Name       | None                                                                                                                                    | Provide the name for the report, so that users can search for it using this name.                                                                                                                                                                                                                                                                                  |
| Report Type       | <p></p><ul><li>Table</li><li>Pentaho</li><li>Chart</li><li>SMS</li></ul>                                                                | <p>If you're creating a Stretchy Report, select 'Table'.</p><p>If you're creating a Pentaho Report, select 'Pentaho'.</p><p>If you're creating a 'Chart' Report (like Bar, Pie, etc.), select 'Chart'.</p>                                                                                                                                                         |
| Report sub type   | <p></p><ul><li>Bar</li><li>Pie</li></ul>                                                                                                | If you have selected the Report Type as 'Chart' , you need to select Report sub type as either Bar or Chart.                                                                                                                                                                                                                                                       |
| Report Category   | None                                                                                                                                    | Provide the Report Category *(for example: Clients, Loans, Savings, Accounts, etc.)* to which the Report belong to.                                                                                                                                                                                                                                                |
| Description       | None                                                                                                                                    | Give a small description about the report being generated.                                                                                                                                                                                                                                                                                                         |
| Use Report        | None                                                                                                                                    | <p>If you check it, the report is ready to be used once it's created.</p><p>If you leave it unchecked , the report name won't be shown in the list of Reports, even though it will be created. This option is used when the report creation is still under process.</p>                                                                                            |
| Sql               | None                                                                                                                                    | <p></p><p>Here, you need to write the SQL Query to generate the required report. In order to write SQL queries, you need to have a basic understanding of the following:</p><ul><li>MySQL</li><li>Database Structure of Mifos X</li><li>Knowledge of most of the important tables which are present in the database (for example: 'Mifostenant-default')</li></ul> |
| Report Parameters | <p></p><ul><li>Start Date</li><li>End Date</li><li>Select Officer</li><li>Select Loan Officer</li><li>Select Currency<br>etc.</li></ul> | Select the available parameter from drop-down list and click on '+Add' button. You can select more than one parameter as per the requirement of your project.                                                                                                                                                                                                      |

&#x20;  3\. After filling in the required parameters, click on the '**Submit**' button to generate the report.

&#x20;  4\. To view the Report, click on '**Reports**' tab and either search for it by Report Name, or go to the specific category to which the report belongs to and select the report.

### **Modify existing Stretchy Reports:**

To modify an existing Stretchy Report:

1. Go to **Admin** >> **System** >> **Manage Reports** to see the list of Stretchy as well as Pentaho Reports.
2. Click on the specific report you want to modify. It will show the highlights of the Stretchy Report as shown in the screenshot below:

<figure><img src="/files/05qC6npF53cXGh8w0YfK" alt=""><figcaption></figcaption></figure>

<figure><img src="/files/RnPZzaSTP9WDgUfs84lI" alt=""><figcaption></figcaption></figure>

&#x20;     3\.  Click on the 'Edit' button to modify the Report.\
\
&#x20;     4\.  Once you modify the report, click on the 'Submit' button.&#x20;

### **Create and Upload Custom Pentaho Reports:**

Pentaho Reporting is a suite of tools for creating pixel-perfect reports. With Pentaho Reporting, you are able to transform data into meaningful information tailored to your audience. You can create HTML, Excel, PDF, Text or printed reports. It’s an open-source reporting tool.&#x20;

**Stretchy Reports vs Pentaho Reports:**

| Sl.No | **Stretchy Reports**                                                                    | Pentaho Reports                                                                                                                           |
| ----- | --------------------------------------------------------------------------------------- | ----------------------------------------------------------------------------------------------------------------------------------------- |
| 1     | They lack formatting options for reports to be created.                                 | You can format texts, column headings and tables.                                                                                         |
| 2     | Not suitable for big and complex reports.                                               | Pixel-perfect reports can be created irrespective of their size and complexity.                                                           |
| 3     | Can only be exported to spreadsheets.                                                   | Can be exported to HTML, Excel, PDF, Text, etc.                                                                                           |
| 4     | Very simple to create and can be created using the community-app front-end for Mifos X. | It needs a separate tool ("Pentaho Report Designer"), which allows us to create Pentaho reports and later embed those reports in Mifos X. |
| 5     | Better suited for simple reports having less or no formatting options                   | Better suited for complex reports having a lot of formatting options                                                                      |

For more information on how to create Pentaho Reports, [click here](/mifosx/user-manual/for-all-users/reports/custom-reports/creating-simple-pentaho-report-and-embedding-it-to-mifos-x). &#x20;

Related articles

* Page:[Manage Funds](/mifosx/user-manual/for-administrators-mifos-x-platform/administration/organization/manage-funds)
* Page:[Manage Reports](/mifosx/user-manual/for-administrators-mifos-x-platform/administration/system/manage-reports)
* Page:[XBRL Reporting](/mifosx/user-manual/for-all-users/reports/xbrl-reporting)
* Page:[Standard Reports Shipped in Mifos X](/mifosx/user-manual/for-all-users/reports/standard-reports-shipped-in-mifos-x)
* Page:[Custom Reports](/mifosx/user-manual/for-all-users/reports/custom-reports)


# Creating Simple Pentaho Report and Embedding it to Mifos X

You could also follow the video guide link here:-

{% embed url="<https://youtu.be/JgTJCiyOsIQ?t=513>" %}

#### I.  Downloading  and Installing Pentaho Report Designer <a href="#creatingsimplepentahoreportandembeddingittomifosx-i.downloadingandinstallingpentahoreportdesigner" id="creatingsimplepentahoreportandembeddingittomifosx-i.downloadingandinstallingpentahoreportdesigner"></a>

&#x20;     1\. To download Pentaho Report Designer Tool please click on the following link,

<https://sourceforge.net/projects/jfreereport/files/latest/download>

&#x20;      Note: The current version of Pentaho Report Designer is 5.0.1

&#x20;     2\. It will be the zipped file with size around 268 MB.

&#x20;     3\. Download it and unzip it in the required directory.&#x20;

&#x20;     4\. Copy mysql connector jdbc into lib folder. <http://dev.mysql.com/downloads/file.php?id=457911>

#### II. Starting Pentaho Report Designer   <a href="#creatingsimplepentahoreportandembeddingittomifosx-ii.startingpentahoreportdesigner" id="creatingsimplepentahoreportandembeddingittomifosx-ii.startingpentahoreportdesigner"></a>

&#x20;     1\. Go into the unzipped 'Pentaho Report Designer' folder and double click on 'report-designer.bat' file(for Windows).

![](/files/-Lf0pgReYRyfo1raWCx9)

&#x20;       2\. Once Pentaho Report Designer tool starts, you will be welcomed with the following window.

![](/files/-Lf0pzBxPeNFTUVUKYjX)

#### III.  Creating Your First Pentaho Report  <a href="#creatingsimplepentahoreportandembeddingittomifosx-iii.creatingyourfirstpentahoreport" id="creatingsimplepentahoreportandembeddingittomifosx-iii.creatingyourfirstpentahoreport"></a>

&#x20;       1\.  Go to the 'File' Menu and click on 'New' button.

&#x20;       2\.  Go to the 'Data' tab, click on 'Add Data Source' and then click on JDBC.&#x20;

![](/files/-Lf0qIyBTAkuwj6EgoaG)

&#x20;       3\. Once you click on JDBC, the following window will open, where you need to click on '+' (Create New Connection) button.

![](/files/-Lf0qsnfdAvXynk3Uv36)

&#x20;      4\. Once you click on 'Create New Connection', the following window will appear.  Here, you have to provide all the setting information as given in the following table and then click on 'Test' button to generate the Message Box where it shows the confirmation of connection. Once Connection is established click on 'OK' button.

![](/files/-Lf0rLIUvJ5VdKSyFi78)

| SI.NO | Field Name      | Description                                                                                                                                                      |
| ----- | --------------- | ---------------------------------------------------------------------------------------------------------------------------------------------------------------- |
| 1     | Connection Name | Provide the appropriate connection name                                                                                                                          |
| 2     | Host Name       | This is the name of server to which designer tool connects to. In this case, we are connecting to 'localhost'.                                                   |
| 3     | Database Name   | Provide the database name to which designer tool needs to connect. In MifosX, we generally connect to the database 'mifostenant-default'                         |
| 4     | Connection Type | In the left column, please select the appropriate connection type(in this case, mysql) . Once you select 'mysql' the Port Number automatically selected as 3306. |
| 5     | User Name       | Provide the mysql username( in this case it is 'root')                                                                                                           |
| 6     | Password        | Provide the mysql password.                                                                                                                                      |

&#x20;         5\. As shown in the following window, click on '+' button to add the sql query.

![](/files/-Lf0slopzM-XeiwTZd_G)

&#x20;         6\. Here, Provide the Sql Query Name and write the appropriate Sql Query and then click on the 'Preview' button to confirm that, the Sql query executed successfully. Then click on the 'OK' button.

{% hint style="info" %}
Query example

select mc.firstname,mc.lastname,mc.account\_no from m\_client mc\
where mc.activation\_date between ${startdate} and ${enddate}
{% endhint %}

![](/files/-Lf0tbMHQgofEVtlWlGx)

7\.  Once you create executable Sql Query, you may have to add parameters if required. In order to embed Pentaho Report to MifosX, At least you have to create 3 parameters which are passed to MifosX, namely:

* &#x20;tenantUrl
* &#x20;username&#x20;
* &#x20;password.&#x20;

To add parameters, under the 'Data' tab, scroll down to see 'parameters' and then right click on 'parameters' and then click on '**Add parameter**' to see the following window.

![](/files/-Lf0tsfv8HvcbAVaXXKB)

![](/files/-Lf0u0wfL4Os_Bsg3PBB)

| SI.NO | Parameter Name               | Parameter Fields                                                                                                                                                |
| ----- | ---------------------------- | --------------------------------------------------------------------------------------------------------------------------------------------------------------- |
| 1     | tenantUrl                    | <p>Name:tenantUrl</p><p>Label:Tenant Db</p><p>Value type: String</p><p>Default Value: jdbc:mysql://localhost:3306/mifostenant-default</p><p>Check mandatory</p> |
| 2     | username                     | <p>Name:username<br>Label:User Name<br>Value Type: String</p><p>Default Value: root</p>                                                                         |
| 3     | password                     | <p>Name:password<br>Label:Password<br>Value Type: String</p><p>Default Value: mysql</p><p>Check Mandatory Field</p>                                             |
| 4     | startdate (For this example) | <p>Name:startdate<br>Label:Start date<br>Value Type: Date (SQL)</p><p>Display Type: Date Picker</p>                                                             |
| 5     | enddate (For this example)   | <p>Name:enddate<br>Label:End date<br>Value Type: Date (SQL)</p><p>Display Type: Date Picker</p>                                                                 |

Basically, these three parameters are required to embed Pentaho Report in MifosX. Similarly, you can define more parameters as per requirement of the report.&#x20;

8\. Once you add the parameters, you need to check whether the report is working fine in the pentaho environment. First, You need to add the Report fields into 'Details' section of the pentaho environment. In our example, the fields 'firstname', 'lastname' and 'account\_no' of the clients are added. In order to add them you need to drag each field in 'Details' section of the pentaho environment as shown in following two screenshots.

![](/files/-Lf0vUDTISzKm9bj_YK9)

![](/files/-Lf0veASvjAs4DWkd4R_)

&#x20;         9\. Next you need to click on the 'Run' button and choose appropriate format for the report.

![](/files/-Lf0vzBMyMOkOSTahIJp)

&#x20;         10\. Once you 'Run' the report by choosing appropriate format, the following window will open where you enter the parameters and generate the report. (In this case, PDF is selected).

![](/files/-Lf0wLIcoQirUXZDZl1_)

11\.  If you click on the 'OK' button and a PDF is generated, it means Pentaho Report was created successfully.

12\. Add Global scripting once you are done with all the design and testing. Before you save the report you need to add global scripting.&#x20;

![](/files/-Lf0wcXR-qMElAhtlX9p)

&#x20;**Copy this content into it**

```
// This is a template to demonstrate the existing functions
// you can use in a global data-source script. All functions and
// global variables you define here will be available for the
// all query scripts.
//
// Feel free to delete any function you don't use.
//
// you can process scripts via
// scriptHelper.eval("println ('Hello World');", "ECMAscript");
//
// or your can load your own ECMA/JavaScript files and execute them via
// scriptHelper.evalFile ("/your/file/here.js", "ECMAscript");
//
// both inline scripts and files will be executed in the global context -
// any function or variable defined there will be available globally.
//
// The following global variables exist by default:
// resourceManager : The ResourceManager can be used to load files
// contextKey : ResourceKey the context key points to the prpt-bundle
// dataFactory : The current datafactory instance
// configuration : The current report configuration
// resourceBundleFactory : Access to translations and locale information

function init(dataRow)
{
// place all initialization logic here. This is the right space to
// prepare complex lookup tables or to fill global variables.

// this method is called once when the data-source is first used.
var tenantUrl = dataRow.get("tenantUrl");
var user = dataRow.get("username");
var password = dataRow.get("password");
dataFactory.getConnectionProvider().setProperty("user", user);
dataFactory.getConnectionProvider().setProperty("password", password);
dataFactory.getConnectionProvider().setUrl(tenantUrl);
}

function shutdown()
{
// place all shutdown logic here. If you use any persistent resources
// like files or connections make sure you close them here.

// this method is called once during the data-source shut-down. It
// will be called after all query scripts have been shut down.

}
```

&#x20;         **13.** You need to save the report with '.prpt' extension. In order to do it, Just go to the 'File' menu and click on 'Save' button.&#x20;

![](/files/-Lf0xVLrrQbPdJczOP5Q)

#### IV.   Embedding Pentaho Report in MifosX <a href="#creatingsimplepentahoreportandembeddingittomifosx-iv.embeddingpentahoreportinmifosx" id="creatingsimplepentahoreportandembeddingittomifosx-iv.embeddingpentahoreportinmifosx"></a>

&#x20;    1\.  Create a '.mifosx' folder (use DOS to create the folder) in your home directory and then create a sub folder 'pentahoReports' in '.mifosx' folder.

&#x20;    2\.  Please copy the pentaho report file( with \*.prpt file extension) which you have created earlier using 'Penntaho Report Designer Tool' in "home/.mifosx/pentahoReports" folder.

&#x20;    3\.  Go to Community-app and then go to Admin >> System >> Manage Reports and click '+Create Report' to see the following window.

![](/files/-Lf0xl_JNX9-uXCFZK7t)

&#x20;   4\. Ensure **'Report Name' should be the same as the pentaho report file name** (that is in this example, "**Activated Clients**.prpt").

&#x20;   5\.  Select Report Type as 'Pentaho' from drop-down list.

&#x20;   6\. Ensure to check the box for "Use report(UI)".&#x20;

&#x20;   7\. Select the required parameters which are passed to pentaho. (in this case, startDate, endDate).

&#x20;   8\. Click on the 'Submit' button to create the report.

#### V.   Generating created Pentaho Report  <a href="#creatingsimplepentahoreportandembeddingittomifosx-v.generatingcreatedpentahoreport" id="creatingsimplepentahoreportandembeddingittomifosx-v.generatingcreatedpentahoreport"></a>

&#x20;   Go to Community-app and then go to 'Reports' tab and then by selecting the report section>>then the required report you could generate the report.&#x20;

&#x20;    In this example: Reports>>clients>>Activated clients.    &#x20;


# XBRL Reporting

### Overview

&#x20;XBRL is adopted as the reporting and data standard for financial inclusion reporting with MIX leading the way. By achieving one standard format for reporting data, financial institutions can save a great deal of time. Prior to Mifos X capability, multiple staffs were required to summarize and generate the regular reports required by external bodies. Mifos X supports the generation of the required XBRL format reports, thereby streamlining the reporting process by creating one report which gets sent to the MIX which automatically sends unique reports back to funders, regulators, associations, etc.&#x20;

**On this page:**

**Associated Workflows** (if applicable) - list out and describe.&#x20;

**Available Actions:** for each one - create as H3 level-header (will show in page-level table of contents) and for each one, include the following this is applicable.  List these out and then for each one, do the following:

1.

{% hint style="danger" %}
Key Error Messages
{% endhint %}

{% hint style="info" %}

{% endhint %}

### Related articles

* Page:[Manage Funds](/mifosx/user-manual/for-administrators-mifos-x-platform/administration/organization/manage-funds)
* Page:[Manage Reports](/mifosx/user-manual/for-administrators-mifos-x-platform/administration/system/manage-reports)
* Page:[XBRL Reporting](/mifosx/user-manual/for-all-users/reports/xbrl-reporting)
* Page:[Standard Reports Shipped in Mifos X](/mifosx/user-manual/for-all-users/reports/standard-reports-shipped-in-mifos-x)
* Page:[Custom Reports](/mifosx/user-manual/for-all-users/reports/custom-reports)


# For Administrators (Mifos X Platform)

The topics in this section are for system administrators. System administrators are responsible for:

### **Table of Contents**

[**Initial System Set Up**](/mifosx/user-manual/for-administrators-mifos-x-platform/initial-system-set-up)

[**Administration**](/mifosx/user-manual/for-administrators-mifos-x-platform/administration)

* [Users](/mifosx/user-manual)
* [Organization](/mifosx/user-manual/for-administrators-mifos-x-platform/administration/organization)
* [System](/mifosx/user-manual/for-administrators-mifos-x-platform/administration/system)
* [Products](/mifosx/user-manual/for-administrators-mifos-x-platform/administration/products)
* [Templates](/mifosx/user-manual/for-administrators-mifos-x-platform/administration/templates)
* [mifos dropdown](/mifosx/user-manual/for-administrators-mifos-x-platform/administration/mifos-dropdown)

[**Clients, Groups and Centers**](/mifosx/user-manual/for-all-users/untitled/clients-groups-centers-navigation)

* [Manage Clients](/mifosx/user-manual/for-administrators-mifos-x-platform/clients-groups-and-centers/manage-clients)
* [Manage Groups](/mifosx/user-manual/for-administrators-mifos-x-platform/clients-groups-and-centers/manage-groups)
* [Manage Centers](/mifosx/user-manual/for-administrators-mifos-x-platform/clients-groups-and-centers/manage-centers)

[**Accounting**](/mifosx/user-manual/for-administrators-mifos-x-platform/accounting)

* [Chart of Accounts - General Ledger Setup](/mifosx/user-manual/for-administrators-mifos-x-platform/accounting/chart-of-accounts-general-ledger-setup)
* [Accounts linked to Financial Activities](/mifosx/user-manual/for-administrators-mifos-x-platform/accounting/accounts-linked-to-financial-activities)
* [Migrate opening balances(Office wise)](/mifosx/user-manual/for-administrators-mifos-x-platform/accounting/migrate-opening-balances-office-wise)
* [Accounting Rules](/mifosx/user-manual/for-administrators-mifos-x-platform/accounting/accounting-rules)
* [Provisioning Entries](/mifosx/user-manual/for-administrators-mifos-x-platform/accounting/provisioning-entries)
* [Print General Ledger Listing](/mifosx/user-manual/for-administrators-mifos-x-platform/accounting/print-general-ledger-listing)
* [How To Enter GL Opening Balance](/mifosx/user-manual/for-administrators-mifos-x-platform/accounting/how-to-enter-gl-opening-balance)

[**Configure Notifications**](/mifosx/user-manual/for-administrators-mifos-x-platform/configure-notifications)


# Initial System Set Up

This section assumes that the *Mifos Community App* has been successfully downloaded and installed. The Mifos X log in page will appear. This page contains the current version of Mifos X, very *helpful links* to this User Manual, Functional Specifications, the most *frequently asked questions*, *upcoming news and very helpful links to the community*. Take a few minutes and discover the Mifos X community.

Before beginning, take a quick overview of [General Navigation](/mifosx/user-manual/for-all-users/untitled). This will introduce you to Mifos X and will be helpful in system setup.&#x20;

Once that is accomplished, the next step is to customize Mifos X for your organization’s needs and approach. This can be done using drop-down menus found along the top of the home screen.

After completing and having your [Pre Configuration Plan.docx](https://mifosforge.jira.com/wiki/download/attachments/73466161/Pre%20Configuration%20Plan.docx?version=1\&modificationDate=1442284208955\&cacheVersion=1\&api=v2)  at hand, follow these steps for first time log-in:

**Tip:** Need help downloading and/or installing the Mifos Community App? Please see the [Mifos X Installation on Windows](https://mifosforge.jira.com/wiki/spaces/docs/pages/53215236/Mifos+X+Installation+on+Windows) or [Mifos X Installation on Linux - Ubuntu Server](https://mifosforge.jira.com/wiki/spaces/docs/pages/74711072/Mifos+X+Installation+on+Linux+-+Ubuntu+Server)  section of this manual for more information.

### **1) Log-in into Mifos X:**&#x20;

#### **Sign in Page**

<figure><img src="/files/RTLLx4kSs04WmHKoyCPZ" alt=""><figcaption></figcaption></figure>

* Type username: mifos &#x20;
* Type password: password&#x20;
* Click "**Sign In"**

&#x20;**NOTE:** The initial username and password will be changed in system set up. The default username and password is *Super User* to allow for full system set up. &#x20;

&#x20;Across the top are the navigation drop downs. The Mifos logo will return the user to the [Welcome Page](/mifosx/user-manual/for-all-users/untitled/welcome-page) from anywhere in the system. Overview:- &#x20;

* [**Clients, Groups and Centers**](/mifosx/user-manual/for-all-users/untitled/clients-groups-centers-navigation) **-** drop down will be used to access individual accounts, groups and centers.&#x20;
* [**Accounting**](/mifosx/user-manual/for-administrators-mifos-x-platform/accounting) **-** drop down opens the menu to access the system tools required by the accounting departments.
* [**Reports**](/mifosx/user-manual/for-all-users/reports) **-** Drop down provides access to all areas of system reports including the default reports provided in the Mifos download and custom reports that will be developed by the organization.
* [**Administration**](/mifosx/user-manual/for-administrators-mifos-x-platform/administration) **-** This is where the system is set up including users, organization, products and templates.
* [**Global Search**](/mifosx/user-manual/for-all-users/untitled/global-search) **-** This will allow the user to quickly navigate the system.
* [**Mifos dropdown**](/mifosx/user-manual/for-administrators-mifos-x-platform/administration/mifos-dropdown). - This will have settings,profile and help. &#x20;

The next step in configuration is to *set up your organization*. Begin at the main screen, click on **Admin** then select **Organization**. &#x20;

### **2) Set-up your Offices :**

Follow this link to the [Manage Offices](/mifosx/user-manual/for-administrators-mifos-x-platform/administration/organization/manage-offices) page.

<figure><img src="/files/mdr7a6y1oDqDUJevNFEH" alt=""><figcaption></figcaption></figure>

* Using the information gathered in the [Pre Configuration Plan.docx](https://mifosforge.jira.com/wiki/pages/viewpageattachments.action?pageId=52035605\&highlight=Pre+Configuration+Plan.docx#Community+App+-+A+user+interface+for+Mifos+X+APIs-attachment-Pre+Configuration+Plan.docx), the first step is to create the Main Office of your organization. In this example, we use the name "Head Office". You enter the name that best describes your office name. This may be a building name, a road name or any other naming scheme your particular organization uses.
* In the **Office** field, enter your main office name.
* In **Parent Office**, do not enter a name.
* In the **Opened** on field, enter the date your organization opened this office.
* In the **External ID** field, enter any numeric identifier your organization may use to further identify your offices. This is an optional field provided for your unique customization. It is not required for effective Mifos functionality.

Review the information entered and if it is all correct, click on the **Submit** button. The head office is now created.

<figure><img src="/files/uyge4wmdwkKPtc1eOu29" alt=""><figcaption></figcaption></figure>

<figure><img src="/files/DITdMO3k17oDMoR7I4xT" alt=""><figcaption></figcaption></figure>

If your organization has multiple offices, return to the **Admin/Organization/Manage Office's** screen and select **+Create Office**. In this example, we use the name "*Branch Office*".  You will enter the name that best describes your additional office name.

&#x20;**NOTE:** It is best to set up your head office first. Then set up any regional offices. Finally set up the individual branch offices taking care to link them to the correct regional or **Parent office.**&#x20;

### **3) Configure Currency:**

&#x20; [Currency Configuration](/mifosx/user-manual/for-administrators-mifos-x-platform/administration/organization/currency-configuration) *-* Return to the **Admin/Organization** Screen.

<figure><img src="/files/oOi4jdMP6wvjYyQp9r7I" alt=""><figcaption></figcaption></figure>

&#x20;Select **Currency Configuration.** Click on the **+Add/Edit** button. Enter your local currency, then press **Submit.**

### **4) Define Holidays:**

&#x20;Return to the **Admin/Organization** screen and Select [Manage Holidays](/mifosx/user-manual/for-administrators-mifos-x-platform/administration/organization/manage-holidays).

If the holiday affects the entire organization, select **Head Office** in the drop down menu located on the left top screen. If the holiday being created affects only one office, select that office name, which we have described as "*branch office*" here. Click on the **+Create Holiday** button. Next, fill in the dates of the holiday, name of the holiday, along with brief description.&#x20;

**Take note that the fields with asterisk (\*) are required.**

<figure><img src="/files/4dsY7Z8rIv9du1HFe3Tk" alt=""><figcaption></figcaption></figure>

<figure><img src="/files/OPSch5J7DSCOd7n5Ix8H" alt=""><figcaption></figcaption></figure>

<figure><img src="/files/sEJw3XxYfZamzQiVrSCa" alt=""><figcaption></figcaption></figure>

* &#x20;In the **Name** field, key in the name of the holiday.
* &#x20;In the **From Date** field, key in the next date of the holiday.
* &#x20;In the **To Date** field, key in the ending date of the holiday.
* &#x20;In the **Repayment scheduled to** field, key in the first business day following the holiday. This will allow loan payments to remain current should the regular due date fall on the holiday.
* &#x20;In the **Description** field, key in the description your organization uses for the holiday.

&#x20;Expand the box next to **Applicable office.** The full list of offices will display. Click on each office affected by the holiday.

&#x20;Review the information for accuracy, then click on **Submit.**

&#x20;The Holiday will go into a "Pending for activation" status. An authorized user must review the holiday and activate it in the system.&#x20;

### **5) Create Employees:**

Return to the **Admin/Organization** Screen and select [**Manage Employees.**](/mifosx/user-manual/for-administrators-mifos-x-platform/administration/organization/manage-employees)

Click the blue **Create Employee** button at the top-right of the page to create a new employee.

**Take note that the fields with asterisk (\*) are required.**

<figure><img src="/files/Pc1zl85SFg80jXlIENK2" alt=""><figcaption></figcaption></figure>

<figure><img src="/files/a1plcbuoYOAWnAxup5Yf" alt=""><figcaption></figcaption></figure>

<figure><img src="/files/XTz4UbsMdnkwCE8ia5U1" alt=""><figcaption></figcaption></figure>

1. Complete the required fields:

   **a.** Select the appropriate office from the drop-down menu

   b. First name

   c. Last name

   d. Designate the employee as a loan officer if that is the case
2. Optional - Add a Mobile Number for SMS messaging.
3. Provide the Joining Date of the employee.&#x20;
4. Click **Submit**.

### **6) Define Working Days**

Return to the **Admin/Organization** Screen and select  [**Working Days**](/mifosx/user-manual/for-administrators-mifos-x-platform/administration/organization/working-days)**.**&#x20;

Now working days can be defined from front-end and it's easy to use. By just checking the check box to specify as working days & Un-check the box to specify as non working days,then click on Submit.

In the below image example: Monday,Tuesday,Wednesday,Thursday,Friday,Saturday are Working days & Sunday(Un-checked box) is a Non-working day.&#x20;

<figure><img src="/files/1e45kaFXDnf0L1oN1VYx" alt=""><figcaption></figcaption></figure>

<figure><img src="/files/B6KLaMq9foZEPnx5mdIe" alt=""><figcaption></figcaption></figure>

**Other Organization features** will be used later in system set up and use.

* **Bulk Loan Reassignment -** this is an operational field that allows the organization to reassign all loans from one loan officer to another. This field will be used in day-to-day operations. No initial set up is required.
* **Standing Instruction History** - this will be used to track and search for standing transaction history.
* **Teller/Cash Management** - this will be used to assign users to a cash drawer. &#x20;

### **7) Create Data Tables**

&#x20;Return to the **Admin/System** Screen and select  [**Manage Data Tables**](/mifosx/user-manual/for-administrators-mifos-x-platform/administration/system/manage-data-tables)  **(Optional - For capturing additional details)**

Mifos X data-table allows the user to add custom fields in addition to the built-in fields to a client profile, loan/saving account, group, center or a office. When creating a set of custom fields (i.e, data-table), you can set multi-row option to capture multiple instance of data. And custom field supports 6 data types (String , Number, Decimal, Date, Text and Drop down).  Review the system provided data tables then, using your Pre-Configuration Guide, create additional fields in this area.

&#x20;Select "**Create Data table**"

<figure><img src="/files/FD9iJf2Xp907TT99n46z" alt=""><figcaption></figcaption></figure>

<figure><img src="/files/rE5RC50adTxk8E4zee8g" alt=""><figcaption></figcaption></figure>

<figure><img src="/files/aFararHChNgIodSWhwAJ" alt=""><figcaption></figcaption></figure>

The **Application table name** field will provide a drop down of system functions the data table will affect. For example, if you are adding fields that will impact the Client level, click on **Client.**

Add **Columns**, enter name, from drop down select type (DBH - write this properly & tie in to pre config guide)

### **8) Define System Codes:**

&#x20;Return to the **Admin/System** Screen, then select [**Manage Codes** ](/mifosx/user-manual/for-administrators-mifos-x-platform/administration/system/manage-codes) - For defining system codes for examples - Payment types, Collateral, etc.

<figure><img src="/files/eGnMjR9rw3QcJ9Pbqf28" alt=""><figcaption></figcaption></figure>

<figure><img src="/files/wxhn8FWioa991yIeJDE1" alt=""><figcaption></figcaption></figure>

Codes are mostly **system defined** which means the code itself comes out of the box and cannot be modified however, its code values can be. e.g. 'Customer Identifier', it defaults to a code value of "Passport" but could be "Drivers License," "National Id" or any other ID acceptable to your organization.

Review the list of system defined codes, then edit as needed for your operations.  For more information on code configuration, see [**Manage Codes**](/mifosx/user-manual/for-administrators-mifos-x-platform/administration/system/manage-codes)**.**

<figure><img src="/files/mpwVLC5ljkhBvyRvicoo" alt=""><figcaption></figcaption></figure>

### **9) Define Roles & Permissions:**

Return to the **Admin/System** Screen, then select [**Manage Roles and Permissions**](/mifosx/user-manual/for-administrators-mifos-x-platform/administration/system/manage-roles-and-permissions)

<figure><img src="/files/dO6dSszT56zhCdYREgAc" alt=""><figcaption></figcaption></figure>

<figure><img src="/files/yuYge3rRTywNeUiF0PVy" alt=""><figcaption></figcaption></figure>

Using the Pre-Configuration Guide, proceed through each function and click on the system privileges allowed by the position. It is important to take care when setting up User Roles as these will be used when setting up each individual employee.

In this example, an Operations Manager will be allowed to allocate cashier cash, create teller, etc. They will not be able to do any other loan transactions.

<figure><img src="/files/bTSOvDluK3PDDnfYlCdm" alt=""><figcaption></figcaption></figure>

![](/files/-Lf1GVu7Q_6AiOBS6RqV)

### **10) Create Users :**

Return to the **Admin Screen** and select [**Users**](/mifosx/user-manual/for-administrators-mifos-x-platform/administration/users)&#x20;

<figure><img src="/files/GShiV0fUmSnCo6I9JejL" alt=""><figcaption></figcaption></figure>

<figure><img src="/files/MmXDZMmYoAjbzzDp9tsG" alt=""><figcaption></figcaption></figure>

### **11) Configure Maker Checker Tasks :**

Return to the **Admin/System** Screen, then select [**Configure Maker-Checker Tasks**](/mifosx/user-manual/for-administrators-mifos-x-platform/administration/system/configure-maker-checker-tasks) (Optional)&#x20;

<figure><img src="/files/bXqjl6gIUBdQfJqJ7RCJ" alt=""><figcaption></figcaption></figure>

<figure><img src="/files/6FrfDqKtLYtF3HZJHoiD" alt=""><figcaption></figcaption></figure>

<figure><img src="/files/OVZ8BDSFxpnDBrf6iaCh" alt=""><figcaption></figcaption></figure>

Mifos X Maker Checker functionality allows an financial institution to define transactions as having a maker and a checker phase. One user enters, deletes or changes data. Then, another user that has "Checker" rights for that transaction, can inspect and approve the data.  By default, Maker Checker functionality is disabled. See [Update Global Configuration](https://demo.openmf.org/api-docs/apiLive.htm#configs_globalconfig_update) to enable/disable Maker Checker functionality at a global level.

Additionally, Maker Checker functionality for each transaction (permission) is disabled by default. see [Enable/Disable Permissions for Maker Checker](https://demo.openmf.org/api-docs/apiLive.htm#permissions_update) to enable/disable Maker Checker functionality at a transaction (permission) level.

Finally, to give checking rights to a user (via a role associated with the user) see [Update a Role's Permissions](https://demo.openmf.org/api-docs/apiLive.htm#rolespermissions_update).&#x20;

### **12) Global Configuration:**

Return to the **Admin/System** page, then select **Configuration.**

<figure><img src="/files/AA3RmD1bc2EqGrwVNOgk" alt=""><figcaption></figcaption></figure>

<figure><img src="/files/Z75eFpbim1DyEdXfuQnD" alt=""><figcaption></figcaption></figure>

&#x20;Global configuration related to set of supported enable/disable configurations:

1. **maker-checker** - defaults to false - if true turns on maker-checker functionality
2. **reschedule-future-repayments** - defaults to false - if true reschedule's repayments which falls on a non-working day to configured repayment [rescheduling rule](https://demo.openmf.org/api-docs/apiLive.htm#nw_repayment_schedule_rule)
3. **allow-transactions-on-non\_working days** - defaults to false - if true allows transactions on non-working days
4. **reschedule-repayments-on-holidays** - defaults to false - if true reschedules repayments which falls on a non-working day to defined [reschedule date](https://demo.openmf.org/api-docs/apiLive.htm#holidays)
5. **allow-transactions-on-holiday** - defaults to false - if true allows transactions on [holidays](https://demo.openmf.org/api-docs/apiLive.htm#holidays)&#x20;

> &#x20;**IMPORTANT** - If you want to enable Accounting module, please set-up Accounting before moving to next step. If you don't want to setup Accounting module you could skip this step. &#x20;

### **13) Accounting:**

&#x20;To access the [**Accounting**](/mifosx/user-manual/for-administrators-mifos-x-platform/accounting) menu and the options within, click on the **Accounting** button on the top of the screen: &#x20;

<figure><img src="/files/UvFGGIRW0L2pDwNlqSUo" alt=""><figcaption></figcaption></figure>

To **Enable Accounting Module** you need to follow below mentioned mandatory step by step instructions before you do any transaction:- &#x20;

Step 1) Create chart of accounts - [Chart of Accounts - General Ledger Setup.](/mifosx/user-manual/for-administrators-mifos-x-platform/accounting/chart-of-accounts-general-ledger-setup) &#x20;

Step 2) Map opening balance contra account in - [Accounts linked to Financial Activities ](/mifosx/user-manual/for-administrators-mifos-x-platform/accounting/accounts-linked-to-financial-activities)&#x20;

Step 3) Pass opening balance entries - [Migrate opening balances(Office wise)](/mifosx/user-manual/for-administrators-mifos-x-platform/accounting/migrate-opening-balances-office-wise) &#x20;

Step 4) Map your products with respective accounts - Once the Products are defined comeback to this section and follow the steps.  &#x20;

* Go to >> [Loan Products](/mifosx/user-manual/for-administrators-mifos-x-platform/administration/products/loan-products) - Accounting&#x20;
* Go to >> [Savings Products](/mifosx/user-manual/for-administrators-mifos-x-platform/administration/products/untitled) - Accounting&#x20;
* Go to >> [Fixed Deposit Products](/mifosx/user-manual/for-administrators-mifos-x-platform/administration/products/fixed-deposit-products) - Accounting&#x20;
* Go to >> [Recurring Deposit](/mifosx/user-manual/for-administrators-mifos-x-platform/administration/products/recurring-deposit) - Accounting  &#x20;

### **14) Define Charges:**

Go to **Admin>>Products** Screen and select [**Charges** ](/mifosx/user-manual/for-administrators-mifos-x-platform/administration/products/charges)

<figure><img src="/files/9J1VvUO4BHemPGBDBZFj" alt=""><figcaption></figcaption></figure>

In-either to attach charges to products, you need to define charges at this point. Later at the time of defining product, you could add charges by just selecting it from drop-down.&#x20;

To create charge, please refer link:- [**Charges** ](/mifosx/user-manual/for-administrators-mifos-x-platform/administration/products/charges)

### **15) Define Products:**

&#x20;Go to **Admin>>**[**Products**](/mifosx/user-manual/for-administrators-mifos-x-platform/administration/products)**.**

<figure><img src="/files/UZkGVonQ7KKfUOFejQaO" alt=""><figcaption></figcaption></figure>

Products are set up once and are then available to qualifying clients (individuals, groups, and centers).

To define Products click on respective below mentioned links :&#x20;

* [Loan Products](/mifosx/user-manual/for-administrators-mifos-x-platform/administration/products/loan-products)
* [Savings Products](/mifosx/user-manual/for-administrators-mifos-x-platform/administration/products/untitled) (current and saving accounts)
* [Fixed Deposit Products](/mifosx/user-manual/for-administrators-mifos-x-platform/administration/products/fixed-deposit-products)
* [Recurring Deposit](/mifosx/user-manual/for-administrators-mifos-x-platform/administration/products/recurring-deposit)&#x20;

### Others:-&#x20;

### **Setting up your Fund Source:**

Return to the **Admin/Organization** Screen and select [**Manage Funds**](/mifosx/user-manual/for-administrators-mifos-x-platform/administration/organization/manage-funds)**.**&#x20;

If your organization has funds that are to be used for specific lending purposes, the names are defined here. In the example below the new fund "Rotary Internal Agriculture Loan 2014" has been entered into the "New Fund" field. Loans that are made to customer that fall into this category will link to the fund to enable the organization to properly monitor fund use and to provide reports. After the fund name has been entered, click on the + to add the fund to the list.

<figure><img src="/files/vdHeG7SNdJrLx1P9PciC" alt=""><figcaption></figcaption></figure>

<figure><img src="/files/7A4Ww5sFc0LuhxETYOBY" alt=""><figcaption></figcaption></figure>

&#x20;Return to the **Admin/System Screen**, then select [**Manage Reports**](/mifosx/user-manual/for-administrators-mifos-x-platform/administration/system/manage-reports)&#x20;

<figure><img src="/files/A5x8eWBXI5D3dj2IZzfd" alt=""><figcaption></figcaption></figure>

<figure><img src="/files/M0kAx0a8iDjgc91ODM7h" alt=""><figcaption></figcaption></figure>

&#x20;There are numerous reports within the Mifos X system. Many are core reports that are pre-installed for your organization. Existing reports can be customized and new reports written.  For details regarding report generation, see the [**Manage Reports**](/mifosx/user-manual/for-administrators-mifos-x-platform/administration/system/manage-reports) section.  &#x20;


# Administration

**Administration** is a drop-down menu that can be accessed from anywhere within the Mifos system. It is a home to several options which allow you to customize the Mifos experience to the needs of your organization.

**Tip:** When beginning to use Mifos X, please refer to the [**Initial System Setup**](/mifosx/user-manual/for-administrators-mifos-x-platform/initial-system-set-up) and [**General Navigation**](/mifosx/user-manual/for-all-users/untitled) sections of this manual for guidance.

To access the **Administration** menu and the options within, click on the **Admin** button on the top of the screen:

<figure><img src="/files/NtDjLemzjxHeDhSM02GV" alt=""><figcaption></figcaption></figure>

This will open a drop-down menu below which allows you to select one of the five **Administration**options by clicking your choice. Under this menu, you can find the following menu options:

### [**Users**](/mifosx/user-manual/for-administrators-mifos-x-platform/administration/users)**:**

Create, edit and organize user profiles for the Mifos X system.

### [**Organization**](/mifosx/user-manual/for-administrators-mifos-x-platform/administration/organization)**:**

Access the **Organization** menu.

### [**System**](/mifosx/user-manual/for-administrators-mifos-x-platform/administration/system)**:**

Access the **System** menu.

### [**Products**](/mifosx/user-manual/for-administrators-mifos-x-platform/administration/products)**:**

Access the **Products** menu.

### [**Templates**](/mifosx/user-manual/for-administrators-mifos-x-platform/administration/templates)**:**

Create, edit and organize templates for the Mifos system.


# Users

Application **Users** are people who work for your organization and will be using Mifos X to track all the information about your organization's operations. For example, an accountant working at a branch needs a user account in this application to track all the accounting related tasks and information. Similarly, a branch manager needs a user account to manage his/her client's portfolios.

In this section, you will learn how to add, delete or modify your organization’s users. These are people with system access working at the offices within your organization. They are subject to different restrictions based on the roles assigned to them (by the system administrator).

Before setting up usernames, the organization should give thought to the standard that will be used throughout the organization. This may be first.lastname; it may be a numerical identifier such as 101lastname (indicating the main office) or 201lastname indicating a branch office.  Whatever the method adopted by your organization, it should be consistently used when creating users.

From the main screen, click on [**Admin**](/mifosx/user-manual/for-administrators-mifos-x-platform/administration) then select **Users** from the drop down list.

![](/files/-Lg8D3OogTLx9bZgj6LP)

This will launch the users page that displays a list of Users with their details *(refer to the screenshot below)* such as:

* First Name
* Last Name
* Email
* Office

![](/files/-Lg8DIZlCX2ou92hMRj0)

**Tip:** Use the **Filter by Name** feature at the top of the screen to avoid scrolling through all the entries. Just begin typing the name you are looking for and Mifos X will automatically narrow down the search for you.

### **Create a User** <a href="#users-createauser" id="users-createauser"></a>

#### **Tip: Before you start to create Users, please ensure that you have created their respective Roles (for more information, see** [**Manage Roles and Permissions**](/mifosx/user-manual/for-administrators-mifos-x-platform/administration/system/manage-roles-and-permissions)**).**&#x20;

Start this process by clicking on the blue **Create User** button at the top-right corner of the **Users** screen.

![](/files/-Lg8EobgWmCnYoJAw7ZG)

You will then be prompted to fill in a series of fields and define the new user's office and role(s), such as:

* Username
* First Name
* Last Name
* Email
* Office
* Selected Roles

**NOTE: Fields marked with asterisks ('\*') are mandatory.**

* By default, the **Auto generate password** checkbox will be checked. It will send an auto generated password to the provided Email ID.<br>
* Alternatively, un-checking the box will allow you to provide a password manually. This will give you access to the **Password** and **Repeat Password** fields that allow you to create your own password.

![](/files/-Lg8Ft5qkx_PFRJ8SPAE)

* Select the associated office of the new user from the drop-down menu:

![](/files/-Lg8G7MJI64a8irh2gyG)

* Select a role from the **Available Roles** menu to be added to the **Selected Roles**  section by clicking the ![](https://mifosforge.jira.com/wiki/download/attachments/67141740/forward.png?version=1\&modificationDate=1552919317808\&cacheVersion=1\&api=v2) button. To add more than one role at once, hold the Ctrl key while clicking on the appropriate roles. Selected roles will be highlighted in blue and then you can forward all of them at once to the Selected Roles section.

![](/files/-Lg8GLyWnLMZjxjA-On1)

* To remove a role from the Selected Roles section, select the role and click the ![](https://mifosforge.jira.com/wiki/download/attachments/67141740/reverse.png?version=1\&modificationDate=1552919565391\&cacheVersion=1\&api=v2) button.

![](/files/-Lg8G_y4O1UHTIigPYXj)

Once you have filled all the information fields, click the **Submit** button.

### **View User's Profile** <a href="#users-viewusersprofile" id="users-viewusersprofile"></a>

&#x20;To view a user, click on their **name** on the list and their profile will open. There will be additional information displayed such as:

* Login Name
* First Name
* Last Name
* Email
* Office
* Roles (*assigned to this user*)

![](/files/-Lg8GrvCdAuZe0iwGVo8)

Once you open a user's profile, you can perform the following actions:

* Edit user
* Delete user
* Change a password

### **Edit User** <a href="#users-edituser" id="users-edituser"></a>

You may edit the profile of current users within your organization. Follow these steps to do the so:

1. Navigate to the chart of current **Users** - If you are not sure how, please see the **View Application Users** section of this manual.
2. Select the user you would like to edit by clicking on their **name** in the chart (this will launch their profile).
3. Click the blue **Edit** button ![](https://mifosforge.jira.com/wiki/download/attachments/67141740/useredit2.png?version=1\&modificationDate=1402359825419\&cacheVersion=1\&api=v2) at the top-right of the page. This will open the user's profile, allowing you to make several changes.&#x20;

![](/files/-Lg8H6RZTXrsJzrLDUwm)

Once you have opened the user's profile for editing, you may modify the following fields:

* Username
* First and last name
* Email
* Selecting staff that report to this user by using the drop-down menu marked **Staff**:

![](https://mifosforge.jira.com/wiki/download/attachments/67141740/staff.png?version=1\&modificationDate=1552920958857\&cacheVersion=1\&api=v2)

* Transfer user account from one office to another office by selecting the office drop-down menu.

After making changes, click **Submit**.

### **Change User Password** <a href="#users-changeuserpassword" id="users-changeuserpassword"></a>

1. Navigate to the list of current **Users** - If you are not sure how, please see the **View** **Users**section of this manual.
2. Select the user whose password you would like to change by clicking on their **name** in the list. This will launch their profile.
3. Click the blue **Change Password** button ![](https://mifosforge.jira.com/wiki/download/attachments/67141740/userchangepw.png?version=1\&modificationDate=1402360045531\&cacheVersion=1\&api=v2) at the top-right of the page.
4. This will launch a pop-up window:

![](/files/-Lg8HRVjAPtkc1i5wcZw)

1. Fill in the **Password** and **Repeat password** fields.
2. Click **Submit**.

### **Delete User** <a href="#users-deleteuser" id="users-deleteuser"></a>

1. Navigate to the chart of current **Users** - If you are not sure how, please see the **View Application Users** section of this manual.
2. Select the user you would like to delete by clicking on their name in the chart. This will launch their profile.
3. Click the blue **Delete** button ![](https://mifosforge.jira.com/wiki/download/attachments/67141740/userdelete.png?version=1\&modificationDate=1402359844452\&cacheVersion=1\&api=v2) at the top-right of the page.
4. Click **Confirm**.

### **Override password expiry policy** <a href="#users-overridepasswordexpirypolicy" id="users-overridepasswordexpirypolicy"></a>

This option determines whether the password expires or not for this user even if the global configuration for password expiry is enabled.&#x20;

This means that checking this check box will grant you access using the same password, regardless of whether global configuration for password expiry is enabled.&#x20;

![](https://mifosforge.jira.com/wiki/download/attachments/67141740/overridePasswordPolicy.png?version=1\&modificationDate=1552923204412\&cacheVersion=1\&api=v2)

Related articles

* Page:[Users](/mifosx/user-manual/for-administrators-mifos-x-platform/administration/users)
* Page:[Audit Trails](/mifosx/user-manual/for-administrators-mifos-x-platform/administration/system/audit-trails)
* Page:[Chart of Accounts - General Ledger Setup](/mifosx/user-manual/for-administrators-mifos-x-platform/accounting/chart-of-accounts-general-ledger-setup)
* Page:[Manage Roles and Permissions](/mifosx/user-manual/for-administrators-mifos-x-platform/administration/system/manage-roles-and-permissions)
* Page:[Configure Maker-Checker Tasks](/mifosx/user-manual/for-administrators-mifos-x-platform/administration/system/configure-maker-checker-tasks)


# Organization

The **Organization** menu contains links to 17 (*seventeen*) pages. These pages are listed on the right side of this page. Each of these will help you set up and customize Mifos X as per your organization's needs.

When getting started with Mifos X, please refer to the [**Initial System Setup**](/mifosx/user-manual/for-administrators-mifos-x-platform/initial-system-set-up) page.

Want to learn more about navigation in Mifos X? See the [**General Navigation**](/mifosx/user-manual/for-all-users/untitled) section of this manual.

From the main screen, click on **Admin,** then click on **Organization** from the drop down list.

<figure><img src="/files/eCVuA9QOBfd0f9M9TZcP" alt=""><figcaption></figcaption></figure>

The **Organizations** page allows you to do several operations *(refer to the screenshot below)*:

* **Offices** can be created and modified
* **Holidays** can be created and modified
* **Employee** profiles and system access can be created and modified
* **Currency** settings can be established&#x20;
* **Loan** **Funds** can be created (such as Kiva.org, Rotary Funds, donor funds - any funds the organization needs to track)
* **Bulk Loan Reassignments** can be made
* **Standing Instructions History** enables viewing of logged history of standing instructions.
* **Teller / Cashier Management** enables managing Tellers/Cashiers - Cash allocation & settlement.&#x20;
* **Fund Mapping** enables the bulk entry screen for mapping fund sources to loans.
* **Working Days** can be defined here.
* **Password preferences** can be set for enforcing the usage of stronger password. &#x20;
* **Payment type** can be managed here, i.e creating & modifying.&#x20;

<figure><img src="/files/gRgpMmfjHWI3odvhqWdc" alt=""><figcaption></figcaption></figure>


# Manage Offices

Manage offices : [YouTube video ](https://www.youtube.com/watch?v=wpwDt8WjvSE\&list=PLAfz_RVd88FooXjldO5tdC63oMi0TSMwK\&index=9)

The **Manage Offices** page allows you to create, edit, and add the offices within your organization.

**Please note:** It is best to set up your head office first. Then set up any regional offices. Finally set up the individual branch offices taking care to link them to the correct regional or **Parent Office.**&#x20;

Beginning at the main screen, select **Admin,** then **Organization** from the drop down menu. This will launch the [**Organization**](/mifosx/user-manual/for-administrators-mifos-x-platform/administration/organization) menu.

Select **Manage Offices** to create a new office or modify current offices.

![](/files/-Lg8JrttxLrqZxz5hEo3)

This will launch the **Manage Office** page that displays a list of created offices along with their external ID, parent office and day of opening.

![](/files/-Lg8KEedjo5X-PVsg12N)

### **Setting Up The Main Office**

Using the information gathered in the [Pre-Configuration Plan.docx](https://mifosforge.jira.com/wiki/download/attachments/73466161/Pre%20Configuration%20Plan.docx?version=1\&modificationDate=1442284208955\&api=v2), the first step is to create the Main Office of your organization. Select the ![](https://mifosforge.jira.com/wiki/download/attachments/67141727/createOfficeIcon.png?version=1\&modificationDate=1552931166588\&cacheVersion=1\&api=v2) button at the top-right of the **Manage Offices** page.

![](/files/-Lg8KUxUELiD0UtkqF-E)

Once the page launches, you can then create an office with the following fields;

1. In the **Office** field, enter your main office name. This may be a building name, a road name or any other naming scheme your particular organization uses.
2. In **Parent Office**, do not enter a name.
3. In the **Opened** on field, enter the date your organization opened this office.
4. In the **External ID** field, enter any numeric identifier your organization may use to further identify your offices. This is an optional field provided for your unique customization. It is not required for effective Mifos X functionality.
5. Review the information entered and if it is all correct, click the **Submit** button. The head office is now created.

### **Edit Office**

From the **Manage Offices** screen, select the office you want to edit from the listed offices.

Once you have selected an office, you will be taken to its detail screen. Click the blue **Edit** button at the top-right of the screen:

![](/files/-Lg8Kj1wI4tn8rVB6de4)

From the **Edit Office** screen you may change the Parent office, rename the Office, change the Opened on and give the office an External ID.

![](/files/-Lg8Kx7Gg9emnMQRRVMX)

After making changes, click the **Submit** button to save those changes.

### **Creating Branch Offices**

If your organization has multiple offices, return to the **Admin/Organization/Manage Offices** screen and select **+Create Office**.  In this example, we use the name "Branch Office".  You will enter the name that best describes your additional office name.

![](/files/-Lg8L9fU5mGGiDMETf0D)

1. In the **Office** field, enter your additional office name.
2. In **Parent Office** field, the name of your Head Office will be the default. If your organization uses regional offices, multiple office names will appear in the drop down and you will select the regional office this newly created office falls under.
3. In the **Opened on** field, enter the date your organization opened this office.
4. In the **External ID** field, enter any numeric identifier your organization may use to further identify your offices. This is an optional field provided for your unique customization. It is not required for effective Mifos X functionality. In this example, we used a numeric identifier for this office.
5. Review the information entered and if it is all correct, click on the **Submit** button. The additional office is now created.

&#x20;After the offices are set up, the full list will appear on the **Admin/Organization/Manage Offices** screen.

### **Tree View**

Your organization's offices may also be viewed in a **Tree View.**&#x20;

From the **Manage Offices** screen, click the ![](https://mifosforge.jira.com/wiki/download/attachments/67141727/treeViewButton.png?version=1\&modificationDate=1552981448200\&cacheVersion=1\&api=v2) button at the top-right of the screen. This will launch an alternative view which allows you to view the office hierarchy for your organization:

![](/files/-Lg8LkpdKWd37RiAwmhz)

To expand the office to expose the branches, click the ![](https://mifosforge.jira.com/wiki/download/attachments/67141727/expand.png?version=1\&modificationDate=1552981898624\&cacheVersion=1\&api=v2) button besides the office name. To collapse, click the ![](https://mifosforge.jira.com/wiki/download/attachments/67141727/collapse.png?version=1\&modificationDate=1552981958074\&cacheVersion=1\&api=v2) button.

To return to list view, click the ![](https://mifosforge.jira.com/wiki/download/attachments/67141727/listView.png?version=1\&modificationDate=1552982349167\&cacheVersion=1\&api=v2)button at the top-right of the page.

### **Import Offices**

At the top most right of the **Manage Offices** page, click the ![](https://mifosforge.jira.com/wiki/download/attachments/67141727/importOfficeIcon.png?version=1\&modificationDate=1552982655291\&cacheVersion=1\&api=v2) button. This will launch the **Bulk import/Offices** page.

![](/files/-Lg8MA1R96cF1kpuiWnM)

You have two options;

1. &#x20;You can either download an office template to your device, add the information required, save and then upload that file.
2. &#x20;Or, if you already have an existing file, you can choose the file and upload it.

**Tip:** It is best to download an office Template as it will contain the fields that pre-exist in Mifos X.

After uploading the file, click the ![](https://mifosforge.jira.com/wiki/download/attachments/67141727/refreshIcon.png?version=1\&modificationDate=1552983417827\&cacheVersion=1\&api=v2) button at the bottom of the page to confirm that the file has been uploaded.

Mifos X Training Manage Office video: <https://youtu.be/wpwDt8WjvSE>

### Related articles <a href="#manageoffices-relatedarticles" id="manageoffices-relatedarticles"></a>

* Page:[Manage Funds](/mifosx/user-manual/for-administrators-mifos-x-platform/administration/organization/manage-funds)
* Page:[Manage Holidays](/mifosx/user-manual/for-administrators-mifos-x-platform/administration/organization/manage-holidays)
* Page:[Manage Offices](/mifosx/user-manual/for-administrators-mifos-x-platform/administration/organization/manage-offices)
* Page:[Bulk Loan Reassignment](/mifosx/user-manual/for-administrators-mifos-x-platform/administration/organization/bulk-loan-reassignment)
* Page:[Manage Employees](/mifosx/user-manual/for-administrators-mifos-x-platform/administration/organization/manage-employees)

### &#x20;<a href="#manageoffices-relatedarticles" id="manageoffices-relatedarticles"></a>

<br>


# Currency Configuration

*For more information, check out the Currency Configuration* [*YouTube Video*](https://www.youtube.com/watch?v=5CEHit2RK14\&list=PLAfz_RVd88FooXjldO5tdC63oMi0TSMwK\&index=8)*.*

As many of the operations within Mifos X take place on an international scale, a variety of currencies may be used. This section allows an organization to define what currencies will be used throughout their interactions within the Mifos X system.

From the [Welcome Page](/mifosx/user-manual/for-all-users/untitled/welcome-page), click on the[ **Admin**](/mifosx/user-manual/for-administrators-mifos-x-platform/administration) button on the top menu bar, then click on **Organization** from the drop down list. This will launch the [**Organization**](/mifosx/user-manual/for-administrators-mifos-x-platform/administration/organization) menu.

Select **Currency Configuration**.

![](https://mifosforge.jira.com/wiki/download/attachments/67141734/currencyconfig.png?version=1\&modificationDate=1552927757045\&cacheVersion=1\&api=v2)

### **Add or Edit Currencies**

Follow the steps below to add or delete currencies from your organization's Mifos X profile. Chosen currencies will be displayed along with their currency code.

* Click the blue **Add/Edit** button at the top-right of the screen.

![](https://mifosforge.jira.com/wiki/download/thumbnails/67141734/currency_config.PNG?version=1\&modificationDate=1553976096766\&cacheVersion=1\&api=v2\&height=400)

* This will display a list of all currencies currently in use. Click the blue '**x**' at the right of a currency to remove it from your organization's selected currencies.

![](https://mifosforge.jira.com/wiki/download/attachments/67141734/removecurrency.png?version=2\&modificationDate=1552736674644\&cacheVersion=1\&api=v2)

* Type the name of the currency you would like to add into the **New Currency** field. Mifos X will automatically filter matches as you type.

![](https://mifosforge.jira.com/wiki/download/attachments/67141734/inputCurrency.png.png?version=1\&modificationDate=1552736915357\&cacheVersion=1\&api=v2)

* Click on the blue '**+**' to the right of the field to add the selected currency.

![](https://mifosforge.jira.com/wiki/download/attachments/67141734/addCurrency.png?version=1\&modificationDate=1552737041652\&cacheVersion=1\&api=v2)

* Click **Submit** to commit your changes.

Youtube video: <https://youtu.be/5CEHit2RK14?t=1>

### Related articles

* Page:[Bulk Loan Reassignment](/mifosx/user-manual/for-administrators-mifos-x-platform/administration/organization/bulk-loan-reassignment)
* Page:[Manage Employees](/mifosx/user-manual/for-administrators-mifos-x-platform/administration/organization/manage-employees)
* Page:[Manage Funds](/mifosx/user-manual/for-administrators-mifos-x-platform/administration/organization/manage-funds)
* Page:[Manage Holidays](/mifosx/user-manual/for-administrators-mifos-x-platform/administration/organization/manage-holidays)
* Page:[Manage Offices](/mifosx/user-manual/for-administrators-mifos-x-platform/administration/organization/manage-offices)

<br>


# Manage Holidays

The ability to manage holidays for individual offices is a very useful tool for an organization spanning multiple locations. Use this option to customize holidays for each office of your organization.

From the [Welcome Page](/mifosx/user-manual/for-all-users/untitled/welcome-page), click on [**Admin**](/mifosx/user-manual/for-administrators-mifos-x-platform/administration)**,** and click on [**Organization**](https://mifosforge.jira.com/wiki/spaces/docs/pages/67141724/Organization) from the drop-down list that pops up. This will launch the [**Organization**](/mifosx/user-manual/for-administrators-mifos-x-platform/administration/organization) menu (*as shown in the screenshot below*).

![](https://mifosforge.jira.com/wiki/download/attachments/67141730/manageholiday.png?version=1\&modificationDate=1552927846976\&cacheVersion=1\&api=v2)

From this menu, select **Manage Holidays**. This will display the following:

![](https://mifosforge.jira.com/wiki/download/attachments/67141730/holidays.PNG?version=1\&modificationDate=1553623047543\&cacheVersion=1\&api=v2)

### **Add Holidays**&#x20;

This option allows you to create new holidays for each office in your organization.&#x20;

1. Click the blue **Create Holiday** button at the top-right of the screen:![](https://mifosforge.jira.com/wiki/download/thumbnails/67141730/create%20holiday.png?version=1\&modificationDate=1402085750115\&cacheVersion=1\&api=v2\&width=100).This will launch a new page:&#x20;

![](https://mifosforge.jira.com/wiki/download/attachments/67141730/createHoliday.png?version=1\&modificationDate=1552737462017\&cacheVersion=1\&api=v2)

&#x20;   **2.  Fill** the required fields:&#x20;

1. Name
2. From Date
3. To Date
4. Repayment Scheduling Type
5. Repayment scheduled to
6. Description (this is not a required field, but is still available. You may also **Edit** this holiday at another time to add a description or edit the current description).

&#x20;   **3. Select** the office(s) the holiday applies to by clicking on the small '**+**' icon beside **Applicable Offices**. This will open a list of offices for you to choose from. Check the boxes to mark the office(s) you would like to include.

![](https://mifosforge.jira.com/wiki/download/attachments/67141730/availableOffices.png?version=1\&modificationDate=1552737633946\&cacheVersion=1\&api=v2)

&#x20;   4\. Click **Submit**.

### **View Holidays**

&#x20;Once you have selected **Manage Holidays,** a chart of all holidays will be displayed. The following fields will be displayed:

* Holiday Name
* Start Date
* End Date
* Alternate working day
* Status - Active or Deleted

![](/files/-LjH-fKs2GeAShmio4w1)

**Tip:** Use the **Filter by Name** field to locate the holiday you are searching for. Begin typing the holiday name and Mifos X will automatically filter the results.

You may also filter holiday results by using the drop-down menu at the center of the **Manage Holidays** screen to select an office:

![](https://mifosforge.jira.com/wiki/download/attachments/67141730/selectOffice.png?version=1\&modificationDate=1552738477802\&cacheVersion=1\&api=v2)

### **Edit/Delete Holiday**

To **Edit** this holiday:

1. Click on a holiday in the list to view more details:

![](https://mifosforge.jira.com/wiki/download/attachments/67141730/holidayDetails.png.png?version=1\&modificationDate=1552738707793\&cacheVersion=1\&api=v2)

&#x20;   2\. Click on the blue **Edit** button at the top-right of the page. This will launch a page where you can change the name of the selected holiday. You may also add or change a description of the chosen holiday.

To **Delete** this holiday:

1. Click the red **Delete** button at the top-right of the screen.
2. Click **Confirm**.

Related articles

* Page:[Working Days](/mifosx/user-manual/for-administrators-mifos-x-platform/administration/organization/working-days)
* Page:[Manage Tax configuration](/mifosx/user-manual/for-administrators-mifos-x-platform/administration/products/manage-tax-configuration)

<br>


# Manage Funds

*This section describes the **Manage Funds** section under the* [*Organization Menu*](/mifosx/user-manual/for-administrators-mifos-x-platform/administration/organization) *that allows you to manage funds associated with loans.*

From the [Welcome Page](/mifosx/user-manual/for-all-users/untitled/welcome-page), click on the [**Admin**](/mifosx/user-manual/for-administrators-mifos-x-platform/administration) button on the top menu bar, then click on **Organization** from the drop down list. This will launch the [**Organization**](/mifosx/user-manual/for-administrators-mifos-x-platform/administration/organization) menu.

Select **Manage Funds**.

![](/files/-LjH1SKyxXypgTKWF8T7)

### **Add Funds**

This section provides an option for adding funds that will be used for lending. Any fund that requires tracking can be set up under a fund name. Add funds by following these steps:&#x20;

1. Type the name of the new fund in the **New Fund** field.
2. Click the blue '**+**' sign to the right of the field to create a New Fund.

![](https://mifosforge.jira.com/wiki/download/attachments/67141736/53.PNG?version=1\&modificationDate=1484337890136\&cacheVersion=1\&api=v2)

*Note: This fund is not interlinked with the* [*Accounting*](/mifosx/user-manual/for-administrators-mifos-x-platform/accounting) *section.*&#x20;

### **View Funds**

Once you have selected **Manage Funds,** a chart of all currently tracked funds will be displayed. Additionally, a blank field will be displayed on top of the page that allows you to create new funds *(see the **Add Funds** section of this page to learn more)*.&#x20;

![](https://mifosforge.jira.com/wiki/download/attachments/67141736/52.PNG?version=1\&modificationDate=1484337937961\&cacheVersion=1\&api=v2)

### **Edit Funds**

Click on **Edit** button ![](https://mifosforge.jira.com/wiki/download/thumbnails/67141736/edit.PNG?version=1\&modificationDate=1553977246406\&cacheVersion=1\&api=v2\&width=36) to modify the **Fund Name.**

![](https://mifosforge.jira.com/wiki/download/thumbnails/67141736/17.png?version=1\&modificationDate=1442207816928\&cacheVersion=1\&api=v2\&width=349)

This will allow you to edit the Fund Name. Click on the **Save** button to save changes.&#x20;

![](https://mifosforge.jira.com/wiki/download/attachments/67141736/edit_fund.PNG?version=1\&modificationDate=1553977339079\&cacheVersion=1\&api=v2)

For more details on this process and the way funds are distributed, please see the [**Products**](/mifosx/user-manual/for-administrators-mifos-x-platform/administration/products) section of this manual.

Related articles

* Page:[Manage Funds](/mifosx/user-manual/for-administrators-mifos-x-platform/administration/organization/manage-funds)
* Page:[Bulk Loan Reassignment](/mifosx/user-manual/for-administrators-mifos-x-platform/administration/organization/bulk-loan-reassignment)
* Page:[Manage Employees](/mifosx/user-manual/for-administrators-mifos-x-platform/administration/organization/manage-employees)
* Page:[Manage Reports](/mifosx/user-manual/for-administrators-mifos-x-platform/administration/system/manage-reports)
* Page:[Manage Holidays](/mifosx/user-manual/for-administrators-mifos-x-platform/administration/organization/manage-holidays)


# Manage Employees

**Employees** are people within your organization who do not have access to the Mifos X system. They are used to distinguish between the various types of staff as well as their roles and permissions (for instance: it designates loan officers and provides the ability to assign a loan officer to a group or center). With this option, you may view, edit and/or delete your organization's employees. To configure system users, their roles and permissions, see [Users](/mifosx/user-manual/for-administrators-mifos-x-platform/administration/users).

From the main screen, click on the [**Admin**](/mifosx/user-manual/for-administrators-mifos-x-platform/administration) button on the top menu bar and click on **Organization** from the drop down list. This will launch the [**Organization**](/mifosx/user-manual/for-administrators-mifos-x-platform/administration/organization) menu.

Select **Manage Employees**

![](https://mifosforge.jira.com/wiki/download/attachments/67141732/manageemployee.png?version=1\&modificationDate=1552928019378\&cacheVersion=1\&api=v2)

A list of all employees will be displayed:

![](https://mifosforge.jira.com/wiki/download/attachments/67141732/employees_list.PNG?version=1\&modificationDate=1553978415258\&cacheVersion=1\&api=v2)

### **Add Employees**

Click the ![](https://mifosforge.jira.com/wiki/download/thumbnails/67141732/createEmployeeButton.png?version=1\&modificationDate=1552739669290\&cacheVersion=1\&api=v2\&width=120) button at the top-right of the page to create a new employee.

![](https://mifosforge.jira.com/wiki/download/attachments/67141732/createemployee.png?version=2\&modificationDate=1552739796738\&cacheVersion=1\&api=v2)

1. Fill the following **mandatory** fields (*denoted by a red asterisk "\*"*):
   * Select the appropriate office from the **Office** drop-down menu.
   * Enter the employee's **First name.**
   * Enter the employee's **Last name**.
   * Provide the **Joining Date** of the employee.<br>
2. Furthermore, fill the following **optional** fields:<br>
   * &#x20;Designate the employee as a loan officer (if required) by checking the "**Is loan officer?**" checkbox.
   * Add a **Mobile Number for SMS** to allow messages via text.

Click on **Submit** once you are done.

### **Import Employee**

You can also import employee details from your local device. Click the ![](https://mifosforge.jira.com/wiki/download/thumbnails/67141732/importEmployeesButton.png?version=1\&modificationDate=1552895754837\&cacheVersion=1\&api=v2\&width=120) button at the top-right of the page (*next to the blue Create Employee button*) on the **Manage Employees** page.

This page has three sections (*as shown below*):

* Employee Template
* Import Employees
* Documents

![](https://mifosforge.jira.com/wiki/download/attachments/67141732/import_employees.PNG?version=1\&modificationDate=1553978991489\&cacheVersion=1\&api=v2)

If you want to use an already existing template, go to the **Employee Template** section.

![](https://mifosforge.jira.com/wiki/download/attachments/67141732/searchAndDownloadTemplate.png?version=1\&modificationDate=1552896092452\&cacheVersion=1\&api=v2)

Select an office template in the **Select Office** drop-down menu. Click the **Download** button to the right of the search field. This will download a spreadsheet file in which you can add employee details. For example: let's assume we selected the **Main Head Office** template and the downloaded spreadsheet includes the following fields:&#x20;

* Office Name
* First Name
* Last Name
* Loan Officer
* Mobile Number
* Joining date
* External Id
* Status

![](https://mifosforge.jira.com/wiki/download/attachments/67141732/employeeTemplate.png?version=1\&modificationDate=1552896512189\&cacheVersion=1\&api=v2)

Once you have filled the details in the spreadsheet, save it and then import the file into Mifos X in the **Import Employees** section of the page.

![](https://mifosforge.jira.com/wiki/download/attachments/67141732/chooseAndUploadTemplate.png?version=1\&modificationDate=1552897804327\&cacheVersion=1\&api=v2)

Click the grey **Choose File** button, navigate to where you saved your file, select it and then click the blue **Upload** button to import your employee details.

![](https://mifosforge.jira.com/wiki/download/attachments/67141732/viewUploadedTemplate.png?version=1\&modificationDate=1552897990042\&cacheVersion=1\&api=v2)

In the **Documents** section at the bottom of the page, click the **Refresh** button to confirm that the file has been uploaded and can be used in Mifos X.

### **View Employees**

Once you have selected **Manage Employees,** a chart of all employees will be displayed with the following information:

* The employee's **Name**
* Whether the employee **Is a Loan Officer** or not
* The employee's **Office**
* The employee's **Status**; whether active![](https://mifosforge.jira.com/wiki/download/attachments/67141732/active.png?version=1\&modificationDate=1552740447560\&cacheVersion=1\&api=v2) or inactive ![](https://mifosforge.jira.com/wiki/download/attachments/67141732/inactive.png?version=1\&modificationDate=1552740473516\&cacheVersion=1\&api=v2)

![](https://mifosforge.jira.com/wiki/download/attachments/67141732/employeeChart.png?version=1\&modificationDate=1552740278548\&cacheVersion=1\&api=v2)

**Tip:** *Use the **Filter by Name** field to quickly locate the employee you are searching for. Begin typing the employee's name and Mifos X will automatically filter the results.*

Clicking on an employee's name on the chart will open that employee's **Profile**:

![](https://mifosforge.jira.com/wiki/download/attachments/67141732/employeeProfile.png?version=1\&modificationDate=1552740679411\&cacheVersion=1\&api=v2)

### **Edit Employee**

Click the blue **Edit** button at the top-right of the employee's profile to edit the employee's information. This will launch a new page where you may change the employee's information:

![](https://mifosforge.jira.com/wiki/download/attachments/67141732/editemployee.png?version=2\&modificationDate=1552740755739\&cacheVersion=1\&api=v2)

Once the appropriate changes have been made, click **Submit**.

**Tip:** **An employee is not the same as a User (and is not interlinked with Users). Therefore, you may need to create users separately. Please see the** [**Users**](/mifosx/user-manual/for-administrators-mifos-x-platform/administration/users) **section of this manual to learn more. In short, All users are the employees. But all employees may not be the users.**&#x20;

Related articles

* Page:[Manage Funds](/mifosx/user-manual/for-administrators-mifos-x-platform/administration/organization/manage-funds)
* Page:[Bulk Loan Reassignment](/mifosx/user-manual/for-administrators-mifos-x-platform/administration/organization/bulk-loan-reassignment)
* Page:[Manage Employees](/mifosx/user-manual/for-administrators-mifos-x-platform/administration/organization/manage-employees)
* Page:[Manage Reports](/mifosx/user-manual/for-administrators-mifos-x-platform/administration/system/manage-reports)
* Page:[Manage Holidays](/mifosx/user-manual/for-administrators-mifos-x-platform/administration/organization/manage-holidays)


# Bulk Loan Reassignment

The Bulk Loan Reassignment tool is a very useful tool that allows you to transfer all of one loan officer's accounts to another loan officer. This tool is very useful in circumstances where a loan officer might be leaving the company or going on an extended leave.

### **Navigation**

From the Home [Page](/mifosx/user-manual/for-all-users/untitled/welcome-page), click on the [**Admin**](/mifosx/user-manual/for-administrators-mifos-x-platform/administration) button (*in the top menu bar*), then click on [**Organization**](/mifosx/user-manual/for-administrators-mifos-x-platform/administration/organization) from the drop down list that appears.

![](https://mifosforge.jira.com/wiki/download/thumbnails/67141738/admin_organization.png?version=1\&modificationDate=1557077445060\&cacheVersion=1\&api=v2\&height=250)

This will launch the[ **Organization**](/mifosx/user-manual/for-administrators-mifos-x-platform/administration/organization) menu (*as shown in the screenshot below*).

Select **Bulk Loan Reassignment**.

![](https://mifosforge.jira.com/wiki/download/attachments/67141738/bulkloanreassignement.png?version=1\&modificationDate=1552928141920\&cacheVersion=1\&api=v2)

This will display a page that allows you to transfer all accounts from one loan officer to another. The following page will be displayed:

![](https://mifosforge.jira.com/wiki/download/thumbnails/67141738/bulkLoanPage.png?version=1\&modificationDate=1552898887734\&cacheVersion=1\&api=v2\&height=250)

### **Transfer Loans**

Follow the steps below to transfer all loans assigned to a loan officer to a different loan officer. Please note that all are mandatory fields and loans can be reassigned to the loan officers from same office or different office.&#x20;

1. Select an **Office** from the drop-down list.
2. Select an **Assignment Date** by clicking on its respective field. This will launch a calendar from which you may select a date for the reassignment to take place.
3. Select the new loan officer from the **To Loan Officer** drop-down list.
4. Click on **Submit*****.***

Related articles

* Page:[Manage Funds](/mifosx/user-manual/for-administrators-mifos-x-platform/administration/organization/manage-funds)
* Page:[How to Prepay a Loan Account](/mifosx/user-manual/for-operational-users-mifos-x-web-app/accounts-and-transactions/loan-accounts/how-to-prepay-a-loan-account)
* Page:[Using collection sheet or other payment types for making payments](/mifosx/user-manual/for-operational-users-mifos-x-web-app/accounts-and-transactions/loan-accounts/using-collection-sheet-or-other-payment-types-for-making-payments)
* Page:[How to Assign a Loan Officer](/mifosx/user-manual/for-operational-users-mifos-x-web-app/accounts-and-transactions/loan-accounts/how-to-assign-a-loan-officer)
* Page:[How to Add a Charge to a Loan Account](/mifosx/user-manual/for-operational-users-mifos-x-web-app/accounts-and-transactions/deposit-accounts/mifos-x-saving-accounts/how-to-add-a-charge-to-a-saving-account)


# Standing Instructions History

Standing Instructions can be set up to transfer funds from a saving account to another account. &#x20;

In order to see the logged history of standing instructions, Select **Admin** from the Home Page and choose **Organization.**

Select **Standing Instruction History**

![](https://mifosforge.jira.com/wiki/download/attachments/82706559/standinginstruction.png?version=1\&modificationDate=1552928225044\&cacheVersion=1\&api=v2)

&#x20; On this page, the following fields are included;

1. Client Name
2. Client Id
3. Transfer Type (Account Transfer or Loan Repayment)
4. Account Type (Savings Account  or Loan Account)
5. From Date
6. To Date

![](https://mifosforge.jira.com/wiki/download/attachments/82706559/instructionFields.png?version=1\&modificationDate=1552899618052\&cacheVersion=1\&api=v2)

Fill in the fields and then click the ![](https://mifosforge.jira.com/wiki/download/attachments/82706559/searchIcon.png?version=1\&modificationDate=1552899747225\&cacheVersion=1\&api=v2) button. This will display a list of all clients in regards to the information you selected.


# Teller / Cashier Management

Mifos X allows an organization to set up cash drawers for proper cash management and reconciliation.

From the main screen, click on [**Admin**](/mifosx/user-manual/for-administrators-mifos-x-platform/administration) then **Organization** from the drop down list. This will launch the [**Organization**](/mifosx/user-manual/for-administrators-mifos-x-platform/administration/organization) menu.

Select **Teller/Cashier Management**

![](https://mifosforge.jira.com/wiki/download/attachments/86114424/tellercashierManage.png?version=1\&modificationDate=1552928308023\&cacheVersion=1\&api=v2)

**TIP:** Before setting up tellers, check the Financial Activity Mappings located under [**Accounting**](/mifosx/user-manual/for-administrators-mifos-x-platform/accounting) and then map the main cash account to the bank account as well as map the cash at tellers GL to the change fund GL.

### **Add Financial Activity Mapping**

![](https://mifosforge.jira.com/wiki/download/attachments/86114424/accountingTab.png?version=1\&modificationDate=1552900869066\&cacheVersion=1\&api=v2)

Select **Accounting** from the main tab and then select **Accounts Linked to Financial Activities**

![](https://mifosforge.jira.com/wiki/download/attachments/86114424/linkedAccounts.png?version=1\&modificationDate=1552901107041\&cacheVersion=1\&api=v2)

This opens a page that displays the financial Activity of an account and the Account name.

![](https://mifosforge.jira.com/wiki/download/attachments/86114424/defineNewMapping.png?version=1\&modificationDate=1552901552260\&cacheVersion=1\&api=v2)

Click on the blue **Define New Mapping** button at the top-right to add a financial activity mapping.

![](https://mifosforge.jira.com/wiki/download/attachments/86114424/addMapping.png?version=1\&modificationDate=1552901763217\&cacheVersion=1\&api=v2)

For Financial activity, select **Cash at Tellers/Cashiers** from the Asset Transfer drop-down list. Also select the Account whose financial activity you want to map.

Click the **Submit** button.

### **Add Teller**

See the [**first**](http://mifosforge.jira.com/wiki/pages/resumedraft.action?draftId=86114424) section to navigate to to the **Teller/Cashier Management** page.

![](https://mifosforge.jira.com/wiki/download/attachments/86114424/tellers.png?version=1\&modificationDate=1552903236766\&cacheVersion=1\&api=v2)

A list of current tellers is displayed with their branch, status and start date. To add a teller, click on the blue **+New Teller** button at the top-right.&#x20;

![](https://mifosforge.jira.com/wiki/download/attachments/86114424/createTeller.png?version=1\&modificationDate=1552903386977\&cacheVersion=1\&api=v2)

Provide Teller details with dates and also ensure to select status as "Active" in-case you want to enable that. Otherwise you could disable it by selecting "In-active".

Click the **Submit** button.

### **Add a new Cashier for Teller**

On Tellers page, select a Teller. This will display an empty list if the teller was not assigned a cashier.

![](https://mifosforge.jira.com/wiki/download/attachments/86114424/selectTeller.png?version=1\&modificationDate=1552903929531\&cacheVersion=1\&api=v2)

Click on the **+ New Cashier For Teller** button on the top-right.&#x20;

![](https://mifosforge.jira.com/wiki/download/attachments/86114424/newCashierforTeller.png?version=1\&modificationDate=1552904103463\&cacheVersion=1\&api=v2)

Select the Cashier or Staff member you want to assign to that teller. This cashier should have been defined in the [**Manage Employees**](/mifosx/user-manual/for-administrators-mifos-x-platform/administration/organization/manage-employees) section.

Provide the dates within which the cashier is assigned to the teller.

Click on **Submit** button.&#x20;

### **Edit Cashier**

Select the ![](https://mifosforge.jira.com/wiki/download/thumbnails/86114424/viewCashierIcon.png?version=1\&modificationDate=1552913597969\&cacheVersion=1\&api=v2\&width=30) button on the Cashier page. This will display the details of the Cashier.

![](https://mifosforge.jira.com/wiki/download/attachments/86114424/editCashier.png?version=1\&modificationDate=1552913713419\&cacheVersion=1\&api=v2)

Select the **Edit** Button at the top-right which will display a page that will permit you to edit.

![](https://mifosforge.jira.com/wiki/download/attachments/86114424/editCashierPage.png?version=1\&modificationDate=1552914003990\&cacheVersion=1\&api=v2)

After editing, click the **Submit** button.

### **View Teller transactions**

&#x20;On Tellers page, select a Teller. This will display details of the teller such as the cashiers who worked on that teller and the period they worked.

![](https://mifosforge.jira.com/wiki/download/attachments/86114424/tellerDetails.png?version=1\&modificationDate=1552910942325\&cacheVersion=1\&api=v2)

Click the first blue button to be able to view the transactions of that cashier.

![](https://mifosforge.jira.com/wiki/download/attachments/86114424/cashierExample.png?version=1\&modificationDate=1552910619992\&cacheVersion=1\&api=v2)

This will display the details of transactions that occurred under that cashier.

### **Allocating Cash**

Select the ![](https://mifosforge.jira.com/wiki/download/thumbnails/86114424/allocateCashIcon.png?version=1\&modificationDate=1552911961769\&cacheVersion=1\&api=v2\&width=100) button from the **Cashiers** page and this will display the Allocate Cash page.&#x20;

![](https://mifosforge.jira.com/wiki/download/attachments/86114424/allocatingCash.png?version=1\&modificationDate=1552911843035\&cacheVersion=1\&api=v2)

Select date and currency, and provide amount value and notes.

Click the **Allocate Cash** button to submit.

### **Settling Cash**

Select the ![](https://mifosforge.jira.com/wiki/download/thumbnails/86114424/settleCashIcon.png?version=1\&modificationDate=1552912496217\&cacheVersion=1\&api=v2\&width=100) button from the **Cashiers** page which will display the Settle Cash Page.

![](https://mifosforge.jira.com/wiki/download/attachments/86114424/settleCashPage.png?version=1\&modificationDate=1552912409010\&cacheVersion=1\&api=v2)

Select the date and currency, and provide the amount and notes on the Settle Cash page.

Click the **Settle Cash** button


# Fund Mapping

\
The **Fund Mapping** page enables you to map the sources of funds to loans in bulk.

Beginning at the main screen, select **Admin,** then **Organization** from the drop down menu. This will launch the **Organization** menu.

Select **Fund Mapping** to set the preferences.&#x20;

![](https://mifosforge.jira.com/wiki/download/attachments/90243210/fundMapping.png?version=1\&modificationDate=1552929757329\&cacheVersion=1\&api=v2)

This will launch an **Advance search** page.          &#x20;

![](https://mifosforge.jira.com/wiki/download/attachments/90243210/adhocQueary.png?version=1\&modificationDate=1552930084269\&cacheVersion=1\&api=v2)

Using Adhoc query search, one can search for loans with different aspects. You can search by;

* Loan Status
* Product
* Office
* Approval/Creation/Disbursement - Date
* Loan outstanding percentage
* Loan outstanding amount

### **Searching by Loan Status**

![](https://mifosforge.jira.com/wiki/download/attachments/90243210/fundbyLoanStatus.png?version=1\&modificationDate=1552987748540\&cacheVersion=1\&api=v2)

The options include;

* All - Searches loan with all status.&#x20;
* Active - Searches only loan with Active status.
* Overpaid - Searches only loan with Overpaid status.
* Closed (obligations met) - Searches loan Closed (obligations met).
* Closed (written-off) - Searches loan Closed (written-off).

### **Searching by Product**

This is a filtered search based on Products. That is clicking on a particular product or by holding the control button and selecting two or more products and then search. &#x20;
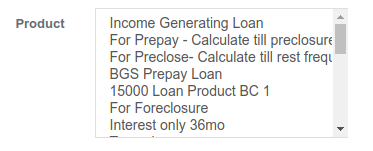
<div align="left"><img src="https://mifosforge.jira.com/wiki/download/attachments/90243210/searchByproduct.png?version=1&#x26;modificationDate=1553065658619&#x26;cacheVersion=1&#x26;api=v2" alt=""></div>

### **Searching by Office**

This is a filter search based on the Office.&#x20;

<div align="left"><img src="https://mifosforge.jira.com/wiki/download/attachments/90243210/searchbyOffice.png?version=1&#x26;modificationDate=1553067124230&#x26;cacheVersion=1&#x26;api=v2" alt=""></div>

You can click on a particular office or many by holding the control button and selecting the offices.

### **Searching by Approval/Creation/Disbursement-Date**

This is a filter search based on the type of date. This can be Approval date, Creation date, and Disbursement date.

![](https://mifosforge.jira.com/wiki/download/thumbnails/90243210/6.png?version=1\&modificationDate=1431328757204\&cacheVersion=1\&api=v2\&width=600)

You can be provided a range of dates within which you want your results to be based.

### **Searching by Loan Outstanding Percentage**

By default, it will have the check box checked for Loan outstanding percentage. If you don't want to use this filter,  un-check the box and then search. &#x20;

By default, it will be a between search. However, you may select another option from the drop-down and then select the range of dates.&#x20;

![](https://mifosforge.jira.com/wiki/download/thumbnails/90243210/8.png?version=2\&modificationDate=1431334035807\&cacheVersion=1\&api=v2\&width=779)

### **Searching by Loan Outstanding Amount**

By default, this section will have the check box checked for Loan outstanding amount. If you don't want to use this filter, un-check the box and then search. &#x20;

By default, it will be a between search. However, you may select another option from the drop-down and then select the range of dates.&#x20;

![](https://mifosforge.jira.com/wiki/download/thumbnails/90243210/9.png?version=2\&modificationDate=1431334183145\&cacheVersion=1\&api=v2\&width=849)

Click the ![](https://mifosforge.jira.com/wiki/download/attachments/90243210/10.png?version=1\&modificationDate=1431329293972\&cacheVersion=1\&api=v2) button to execute your filtered search. &#x20;

Related articles

* Page:[Entity To Entity Mapping](/mifosx/user-manual/for-administrators-mifos-x-platform/administration/system/entity-to-entity-mapping)
* Page:[Fund Mapping](/mifosx/user-manual/for-administrators-mifos-x-platform/administration/organization/fund-mapping)


# Working Days

Working days page allows you to define which days of the week are working days.

Working days page allows you to define which days of the week are working days.

![](https://mifosforge.jira.com/wiki/download/attachments/90243212/workingDays.png?version=2\&modificationDate=1552928494523\&cacheVersion=1\&api=v2)

This will launch the Working Days page with days pre-selected.

![](https://mifosforge.jira.com/wiki/download/attachments/90243212/workingDaysPage.png?version=1\&modificationDate=1552925211124\&cacheVersion=1\&api=v2)

You now are able to do the following;

1. You can un-check the working days that do not apply in your organization and check those that do by clicking on the box besides the day of the week. Checking the box means the day is a working day while un-checking means the day is a non-working day.
2. Select the day in which payments due on non-working days will apply by clicking the drop-down menu.

![](https://mifosforge.jira.com/wiki/download/attachments/90243212/paymentDue.png?version=1\&modificationDate=1552926019856\&cacheVersion=1\&api=v2)

&#x20; The existing options are:&#x20;

* &#x20;"Same day":- For example: If Sunday is a Non-working day, the payments falling on Sunday will be on Sunday (on the same day).
* &#x20;"Move to next working day":- For example: If Sunday is a Non-working day, the payments falling on Sunday will be moved to Monday which is the next working day.
* &#x20;"Move to next repayment meeting day":- For example: If Sunday is a Non-working day, the payments falling on Sunday will be moved to next Friday which is a next repayment meeting day.
* &#x20;"Move to previous working day":- For example: Sunday is a Non-working day so the payments falling on Sunday will be moved to Saturday which is the previous working day.

&#x20;     3\. Decide whether to extend the term for loans following a daily repayment schedule by leaving the box checked or not extended by un-checking the box

When complete, click the **Submit** button.

### Related articles <a href="#workingdays-relatedarticles" id="workingdays-relatedarticles"></a>

* Page:[Working Days](/mifosx/user-manual/for-administrators-mifos-x-platform/administration/organization/working-days)


# Password preferences

This enables us to set password preferences by just selecting one of the available two preferences. Once the preference is set depending upon the set preference, it allows us to create password as per the mentioned conditions. The two preferences are: one is simple but weak and the other is a second preference which is strong.

Beginning at the main screen, select **Admin,** then **Organization** from the drop down menu. This will launch the [**Organization**](/mifosx/user-manual/for-administrators-mifos-x-platform/administration/organization) menu.

Select **Password Preferences** to set the preferences.

![](https://mifosforge.jira.com/wiki/download/attachments/90243214/passwordPreferences.png?version=1\&modificationDate=1553068923461\&cacheVersion=1\&api=v2)

This will launch the **Password Preferences** page:

![](https://mifosforge.jira.com/wiki/download/attachments/90243214/passwordPreferencesPage.png?version=1\&modificationDate=1553069279474\&cacheVersion=1\&api=v2)

### **Setting Up the Password Preferences**

On this page, there are two preferences;

1\. Password must be at least 1 character and not more than 50 characters long. This means that the provided password should satisfy these conditions;

* Must have a **minimum** of 1 character
* If you decide to use more than one character, then the password must not contain more than 50 characters
* The characters can be of any kind (letters, numbers and symbols) but **Not** the '**&**' symbol.

2\. Password must be at least 6 characters, no more than 50 characters long, must include at least one upper case, one lower case letter, one numeric digit & no space. This means that the provided password must satisfy these conditions;

* Must have a **minimum** of 6 characters
* If you decide to use more than 6 characters, then the password must not contain more than 50 characters
* Must include at least one upper case letter.
* Must include at least one lower case letter.
* Must include at least one numeric digit (number).
* Must not have space. There must not be any space between the characters.
* The characters can be of any kind (letters, numbers and symbols) but **Not** the '**&**' symbol.

Select your preference and then click the **Submit** button.&#x20;

### Related articles

* Page:[Account Number Preferences](/mifosx/user-manual/for-administrators-mifos-x-platform/administration/system/account-number-preferences)
* Page:[Password preferences](/mifosx/user-manual/for-administrators-mifos-x-platform/administration/organization/password-preferences)


# Payment type

For all kinds of payments, you can specify what forms of payment you will accept.

Beginning at the main screen, select **Admin,** then **Organization** from the drop down menu. This will launch the [**Organization**](/mifosx/user-manual/for-administrators-mifos-x-platform/administration/organization) menu.

Select **Payment type** to specify types of payment you will accept.

![](https://mifosforge.jira.com/wiki/download/attachments/90243216/paymentType.png?version=1\&modificationDate=1553071905531\&cacheVersion=1\&api=v2)

This will launch the **Payment Type** page that displays a list of types of payments, their description, position and whether the payment is a cash payment or not.

![](https://mifosforge.jira.com/wiki/download/attachments/90243216/paymentTypePage.png?version=1\&modificationDate=1553072069193\&cacheVersion=1\&api=v2)

### **Adding a Payment Type**

Click the ![](https://mifosforge.jira.com/wiki/download/attachments/90243216/addPaymentIcon.png?version=1\&modificationDate=1553072564907\&cacheVersion=1\&api=v2) button at the top-right of the page. This will launch the **Create Payment Type** page:

![](https://mifosforge.jira.com/wiki/download/attachments/90243216/createPaymentType.png?version=1\&modificationDate=1553072674961\&cacheVersion=1\&api=v2)

To create a payment type, follow these steps:&#x20;

1. **Payment type** - Fill in an appropriate name of your choice. In the example below, Payment type is Mobile Money.
2. **Description** - Input the description of the mentioned payment type.&#x20;
3. **Is Cash payment?**- Check the check box if the payment type is a Cash payment. In the example below, the box is left un-checked since the payment is not in cash.&#x20;
4. **Position** - Provide the position number to list in the provided drop down menu.&#x20;
5. Check your input and if complete, click the **Submit** button.

![](https://mifosforge.jira.com/wiki/download/attachments/90243216/createPaymentTypeExample.png?version=1\&modificationDate=1553073086890\&cacheVersion=1\&api=v2)

### **Edit Payment Type**

Click the **Edit** button at the right of the payment type you want to modify.

![](https://mifosforge.jira.com/wiki/download/attachments/90243216/editPaymentType.png?version=1\&modificationDate=1553073531880\&cacheVersion=1\&api=v2)

This will launch the Edit Payment type page in which you can modify the details of the type of payment.

![](https://mifosforge.jira.com/wiki/download/attachments/90243216/editPaymentTypePage.png?version=1\&modificationDate=1553074053330\&cacheVersion=1\&api=v2)

When you are done modifying the payment type, click the **Submit** button.

### **Delete Payment Type**

To delete a payment type, Click the ![](https://mifosforge.jira.com/wiki/download/attachments/90243216/deleteIcon.png?version=1\&modificationDate=1553074223207\&cacheVersion=1\&api=v2) button at the extreme right of the payment type.

![](https://mifosforge.jira.com/wiki/download/attachments/90243216/deletePaymentType.png?version=1\&modificationDate=1553074332397\&cacheVersion=1\&api=v2)

**Related Articles**

* Page:[Payment type](/mifosx/user-manual/for-administrators-mifos-x-platform/administration/organization/payment-type)


# Loan Provisioning Criteria

A Loan provisioning is an expense that is reserved for default/bad performing loans/credits. It is an amount that is set aside as an allowance for bad loans or credits.

Loan loss provision is also known as the "**Valuation Allowance**" or "**Valuation Reserve**". It is also known as "**Allowance for Loan Loss**"                             &#x20;

In any group of loans, banks (used to refer to all financial institutions) expect that there can be some loans that do not perform as expected. These loans may be delinquent on their repayments or default the entire loan. This can create a loss to the bank on expected income. Therefore, banks can set aside a portion of the expected repayments from all loans in its portfolio to cover all or a portion of the loss. In the event of loss or in critical situations, banks can use that amount set aside to cover the loss instead of taking a loss in its cash flow. This loan loss reserve acts as an internal insurance fund.

From the main screen, click on [**Admin**](/mifosx/user-manual/for-administrators-mifos-x-platform/administration) then **Organization** from the drop down list.This will launch the [**Organization**](/mifosx/user-manual/for-administrators-mifos-x-platform/administration/organization) menu.&#x20;

Then Select **Create Provisioning Criteria.**&#x20;

![](https://mifosforge.jira.com/wiki/download/attachments/110690306/loanProvisioningCriteria.png?version=1\&modificationDate=1553075320831\&cacheVersion=1\&api=v2)

This will launch the Provisioning Criteria page that displays the name of the loan provision and who created it.

![](https://mifosforge.jira.com/wiki/download/attachments/110690306/provisioningCriteriaPage.png?version=1\&modificationDate=1553075541185\&cacheVersion=1\&api=v2)

### **Create Provisioning Criteria**

Click the ![](https://mifosforge.jira.com/wiki/download/attachments/110690306/5.png?version=1\&modificationDate=1451910563209\&cacheVersion=1\&api=v2) button at the top-right of the page. This will launch a new page as shown below:

![](https://mifosforge.jira.com/wiki/download/attachments/110690306/createProvisioningCriteria.png?version=1\&modificationDate=1553076051204\&cacheVersion=1\&api=v2)

Complete the fields provided:

1. Provisioning Criteria:- Choose an appropriate name for the Provisioning criteria.
2. Choose the products to which the provisioning criteria should apply. Simply select a product from the **All products** list and add it to the **Selected product** list by clicking the ![](https://mifosforge.jira.com/wiki/download/attachments/67141740/forward.png?version=1\&modificationDate=1552919317808\&cacheVersion=1\&api=v2) button. To select multiple products, select one and hold the Ctrl button on your device to select the other products.&#x20;

![](https://mifosforge.jira.com/wiki/download/attachments/110690306/fowardProducts.png?version=1\&modificationDate=1553084111172\&cacheVersion=1\&api=v2)

To remove a product from the selected list, simply select the product you want to remove and click the ![](https://mifosforge.jira.com/wiki/download/attachments/67141740/reverse.png?version=1\&modificationDate=1552919565391\&cacheVersion=1\&api=v2) button.

![](https://mifosforge.jira.com/wiki/download/attachments/110690306/reverseProduct.png?version=1\&modificationDate=1553084250278\&cacheVersion=1\&api=v2)

&#x20;    3\. For each of the categories in the next section, provide;

* **Min Age** - Provide minimum number of days, example: 1&#x20;
* **Max Age** - Provide maximum number of days, example: 30&#x20;
* **Percentage** - Provide percentage value.&#x20;
* **Liability Account** - Select respective liability account.&#x20;
* **Expense Account** - Select respective expense account.&#x20;

Check to confirm your input and then click the **Submit** button.

**Tip:- You could go to** [**Provisioning Entries** ](/mifosx/user-manual/for-administrators-mifos-x-platform/accounting/provisioning-entries)**for the creation of provisioning entries.**&#x20;

### Related articles

* Page:[Loan with term vary based on loan cycle](/mifosx/user-manual/for-operational-users-mifos-x-web-app/accounts-and-transactions/loan-accounts/loan-with-term-vary-based-on-loan-cycle)
* Page:[Tranche loan process](/mifosx/user-manual/for-administrators-mifos-x-platform/administration/products/loan-products/loan-product-fields/tranche-loan-fields)
* Page:[How to create new loan - Interest Recalculation](/mifosx/user-manual/for-operational-users-mifos-x-web-app/accounts-and-transactions/loan-accounts/how-to-create-new-loan-interest-recalculation)
* Page:[How to provide floating rates](/mifosx/user-manual/for-operational-users-mifos-x-web-app/accounts-and-transactions/loan-accounts/how-to-provide-floating-rates)
* Page:[How to reschedule loan](/mifosx/user-manual/for-operational-users-mifos-x-web-app/accounts-and-transactions/loan-accounts/how-to-reschedule-loan)


# SMS Campaigns

{% hint style="warning" %}
Setup Message Gateway Before creating SMS Campaigns

Create a Message-Gateway before creating SMS Campaigns by following this link: <https://mifosforge.jira.com/wiki/display/docs/Message+Gateway+Configuration>
{% endhint %}

### **Configuring Message Gateway in Platform**

**Step 1:** At the top the screen, navigate to **Admin** and select **System** from the drop-down.

Select **External Services**

![](https://mifosforge.jira.com/wiki/download/attachments/165871671/externalSErvices.png?version=1\&modificationDate=1553085853949\&cacheVersion=1\&api=v2)

**Step 2:** Next Click **External Services (SMS Service Configuration)**

![](https://mifosforge.jira.com/wiki/download/attachments/165871671/externalServicesSMSConfig.png?version=1\&modificationDate=1553085972349\&cacheVersion=1\&api=v2)

**Step 3:** Click  ![](https://mifosforge.jira.com/wiki/download/thumbnails/165871671/33.png?version=1\&modificationDate=1479209311435\&cacheVersion=1\&api=v2\&width=45) button at the top-right of the page

![](https://mifosforge.jira.com/wiki/download/attachments/165871671/viewExternalService.png?version=1\&modificationDate=1554409705030\&cacheVersion=1\&api=v2)

**Step 4:** Set the following parameters in **Edit External Service Configuration**

![](https://mifosforge.jira.com/wiki/download/attachments/165871671/viewExternalServiceConfig.png?version=1\&modificationDate=1554409730007\&cacheVersion=1\&api=v2)

{% hint style="info" %}
**host\_name:** Use the {**Message-gateway host name**}

**Port\_Number:** It should be **9191**

**end\_point:** Set end point as **message-gateway-0.0.1/**

**tenant\_app\_key:** {Paste the same tenant\_app\_key that is generated while configuring **Message-Gateway**}
{% endhint %}

**Step 5:** Click **Submit.**

### **How to Create SMS Campaigns**

**Step 1:** At the top the screen, navigate to **Admin** and select **Organization** from the drop-down menu.

Select **SMS Campaigns**

![](https://mifosforge.jira.com/wiki/download/attachments/165871671/smsCampaigns.png?version=1\&modificationDate=1553087082081\&cacheVersion=1\&api=v2)

**Step 2:** On the **SMS Campaigns** page, click on ![](https://mifosforge.jira.com/wiki/download/thumbnails/165871671/3.png?version=1\&modificationDate=1478190364254\&cacheVersion=1\&api=v2\&width=100) button to create a new SMS Campaign

![](https://mifosforge.jira.com/wiki/download/attachments/165871671/createCampaign.png?version=1\&modificationDate=1553094847335\&cacheVersion=1\&api=v2)

**Step 3:** Here you find a three step process from **Campaign** to **Message** to **Preview**. At the campaign stage, fill out these details;

![](https://mifosforge.jira.com/wiki/download/attachments/165871671/firstStep.png?version=1\&modificationDate=1553095156901\&cacheVersion=1\&api=v2)

Define the "**Message Details**" for the SMS Campaign.

* **Campaign Name:** Provide a name for the SMS Campaign.
* **Is Notification:** By default, the campaign is not a notification and therefore you are required to provide the SMS Provider. If the campaign is of notification kind, please check the check box. This will disable the SMS provider section and you may then proceed to the trigger type.

When it **Is** **Not** a Notification;

![](https://mifosforge.jira.com/wiki/download/attachments/165871671/notNotification.png?version=1\&modificationDate=1553175824762\&cacheVersion=1\&api=v2)

* **SMS Provider:** Select the appropriate SMS provider from the drop down menu.

When it **Is** a Notification;

![](https://mifosforge.jira.com/wiki/download/attachments/165871671/isNotification.png?version=1\&modificationDate=1553175807081\&cacheVersion=1\&api=v2)

No need for SMS provider

* **Trigger Type:** You can set "Trigger type" as either 'Direct', 'Scheduled', or  'Triggered'. Choose one from the drop down menu.

{% hint style="danger" %}

* Choose **Direct** when you want to send the SMS only once.
* Choose **Scheduled** if you want to send multiple SMS for a particular 'date' and 'Time'.
* Choose **Triggered** when you want to send 'transactional' SMS (For Example: Loan Repayment, Savings Deposit, Savings Withdrawal, etc. Currently 9 types of transactional campaigns are supported)
  {% endhint %}

If you select Direct or Triggered, you may then proceed to the Business Rule part of the page. However, if you select Scheduled, then you will be required to provide additional information like **Schedule Date** and **Schedule Time**;

![](https://mifosforge.jira.com/wiki/download/attachments/165871671/scheduled.png?version=1\&modificationDate=1553177128023\&cacheVersion=1\&api=v2)

* **Scheduled Date:** Choose the date you want the campaign to take place or start (in the event that the campaign will not be for a day)
* **Scheduled Time:** Choose the time you want the campaign to run. Also select when you want the campaign to be repeated and the interval of repetition.
* **Business Rule:** Select the appropriate business rule from the drop down menu. Depending on the option you choose, a new set of sections will be displayed under the **Business Rule Parameters** section at the end of the page. As an example, we select Loan Payment Due as Business Rule and the Business Rule Parameters are Office, From X Number and To Y Number.

![](https://mifosforge.jira.com/wiki/download/attachments/165871671/loanPaymentsDueSection.png?version=1\&modificationDate=1554400109255\&cacheVersion=1\&api=v2)

Depending on your Business Rule selection, fill in the required fields.

* Check to confirm your inputs and then Click ![](https://mifosforge.jira.com/wiki/download/thumbnails/165871671/6.png?version=1\&modificationDate=1478190362934\&cacheVersion=1\&api=v2\&width=60)

**Step 4:** Next is the **Campaign Message** Section.&#x20;

![](https://mifosforge.jira.com/wiki/download/attachments/165871671/messageSection.png?version=1\&modificationDate=1554400728095\&cacheVersion=1\&api=v2)

{% hint style="danger" %}
The Available Template Parameters vary according to the Business Rule you selected in the previous section.
{% endhint %}

Choose those which apply to the campaign message you wish to broadcast. These available templates act as placeholders for the various options. For example, if you want to capture the first name of the client in the message, select firstName and it will be added into the Campaign Message textbox.

![](https://mifosforge.jira.com/wiki/download/attachments/165871671/firstNamePlaceHolder.png?version=1\&modificationDate=1554401277642\&cacheVersion=1\&api=v2)

* After composing your message and adding the placeholders provided, click ![](https://mifosforge.jira.com/wiki/download/attachments/165871671/6.png?version=1\&modificationDate=1478190362934\&cacheVersion=1\&api=v2).

**Step 5: Preview** avails you the opportunity to check the information you have provided. Click the![](https://mifosforge.jira.com/wiki/download/attachments/165871671/6.png?version=1\&modificationDate=1478190362934\&cacheVersion=1\&api=v2) button to finish.

![](https://mifosforge.jira.com/wiki/download/attachments/165871671/preview.png?version=1\&modificationDate=1554401814901\&cacheVersion=1\&api=v2)

After which, you can then choose to activate the campaign or edit.

![](https://mifosforge.jira.com/wiki/download/attachments/165871671/viewSmsCampaign.png?version=1\&modificationDate=1554402051962\&cacheVersion=1\&api=v2)

### **How to Activate an SMS Campaign**

From the general list of SMS Campaign, select the Campaign you want to make active. This should launch the details of the campaign like the screenshot below:

![](https://mifosforge.jira.com/wiki/download/attachments/165871671/activate.png?version=1\&modificationDate=1554403101256\&cacheVersion=1\&api=v2)

Click the Activate button which will launch a pop-up dialog box in which you should provide the current date.

![](https://mifosforge.jira.com/wiki/download/attachments/165871671/activatePopup.png?version=1\&modificationDate=1554403236930\&cacheVersion=1\&api=v2)

{% hint style="danger" %}
If you want the campaign to begin on another day, you have to wait till that day arrives and then you provide that date in the Activate date field.

Also you may not be able to edit the details of the campaign once you Confirm. Ensure that the provided details are according to your preference.
{% endhint %}

After choosing the date, click the **Confirm** button.

Your SMS Campaign has successfully been created and marked active in the general SMS Campaign page.

![](https://mifosforge.jira.com/wiki/download/attachments/165871671/markedActive.png?version=1\&modificationDate=1554403931940\&cacheVersion=1\&api=v2)

&#x20;From the SMS campaign window, you can see the SMS campaign names that are at the **active,closed** and **pending** stages.

### **How to check the status of the SMS**

To check the status of your campaign, select the campaign from the general SMS Campaign page. At the top of the campaign details, there are tabs with the different campaign statuses. Select the status you want to view.

![](https://mifosforge.jira.com/wiki/download/attachments/165871671/statusTabs.png?version=1\&modificationDate=1554404264369\&cacheVersion=1\&api=v2)

In each case, set "**From Date**" and "**To Date**" parameters. This will provide a list of SMS if applicable.

{% hint style="info" %}
To send pending SMS, please run the scheduler job "**Send Messages to SMS Gateway**". This can be achieved by navigating to **Admin**>>**System**>>**Scheduler Jobs.**
{% endhint %}


# Message Gateway Configuration

{% hint style="info" %}

Software Prerequisites

&#x20; **Note:- The softwares mentioned below are MANDATORY prerequisites. Note that only the versions mentioned below are required.**

* **Java Development Kit** (version 1.8.0\_65 & above)
* **MySQL Server** (version 5.5 or 5.6)<br>
* **Apache Tomcat** (version 7.0.64.0)
  {% endhint %}

### **How to Setup the Code Base** <a href="#messagegatewayconfiguration-howtosetupthecodebase" id="messagegatewayconfiguration-howtosetupthecodebase"></a>

**Step 1:** Clone the **message-gateway** source code into your local machine from GitHub.

**On Windows**

```
$ git clone https://github.com/openMF/message-gateway.git
```

**On Ubuntu:**

```
$ sudo git clone https://github.com/openMF/message-gateway.git
```

**Step 2:** Open the source code directory on your local machine. Now, open Git Bash in this folder (through the right-click context menu).

**On Windows:**

![](https://mifosforge.jira.com/wiki/download/thumbnails/166658049/git1.png?version=1\&modificationDate=1478515703096\&cacheVersion=1\&api=v2\&width=850)

**On Ubuntu:**

Simple change your current directory to the **message-gateway** directory by entering the following command:

```

$ cd message-gateway

```

### **How to Build the Code Base**

**Step 1:** Next, we need to generate the **.war** file. This can be achieved by using the commands mentioned below:

**On Windows:**

```
$ gradlew clean build -Pprofile=deployable
```

**On Ubuntu:**

```
~/message-gateway$ sudo chmod 777 gradlew

~/message-gateway$ sudo ./gradlew clean build -Pprofile=deployable
```

**Step 2:** Create a database with the name \`**messagegateway**\`.

**Step 3:** Open the **message-gateway** source directory and navigate to **build** >> **libs.** Copy the **message-gateway-0.0.1.war** file.

**On Windows:**

![](https://mifosforge.jira.com/wiki/download/thumbnails/166658049/screen2.png?version=1\&modificationDate=1478515702851\&cacheVersion=1\&api=v2\&width=850)

**On Ubuntu:**

```
~/message-gateway$ cd build

~/message-gateway/build$ cd libs
```

**Step 4:** Navigate to **Tomcat** >> **webapps** and paste the **message-gateway-0.0.1.war** file into this directory.

**On Windows:**

![](https://mifosforge.jira.com/wiki/download/thumbnails/166658049/tomcat3.png?version=1\&modificationDate=1478515702514\&cacheVersion=1\&api=v2\&width=850)

**On Ubuntu:**

```
~/message-gateway/build/libs$ sudo cp message-gateway-0.0.1.war /home/tomcat7/webapps/
```

### **How to Run**

**On Windows:**

Navigate to **Tomcat** >> **Bin** directory and double click on **startup.bat** to start the application.

![](https://mifosforge.jira.com/wiki/download/thumbnails/166658049/crop.png?version=1\&modificationDate=1479198459144\&cacheVersion=1\&api=v2\&width=850)

**On Ubuntu:**

Now navigate to the **Tomcat** >> **bin** folder and execute the following command to start the application:

```
~/tomcat7/bin$ sudo sh startup.sh
```

### **How to Configure Message Gateway**

{% hint style="danger" %}
You can download the **REST Client** from this link:

<http://download.wiztools.org/rest-client/archive/index.html>
{% endhint %}

Open the **REST Client** and perform the following steps:

**Step 1:** When you open the REST client set the URL as: [**http://localhost:9191/message-gateway-0.0.1/tenants/**](http://hostName:9191/tenants/)**. HTTP** method should be set to "**POST**". Finally, in the HTTP request body pass the following data:

{% hint style="info" %}
{\
"tenantId":"\[Tenant\_NAME]",\
"description": "Some description"\
}

**NOTE:** Pass the appropriate "tenantId"
{% endhint %}

![](https://mifosforge.jira.com/wiki/download/thumbnails/166658049/new123.png?version=1\&modificationDate=1478678896401\&cacheVersion=1\&api=v2\&width=850)

When we fire this request, "**tenant app key**" is generated as a response. This is shown in the screenshot below:

![](https://mifosforge.jira.com/wiki/download/thumbnails/166658049/rest21.png?version=1\&modificationDate=1478679275312\&cacheVersion=1\&api=v2\&width=850)

**Step 2:** In this step, set **REST client** URL as[**http://localhost:9191/message-gateway-0.0.1/smsbridges**](http://localhost:9191/smsbridges). **HTTP** Method should be set to **"POST**". In the HTTP request body, pass the following data:

{% hint style="info" %}
{\
"phoneNo": "+12345678901",\
"providerName": "Twilio SMS",\
"providerDescription": "Twilio SMS Provider",\
"providerKey":"Twilio",

"countryCode":"+xx",\
"bridgeConfigurations": \[\
{\
"configName":"Provider\_Account\_Id",\
"configValue":"ACcb95cd9fb2e7d72f85c06aea6473f7iv"\
},\
{\
"configName":"Provider\_Auth\_Token",\
"configValue":"fed820a353def95f1m6fad077fef670e"\
}\
]\
}

**NOTE:** *phoneNo*, *providerName*, *configName*, *configValue*, *configName*, *configValue* are to be set based on the individual subscription.
{% endhint %}

Pass these HTTP headers in the REST client:

| **Header**                 | V**alue**                                                               |
| -------------------------- | ----------------------------------------------------------------------- |
| Fineract-Platform-TenantId | {Pass the same Tenant ID that you have set in the previous step}        |
| Fineract-Tenant-App-Key    | {Pass the same "Tenant app key" that is generated in the previous step} |

Once headers are set, fire the HTTP request.

**Step 3:** In this step, set **REST client** URL as [**http://localhost:9191/message-gateway-0.0.1/sms/**](http://localhost:9191/sms/)**.  HTTP** method should be **"POST**". In HTTP request body pass the following data:

{% hint style="info" %}

\[{\
"internalId":"55",\
"mobileNumber":"+91xxxxxxxx80",\
"message":"Hello from Staging",\
"providerId":"2"\
}]

**NOTE:**

* Set the appropriate "mobileNumber" to the phone number you want to send the message to.
* Set your required "message".
* Set "providerId" to the value generated in the **previous step**.
  {% endhint %}

Pass the same HTTP headers that we passed in the last step.


# Daily Teller Cash Management

### **How to Generate a Daily Report**

\
**Step 1:** Login into Mifos X and at the top of the screen, select **Reports** and choose the **All** option from the drop-down menu.

![](https://mifosforge.jira.com/wiki/download/attachments/168198183/reportsAll.png?version=1\&modificationDate=1553461433413\&cacheVersion=1\&api=v2)

This will launch the **All Reports** page that displays a list of reports with their names, type and category:

![](https://mifosforge.jira.com/wiki/download/attachments/168198183/allReportsPage.png?version=1\&modificationDate=1553461605288\&cacheVersion=1\&api=v2)

In the Search bar, type **Daily Teller Cash Report** and click on this report.

![](https://mifosforge.jira.com/wiki/download/attachments/168198183/selectDailyTellerReport.png?version=1\&modificationDate=1553461876375\&cacheVersion=1\&api=v2)

This will launch the Daily Teller Cash Report page that will enable you to generate a Daily report.

![](https://mifosforge.jira.com/wiki/download/attachments/168198183/dailyTellerCashReport.png?version=1\&modificationDate=1553529212243\&cacheVersion=1\&api=v2)

**Step 2:** Fill in the given parameters like **Office**, **Currency**, **Teller** (name), **Cashier** (name), **As on** (Date on which report need to be generated) from the drop downs.

* **Currency:** Select the appropriate currency.
* **Office:** Select the office for which the report needs to be generated.
* **Teller:** When you select the Office, the Teller section will be activated providing you with a list of Tellers from that branch. Select one from the drop-down menu.

![](https://mifosforge.jira.com/wiki/download/attachments/168198183/tellerOffice.png?version=1\&modificationDate=1553529549379\&cacheVersion=1\&api=v2)

* **Cashier:** After selecting a Teller, the Cashier section will be activated providing you with a list of names of the Cashiers who work at that Teller. Select one from the drop-down menu.

![](https://mifosforge.jira.com/wiki/download/attachments/168198183/cashierTeller.png?version=1\&modificationDate=1553529780687\&cacheVersion=1\&api=v2)

* **As On:** Choose the date you want to generate the report for.
* **Output type:** Select the appropriate format you require the report to be generated
* **Decimal places:** Select the number of decimal places you require your report to have.

Check to verify your input and then click the ![](https://mifosforge.jira.com/wiki/download/attachments/168198183/runReportIcon.png?version=1\&modificationDate=1553530459557\&cacheVersion=1\&api=v2) button. This will generate and display the report.

![](https://mifosforge.jira.com/wiki/download/attachments/168198183/generatedReport.png?version=1\&modificationDate=1553531457360\&cacheVersion=1\&api=v2)

Should you wish to change the parameters you provided, click the **Parameters** button to modify the fields and **Run Report** again.

*Related Articles*

* Page:[XBRL Reporting](/mifosx/user-manual/for-all-users/reports/xbrl-reporting)
* Page:[Standard Reports Shipped in Mifos X](/mifosx/user-manual/for-all-users/reports/standard-reports-shipped-in-mifos-x)
* Page:[Manage Reports](/mifosx/user-manual/for-administrators-mifos-x-platform/administration/system/manage-reports)
* Page:[Custom Reports](/mifosx/user-manual/for-all-users/reports/custom-reports)
* Page:[How to generate - Loan transactions report](/mifosx/user-manual/for-operational-users-mifos-x-web-app/accounts-and-transactions/loan-accounts/how-to-generate-loan-transactions-report)


# Entity Data Table Checks

Entity Data Table Check is a new feature added to check few Custom details during certain actions that need to be done by making use of Custom Data Tables. For instance you need to check the existing Bank Account of the client before the creation of client. Then you can create your own Custom Data Table with column **Existing Bank Account** and check the details before the creation of client.

### **How to create Entity Data Table Checks**

**Step 1:** From the main screen, click on [**Admin**](/mifosx/user-manual/for-administrators-mifos-x-platform/administration) then **Organization** from the drop down list. This will launch the [**Organization**](/mifosx/user-manual/for-administrators-mifos-x-platform/administration/organization) menu. Select **Entity Data Table Checks.**

![](https://mifosforge.jira.com/wiki/download/attachments/174882832/entityDataTableChecks.png?version=1\&modificationDate=1553532391694\&cacheVersion=1\&api=v2)

This will launch the **Entity Data Table Checks** page.

![](https://mifosforge.jira.com/wiki/download/attachments/174882832/entityDataChecksPage.png?version=1\&modificationDate=1553617937739\&cacheVersion=1\&api=v2)

**Step 2:** Click the ![](https://mifosforge.jira.com/wiki/download/attachments/174882832/createEntityIcon.png?version=1\&modificationDate=1553618046685\&cacheVersion=1\&api=v2) button which will launch a pop-up box;

![](https://mifosforge.jira.com/wiki/download/attachments/174882832/entityDataPOpUp.png?version=1\&modificationDate=1553618174436\&cacheVersion=1\&api=v2)

**Field description**&#x20;

| **Field**              | Description                                                                                                                                                                                                                                                                                                                                                   |
| ---------------------- | ------------------------------------------------------------------------------------------------------------------------------------------------------------------------------------------------------------------------------------------------------------------------------------------------------------------------------------------------------------- |
| Entity (mandatory)     | This field describes which entity will undergo Entity Data Table Checks. Only four entities are supported with Entity Data Table Check and they are **Client, Group, Loan** and **Saving Account.**                                                                                                                                                           |
| Status (mandatory)     | This field describes when the specified entity should undergo Entity Data Table Checks. The status is not same for all entity and the statuses are **create, approve, activate, write\_off, withdrawn, rejected** and **close.**                                                                                                                              |
| Data Table (mandatory) | This field describes what need to be checked. These are custom data tables which are created in the manage table. Based on the Custom Data Table created, the additional screens are designed for the specified Entity during specified **Status**. All the columns given in the custom data table are displayed as fields in the additional screens created. |
| Product                | This field is enabled only for **Loan** and **Saving Account** entity. All the Loan Products are captured in the drop-down for Loan entity and all the Save product will be captured in the drop-down for Saving Account entity.                                                                                                                              |

* Any number of Entity Data Table Checks can be created for all the four entities.

### **Creating Client Entity Data Table**&#x20;

Navigate to the **Entity Data Table Checks** page and then click the **+Create Entity Data-Table Check** button which will launch a pop-up box. Look through the previous section of this page to get details on how to navigate to the page.

From the **Entity field**, select **Client** from the drop-down menu.

![](https://mifosforge.jira.com/wiki/download/attachments/174882832/clientEntity.png?version=1\&modificationDate=1553619362346\&cacheVersion=1\&api=v2)

For Client entity, only three statuses are provided.

| Drop-down values | Description                                                               |
| ---------------- | ------------------------------------------------------------------------- |
| CREATE           | During the creation of Client, the Entity Data Table Checks are enabled   |
| ACTIVATE         | During the activation of Client, the Entity Data Table Checks are enabled |
| CLOSE            | While closing the Client, the Entity Data Table Checks are enabled        |

The Data Tables which are created are captured in the Data Table drop-down.

To create a Custom Data Table, select **Admin** from the top of the screen and choose **System** from the drop-down menu. Select [**Manage Data Tables**](/mifosx/user-manual/for-administrators-mifos-x-platform/administration/system/manage-data-tables) and click the **+Create Data Table** button. After creating a Data Table, you will find it listed in the Data Table drop-down menu:

![](https://mifosforge.jira.com/wiki/download/attachments/174882832/dataTableDropdown.png?version=1\&modificationDate=1553620073867\&cacheVersion=1\&api=v2)

For the created **Entity Data Table Check**, their respective pages are affected. For instance, an "Entity Data Table Check" for clients has been created for **CREATE** status. So the create client page consists of wizards as shown below. Here, two "Entity Data Table Checks" are created for create client via wizard i.e., **Client Bank Details** and **Family Details.** And their respective fields are created based on the data tables created in [**Manage Data Tables**](/mifosx/user-manual/for-administrators-mifos-x-platform/administration/system/manage-data-tables) page.

**>>Create Client**

This is a **create client** screen with additional wizard consisting **Client Bank Details** and **Family Details.** Only **CREATE** status will consist of wizards. For other status, additional tabs will be created.

&#x20;After clicking on proceed, the current screen navigates to the next page.&#x20;

![](https://mifosforge.jira.com/wiki/download/attachments/174882832/client%20screen%201.jpg?version=2\&modificationDate=1504948826802\&cacheVersion=1\&api=v2)

**>>Create Client>> Create Bank Details**

This is an additional wizard created for **Client** entity and **CREATE** status with **Client Bank Details** data table as custom data table. **Bank Account Number** and the **Bank Branch** are the columns created in this custom data table. After clicking on proceed the current screen navigates to the next page.&#x20;

![](https://mifosforge.jira.com/wiki/download/attachments/174882832/client%20screen%202.jpg?version=2\&modificationDate=1504948827698\&cacheVersion=1\&api=v2)

**>>Create Client>> Create Bank Details>> Family Details**

This is an additional wizard created for **Client** entity and **CREATE** status with **Family Details** data table as custom data table. Members and the Occupation are the columns created in this custom data table. Only after completing all the wizard screens the page will allow you to submit the Application.

![](https://mifosforge.jira.com/wiki/download/attachments/174882832/client%20screen%203.jpg?version=1\&modificationDate=1504948828560\&cacheVersion=1\&api=v2)

If you are not providing the required details (only if the field is mandatory) then an error message is shown.

![](https://mifosforge.jira.com/wiki/download/thumbnails/174882832/create%20client%20entity%20datatable%20check%20error.png?version=2\&modificationDate=1482137504830\&cacheVersion=1\&api=v2\&height=250)

**Step 2.2:** Creating **Entity Data Table Checks** for **Group** Entity

* Group Entity has the following Status&#x20;

| Drop-down values | Description                                                               |
| ---------------- | ------------------------------------------------------------------------- |
| CREATE           | During the creation of Client, the Entity Data Table Checks are enabled   |
| ACTIVATE         | During the activation of Client, the Entity Data Table Checks are enabled |
| CLOSE            | While closing the Client, the Entity Data Table Checks are enabled        |

* The data tables which are created are captured in the data table drop-down.
* To create custom data table navigate to **Admin>>System>>Manage Data Tables>>Create Data Tables.**

![](https://mifosforge.jira.com/wiki/download/thumbnails/174882832/group%201.jpg?version=1\&modificationDate=1504949053454\&cacheVersion=1\&api=v2\&height=250)

* Instance 1: A data table has been created for the activation of a Group and the custom data table name is "Group Details". Wizard is not facilitated for status other than create. Hence in the screen below, we can see a tab named by "Group Details" with Add button. Clicking on the Add button will navigate to the Group Details page.

![](https://mifosforge.jira.com/wiki/download/attachments/174882832/group%20screen%201.jpg?version=1\&modificationDate=1504949378056\&cacheVersion=1\&api=v2)

* As shown in the GroupDetails screen, the fields are captured based on the custom data table created by you.

![](https://mifosforge.jira.com/wiki/download/thumbnails/174882832/group%20screen%202.jpg?version=1\&modificationDate=1504949394736\&cacheVersion=1\&api=v2\&height=250)

* If we are not provided the data to the custom data table based field and if we try to activate the Group, then an error message is shown as in the screen below

![](https://mifosforge.jira.com/wiki/download/attachments/174882832/error%20msg.jpg?version=1\&modificationDate=1504949416053\&cacheVersion=1\&api=v2)

Instance 2: A data table has been created for the Creation of Group and the custom data table name is "GroupBankDetails". Since the status is create the wizard come into picture. Hence in the screen below, we can see the wizard named by "GroupBankDetails" .

![](https://mifosforge.jira.com/wiki/download/thumbnails/174882832/create%20Group%20entity%20datatable.png?version=1\&modificationDate=1482227968854\&cacheVersion=1\&api=v2\&height=250)

As shown in the GroupBankDetails screen, the fields are captured based on the custom data table created by us

![](https://mifosforge.jira.com/wiki/download/thumbnails/174882832/create%20Group%20entity%20datatable%202.png?version=1\&modificationDate=1482228113440\&cacheVersion=1\&api=v2\&height=250)

**Step 2.3:** Creating **Entity Data Table Checks** for the **Loan** Entity

* Loan Entity has 6 Statuses as that of Client. i.e.,

| Dropdown Values | Description                                                            |
| --------------- | ---------------------------------------------------------------------- |
| CREATE          | During the creation of Loan the Entity Data Table Checks are enabled   |
| APPROVE         | During the Approval of Loan the Entity Data Table Checks are enabled   |
| ACTIVATE        | During the Activation of Loan the Entity Data Table Checks are enabled |
| WITHDRAWN       | During the Withdrawal of Loan the Entity Data Table Checks are enabled |
| REJECTED        | During the Rejection of Loan the Entity Data Table Checks are enabled  |
| WRITE\_OFF      | During the Write\_off of Loan the Entity Data Table Checks are enabled |

![](https://mifosforge.jira.com/wiki/download/thumbnails/174882832/loan%201.1.png?version=1\&modificationDate=1505120103159\&cacheVersion=1\&api=v2\&height=400)

* The data tables which are created are captured in the data table drop-down.
* To create custom data table, navigate to **Admin>>System>>Manage Data Tables>>Create Data Tables.**
* For loan entity an extra field is added i.e., Product. This field is visible only if the Loan products are already created.&#x20;

![](https://mifosforge.jira.com/wiki/download/thumbnails/174882832/loan%201.png?version=1\&modificationDate=1505120104076\&cacheVersion=1\&api=v2\&height=400)

* Instance 1: A data table has been created for approval of loan and the custom data table name is "LoanDetails". Wizard is not facilitated for status other than create. Hence in the screen below, we can see a tab named by "LoanDetails" with Add button. Clicking on the Add button will navigate to the LoanDetails page.

![](https://mifosforge.jira.com/wiki/download/thumbnails/174882832/loan%20details%201.png?version=1\&modificationDate=1505120324847\&cacheVersion=1\&api=v2\&height=400)

* &#x20;As shown in the LoanDetails screen, the fields are captured based on the custom data table created by us.

![](https://mifosforge.jira.com/wiki/download/thumbnails/174882832/loan%20details%202.png?version=1\&modificationDate=1505120346935\&cacheVersion=1\&api=v2\&height=250)

* If we are not providing the data to the custom data table based field and if we try to approve the loan, then an error message is shown as in the screen below:

![](https://mifosforge.jira.com/wiki/download/thumbnails/174882832/error.png?version=1\&modificationDate=1505120365984\&cacheVersion=1\&api=v2\&height=400)

Instance 2: A data table has been created for the creation of loan account and the custom data table name is "FamilyAnnualIncome". Since the status is create the wizard comes into picture. Hence in the screen below, we can see the wizard named by "FamilyAnnualIncome".

![](https://mifosforge.jira.com/wiki/download/thumbnails/174882832/loan%202.1.png?version=1\&modificationDate=1505120506223\&cacheVersion=1\&api=v2\&height=400)

As shown in the FamilyAnnualIncome, the fields are captured based on the custom data table created by us.

![](https://mifosforge.jira.com/wiki/download/thumbnails/174882832/loan%202.2.png?version=1\&modificationDate=1505120507233\&cacheVersion=1\&api=v2\&height=250)

**Step 2.4:** Creating **Entity Data Table Checks** for **Saving Account** entity

* Saving Account Entity has 6 Statuses as that of Client. i.e.,

| Drop-down Values | Description                                                                      |
| ---------------- | -------------------------------------------------------------------------------- |
| CREATE           | During the creation of Saving Account the Entity Data Table Checks are enabled   |
| APPROVE          | During the Approval of Saving Account the Entity Data Table Checks are enabled   |
| ACTIVATE         | During the Activation of Saving Account the Entity Data Table Checks are enabled |
| WITHDRAWN        | During the Withdrawal of Saving Account the Entity Data Table Checks are enabled |
| REJECTED         | During the Rejection of Saving Account the Entity Data Table Checks are enabled  |
| CLOSE            | While Closing the Saving Account the Entity Data Table Checks are enabled        |

![](https://mifosforge.jira.com/wiki/download/attachments/174882832/saving%201.png?version=1\&modificationDate=1505120892034\&cacheVersion=1\&api=v2)

* The data tables which are created in the manage tables are captured in the data table drop-down.
* To create custom data table navigate to **Admin>>System>>Manage Data Tables>>Create Data Tables.**
* For loan entity an extra field is added i.e., Product. This field is visible only if the Saving products are already created.&#x20;
* Instance 1: For an instance a data table has been created for activation for saving account and the custom data table name is "SavingDetails". Wizard is not facilitated for status other than create. Hence in the screen below, we can see a tab named by "SavingDetails" with Add button. Clicking on the Add button will navigate to the SavingDetails page.

![](https://mifosforge.jira.com/wiki/download/thumbnails/174882832/saving%202.png?version=1\&modificationDate=1505121034454\&cacheVersion=1\&api=v2\&height=400)

* &#x20;As shown in the SavingDetails screen, the fields are captured based on the custom data table created by us.

![](https://mifosforge.jira.com/wiki/download/thumbnails/174882832/saving%203.png?version=1\&modificationDate=1505121030524\&cacheVersion=1\&api=v2\&height=250)

* If we are not providing the data to the custom data table based field and if we try to activate the Saving account, then an error message is shown as in the screen below.

![](https://mifosforge.jira.com/wiki/download/thumbnails/174882832/saving%204.png?version=1\&modificationDate=1505121130315\&cacheVersion=1\&api=v2\&height=250)

* Instance 2: A data table has been created for the creation of saving account and the custom data table name is "AdditionalAccount". Since the status is create the wizard comes into picture. Hence in the screen below, we can see the wizard named by "AdditionalAccount" .

![](https://mifosforge.jira.com/wiki/download/thumbnails/174882832/create%20save%20account%20entity%20datatable.png?version=1\&modificationDate=1482228475613\&cacheVersion=1\&api=v2\&height=250)

As shown in the AdditionalAccount screen, the fields are captured based on the custom data table created by us.

![](https://mifosforge.jira.com/wiki/download/thumbnails/174882832/create%20save%20account%20entity%20datatable%202.png?version=1\&modificationDate=1482228492703\&cacheVersion=1\&api=v2\&height=250)

* Wizard is supported only for the creation of Client/Group/Loan/Saving Account. It is not supported for other statuses such as activate/approve/write-off/rejected/close/withdrawal. Instead statuses such as activate/approve/write-off/rejected/close/withdrawal are supported by a tab.
* Hence "Entity Data Table Check" is required for enhancing the existing entity details or any additional verification during certain actions like disbursing the loan, activating the Saving Account, creation of client etc.\
  \
  Video link for Entity Data table checks: [https://youtu.be/c77h61AJEQ0\ <br>](<https://youtu.be/c77h61AJEQ0&#xA;&#xA;>)<br>


# System

The **System** menu contains links to ten (10) pages. These pages are listed on the right hand side of this page. Each one is designed to help you control the day-to-day operations your organization requires when using Mifos X.

When getting started with Mifos X, please refer to the [**Initial System Setup**](/mifosx/user-manual/for-administrators-mifos-x-platform/initial-system-set-up) page.

Want to learn more about navigation in Mifos X? See the [**General Navigation**](/mifosx/user-manual/for-all-users/untitled) section of this manual.

From the Welcome page, click [**Admin**](/mifosx/user-manual/for-administrators-mifos-x-platform/administration) and choose **System** from the drop down list.

<figure><img src="/files/hdLqKI5Q0sv8KCNl10lU" alt=""><figcaption></figcaption></figure>

This will launch the System page as shown below;

<figure><img src="/files/CpS6DezQZzLiWEcu5U1J" alt=""><figcaption></figcaption></figure>

It is from this page that:

* **Data-tables** are managed and modified
* **Codes** are defined and modified
* **Roles** and **Permissions** are managed
* **Maker Checker** tasks are configured
* **Audit Trails** are managed
* **Reports** are created and modified
* **Jobs** are created, scheduled or modified
* **Global Configurations** are defined
* **Hooks** are defined.
* **Account Number Preferences** are defined.
* **Two-Factor Configurations** are modified.
* **Surveys** are created and managed.
* **Mappings** between entities are defined and modified
* **External Services** are configured


# Manage Data Tables

Mifos X data-tables allow the user to add custom fields in addition to the built-in fields to a client profile, loan/saving account, group, center or an office.

For example, you may want to collect additional client details such as education and poverty level. You can do this in Mifos X by creating a data-table, choosing the client application table name and adding custom fields: education and poverty level.

In another example, you may want to collect additional loan details, such as business name, business type, monthly cash flows, and outstanding liabilities. You can do this in Mifos X by creating a business details data-table, choosing the loan application table name and adding custom fields such as business name, business type, monthly cash flows, and outstanding liabilities.

When creating a set of custom fields (i.e., data-table), you can set the multi-row option to capture multiple instance of data. It should be noted that custom field supports 6 data types (String , Number, Decimal, Date, Text and Drop-down)

Beginning at the main screen, select [**Admin** ](/mifosx/user-manual/for-administrators-mifos-x-platform/administration)**>> System** from the drop-down menu. This will launch the [**System**](/mifosx/user-manual/for-administrators-mifos-x-platform/administration/system) menu.

Select **Manage Data Tables**.

![](https://mifosforge.jira.com/wiki/download/attachments/52592760/manageDataTables.png?version=1\&modificationDate=1554832987679\&cacheVersion=1\&api=v2)

This will launch a page as seen in the screenshot below;

![](https://mifosforge.jira.com/wiki/download/attachments/52592760/manageDataTablesPage.png?version=1\&modificationDate=1554833439231\&cacheVersion=1\&api=v2)

### **View Data Tables**

Once you have have selected **Manage Data Tables,** Mifos X will generate a list of all currently available data tables. This will appear in alphabetical order but you may filter the results by using the **Filter by Name** field at the top of the list. To view a data-table in detail, click on its name in the list - it will be highlighted blue when the cursor is hovering over it.&#x20;

![](https://mifosforge.jira.com/wiki/download/attachments/52592760/filterDataTbales.png?version=1\&modificationDate=1554833489774\&cacheVersion=1\&api=v2)

Once selected, another page will be displayed showing all the details of that Data Table. From there, you can choose to edit or delete it.

![](https://mifosforge.jira.com/wiki/download/attachments/52592760/selectedDataTable.png?version=1\&modificationDate=1554834202975\&cacheVersion=1\&api=v2)

### **Create a New Data Table**

Once you have navigated to the **Manage Data Tables** screen, you may create a new data table. Click the blue **Create Data Table** button at the top-right of the screen to add a new data table.

![](https://mifosforge.jira.com/wiki/download/attachments/52592760/createDataTablepage.png?version=1\&modificationDate=1554834679438\&cacheVersion=1\&api=v2)

This will launch a page that will allow you to create a new data table as shown below;

![](https://mifosforge.jira.com/wiki/download/attachments/52592760/createDataTable.png?version=1\&modificationDate=1554838197460\&cacheVersion=1\&api=v2)

* Give the Data Table an appropriate name of your choice.
* The **Application table name** field will provide a drop down of system functions the data table will affect. For example, if you are adding fields that will impact the Client level, click on **Client.**
* Select Multi row if there will be more than one entry.
* Under Add Columns, enter an appropriate name of your choice for the field in the **Column name** box. Then select a column type from the **column type** drop-down menu. Some options include Date, Number, String, Decimal. Click the plus (**+**) button to add your custom field.&#x20;

{% hint style="info" %}
To add more columns, repeat the add columns process until you have entered all the columns you planned for.
{% endhint %}

![](https://mifosforge.jira.com/wiki/download/attachments/52592760/columns.png?version=1\&modificationDate=1554839285147\&cacheVersion=1\&api=v2)

From the screenshot above, you can make a field required by clicking the **Mandatory** checkbox next to the type. If you selected a **String** column type for any fiel&#x64;**,** enter a maximum number of characters for the field in the **Length box.** For **Drop-down** column type, select a system defined code from the drop-down list. To define your own code, check out the [**Manage Codes**](/mifosx/user-manual/for-administrators-mifos-x-platform/administration/system/manage-codes) documentation. To delete a field click the blue button at the end of the column.

Check your inputs and then click the **Submit** button.

Here is a table that details the column types:

| Type      | Usage                                                                             | Example values                                                                                |
| --------- | --------------------------------------------------------------------------------- | --------------------------------------------------------------------------------------------- |
| String    | To capture names, address line, email-id                                          | Stev, Nayan, 17th Cross, <info@mifos.org>                                                     |
| Number    | To capture age, number of children, number of earning members                     | Ex: Age = 23                                                                                  |
| Decimal   | To capture income, monthly expense, interest rate, growth rate                    | 100.50, 1200.5, 10.25                                                                         |
| Date      | To capture date of birth, joining date                                            | 21-Jan-1983, 17-Jan-2013                                                                      |
| Text      | To capture person's description or business description                           | "I started this business 3 years ago with my savings and now I am looking for loan to expand" |
| Drop-down | To capture relationship, qualification, employment type or any pre-defined values | \[Father, Mother, Sister, Brother] , \[Self employed, Govt employee]                          |

### **How to Modify a Data Table**

Once you have selected a data table from the **Manage Data Tables** page you may modify it. Click the blue **Edit** button at the top-right of the screen to modify the table.

![](https://mifosforge.jira.com/wiki/download/attachments/52592760/editDataTable.png?version=1\&modificationDate=1554835314474\&cacheVersion=1\&api=v2)

This will launch a page that will permit you to modify the information of the Data Table as shown below:

![](https://mifosforge.jira.com/wiki/download/thumbnails/52592760/Screenshot%20from%202019-06-04%2017-02-37.png?version=1\&modificationDate=1559664369642\&cacheVersion=1\&api=v2\&height=400)

Once you have modified the necessary information, click On the blue **Submit** button below the page to update the Data Table.

### **How to Delete a Data Table**

Once you have opened a data table page, you may delete it. To delete a data table:

* Click on the data table name in the list of available tables at the **View Data Tables** screen.
* Click on the orange **Delete** button at the top-right of the screen&#x20;

![](https://mifosforge.jira.com/wiki/download/attachments/52592760/deleteDataTable.png?version=1\&modificationDate=1554837888260\&cacheVersion=1\&api=v2)

This will launch a pop-up window to confirm the deletion as seen in the screenshot below;

![](https://mifosforge.jira.com/wiki/download/attachments/52592760/confirmDataTableDeletion.png?version=1\&modificationDate=1554838004400\&cacheVersion=1\&api=v2)

Click the blue **Confirm** button to delete the data table.

*Related Articles*

* Page:[Manage Tax configuration](/mifosx/user-manual/for-administrators-mifos-x-platform/administration/products/manage-tax-configuration)
* Page:[Manage Scheduler Jobs](/mifosx/user-manual/for-administrators-mifos-x-platform/administration/system/manage-scheduler-jobs)
* Page:[Installing Data Import Tool](/mifosx/user-manual/data-import-tool/installing-data-import-tool)
* Page:[Data Import Tool](/mifosx/user-manual/data-import-tool)


# Audit Trails

Audit Trails allows you to keep track of your organization\`s activities in the Mifos system. By selecting different criteria or searching by user, you can gain a better understanding of how your organization is using the Mifos X platform.

From the welcome page, select [**Admin**](/mifosx/user-manual/for-administrators-mifos-x-platform/administration), then **System** from the drop-down menu. This will launch the [**System**](/mifosx/user-manual/for-administrators-mifos-x-platform/administration/system) menu.

Select **Audit Trails**.

![](https://mifosforge.jira.com/wiki/download/attachments/67895352/auditTrails.png?version=1\&modificationDate=1554840273777\&cacheVersion=1\&api=v2)

This will launch the Audit Trails page as seen in the screenshot below:

![](https://mifosforge.jira.com/wiki/download/attachments/67895352/auditTrailsPage.png?version=1\&modificationDate=1554840614765\&cacheVersion=1\&api=v2)

### **Advanced Search for a User**

You can search for a user via the "Search by User" field at the top or you can have an advanced search by clicking the ![](https://mifosforge.jira.com/wiki/download/thumbnails/67895352/dropdown.png?version=2\&modificationDate=1554841027044\&cacheVersion=1\&api=v2\&width=30) button at the side of the search bar.

![](https://mifosforge.jira.com/wiki/download/attachments/67895352/filterAudit.png?version=1\&modificationDate=1554841190933\&cacheVersion=1\&api=v2)

This will activate additional search filters to ease your search;

* Search by user
* Resource ID
* From Date
* To Date
* Checked from&#x20;
* Checked to
* Select status - drop-down menu
* Select Entity - drop-down menu
* Select Action - drop-down menu
* Select checker - drop-down menu

![](https://mifosforge.jira.com/wiki/download/attachments/67895352/advancedSearch.png?version=1\&modificationDate=1554841323804\&cacheVersion=1\&api=v2)

After adding the filters of your choice, click the **Advanced** **Search** button as indicated in the screenshot above. Mifos X will display records according to the filters selected. Should you wish to reset your filters, select the **Reset** Button just above the Advanced Search button. This will clear all entries in the filter fields.

### **How to view an Audit Entry**

On the Audit Trails page, select the the Audit Entry you would like to view (*it will be highlighted in blue when the cursor is over it*.)

A page detailing the Audit Entry will be displayed as seen in the example below:

![](https://mifosforge.jira.com/wiki/download/attachments/67895352/auditEntryExample.png?version=1\&modificationDate=1554841774109\&cacheVersion=1\&api=v2)

### **How to Export CSV**

At the top-right of the report is a blue button labelled **Export CSV**. A CSV (or Comma-separated values) is a type of file that stores tabular data in plain text form. This allows the data to be easily transferred between programs that are not normally compatible.&#x20;

![](https://mifosforge.jira.com/wiki/download/attachments/67895352/exportCSV.png?version=1\&modificationDate=1554842146564\&cacheVersion=1\&api=v2)

To create a CSV file of your selected data, click on the blue **Export CSV** button. This will download a CSV file:

![](https://mifosforge.jira.com/wiki/download/attachments/67895352/downloadCSV.png?version=1\&modificationDate=1554842229934\&cacheVersion=1\&api=v2)

Open the CSV file with an appropriate program of your choice, for example Microsoft Excel or Libre Office Calc. Only the Audit Entries of that page will be exported.

![](https://mifosforge.jira.com/wiki/download/attachments/67895352/csv.png?version=1\&modificationDate=1554842393912\&cacheVersion=1\&api=v2)

*Related Articles*

* Page:[Manage Tax configuration](/mifosx/user-manual/for-administrators-mifos-x-platform/administration/products/manage-tax-configuration)
* Page:[Manage Scheduler Jobs](/mifosx/user-manual/for-administrators-mifos-x-platform/administration/system/manage-scheduler-jobs)
* Page:[Audit Trails](/mifosx/user-manual/for-administrators-mifos-x-platform/administration/system/audit-trails)


# Manage Codes

Codes or drop-down values are  instrumental parts of the Mifos X Community App. From this selection you can create new drop-downs and edit their values as well as edit the values for system-generated codes and drop-downs.&#x20;

### How to Navigate?

Navigate to **Admin>>System>>** click on **Manage Codes**

![](https://mifosforge.jira.com/wiki/download/thumbnails/67895350/code%201.jpg?version=1\&modificationDate=1504952918490\&cacheVersion=1\&api=v2\&height=400)

### **View Codes**

Once you click on **Manage Codes,** Mifos application will generate a list of all codes in the Mifos system for your organization.

{% hint style="danger" %}
One can search the required field by using the **Filter by Name** search bar at the top of the list.
{% endhint %}

![](https://mifosforge.jira.com/wiki/download/thumbnails/67895350/code%202.jpg?version=1\&modificationDate=1504953014226\&cacheVersion=1\&api=v2\&height=400)

* Mifos provides a list of standard system codes.
* Can be customized to terms used by your organization.
* Information provided here will appear in the drop-down menus in the system.
* Adjust the numbers to reflect the desired order for the menu.

### How to Add Code?

### **Add Code**

You may create additional codes in this area by following the steps:

1. Click on **Add Code** button at the top-right of the screen

![](https://mifosforge.jira.com/wiki/download/thumbnails/67895350/add%20code.jpg?version=1\&modificationDate=1504953013334\&cacheVersion=1\&api=v2\&height=400)

2.Type the code name in the blank field

![](https://mifosforge.jira.com/wiki/download/attachments/67895350/code%203.jpg?version=2\&modificationDate=1504953321025\&cacheVersion=1\&api=v2)

&#x20;  3\. Click Submit.

### Customize Codes&#x20;

The system comes with the most commonly used codes. To add specific fields for your organization,

1. Click on the desired code.
2. Click on ![](https://mifosforge.jira.com/wiki/download/thumbnails/67895350/5.png?version=1\&modificationDate=1471934609244\&cacheVersion=1\&api=v2\&width=100)
3. Type in the Name to appear in the field's drop down menu

![](https://mifosforge.jira.com/wiki/download/attachments/67895350/code%203.jpg?version=2\&modificationDate=1504953321025\&cacheVersion=1\&api=v2)

&#x20;    4\. Enter the position of each code value for a given field.  In this example, the "Client Closure Reason" lists four reasons a client may leave the organization.

![](https://mifosforge.jira.com/wiki/download/attachments/67895350/code%204.jpg?version=1\&modificationDate=1504953399086\&cacheVersion=1\&api=v2)

&#x20;    5\. When working on a client account, the "Client Closure Reason" lists four reasons a client may leave the organization.

![](https://mifosforge.jira.com/wiki/download/thumbnails/67895350/code%205.jpg?version=2\&modificationDate=1504953690277\&cacheVersion=1\&api=v2\&height=400)

&#x20;   6\. The above created code values appear in the system drop downs.

![](https://mifosforge.jira.com/wiki/download/attachments/67895350/code%206.jpg?version=1\&modificationDate=1504953691101\&cacheVersion=1\&api=v2)

### System-defined Codes&#x20;

| Code Name              | Description                                                                                                                                            |
| ---------------------- | ------------------------------------------------------------------------------------------------------------------------------------------------------ |
| Address\_type          | This will appear in client screen, the address type may include permanent address, residential address, office address.                                |
| Asset Account Tags     | Asset account tags include cash, cash in bank, inventory and so on. The accounting staff will identify the required tags in pre-configuration planning |
| Center Closure Reason  | Lists the reason to close the center, this information appears in center screen.                                                                       |
| Client Classification  | This will appear on the Create Client screen. The organization may add descriptors to define customer classes for reporting requirements.              |
| Client Closure Reason  | List any reasons a customer may close an account. This information will appear on the Client Close screen.                                             |
| Client Type            | This will appear on the Create Client screen. The organization may add descriptors to define customer classes for tracking and reporting purposes.     |
| Client reject Reason   | Lists the reason with respect to client rejection criteria, this will appear in client reject screen.                                                  |
| Client sub status      | Lists the reason which shows sub status of a client.                                                                                                   |
| Client withdraw reason | Lists the reason with respect to client withdraw, this will appear in client withdraw screen.                                                          |
| Constitution           | Shows the list of districts, this will appear in create client screen.                                                                                 |
| Country                | Shows the list of countries, this will appear in create client screen.                                                                                 |
| Customer Identifier    | This will appear on the Create Client screen. The organization will list all acceptable form of identification a customer can use.                     |
| Equity Account Tags    | This will appear as a "tag" on the **Accounting/General Ledger** screen when creating or editing an equity account.                                    |
| Expense Account Tags   | This will appear as a "tag" on the **Accounting/General Ledger** screen when creating or editing an expense account.                                   |
| Gender                 | This will appear on the Create Client screen. The system provides male/female                                                                          |
| Group Closure Reason   | This will appear on the Close Group screen. The organization may list the reasons accepted to close a group.                                           |
| Group Role             | This will appear in the Group Create and Edit screens. This allows the organization to define roles such as "leader" or "trainer."                     |
| Guarantor Relationship | This will appear in the New Loan screen. The organization will list the acceptable loan guarantors.                                                    |
| Income Account Tags    | This will appear as a "tag" on the **Accounting/General Ledger** screen when creating or editing an income account.                                    |
| Liability Account Tags | This will appear as a "tag" on the **Accounting/General Ledger** screen when creating or editing a liability account.                                  |
| Loan Collateral        | This will appear in the New Loan screen. The organization will list the acceptable loan collateral.                                                    |
| Loan Purpose           | This will appear in the New Loan screen. The organization will list the acceptable loan purposes.                                                      |
| Loan reschedule reason | Lists the reason for rescheduling the loan, it may include values like "repay after two months", "Change the repayment date" .                         |
| Main Business Line     | Lists the different business streams of the customer, this will appear in create client screen.                                                        |
| Relationship Type      | This will appear in the New Client screen. The organization will list the relationships used in the organization such as "spouse."                     |
| State                  | Shows the list of states, this will appear in create client screen.                                                                                    |
| Write off reasons      | Lists the reason for closing the loans.                                                                                                                |
| Yes or No              |                                                                                                                                                        |


# Manage Reports

There are numerous reports within the Mifos system. Many are core reports that are pre-installed for your organization. However you may add customized reports and edit core reports.

Beginning at the main screen, select [**Admin**](/mifosx/user-manual/for-administrators-mifos-x-platform/administration), then **System** from the drop-down menu. This will launch the [**System**](/mifosx/user-manual/for-administrators-mifos-x-platform/administration/system) menu.

Select **Manage Reports**.

![](https://mifosforge.jira.com/wiki/download/thumbnails/67895354/manageRepo.png?version=1\&modificationDate=1552930089401\&cacheVersion=1\&api=v2\&width=900)

*This section might live within the* [*Custom Reports*](/mifosx/user-manual/for-all-users/reports/custom-reports) *section.*&#x20;

### **View Reports**

Once you have have selected **Manage Reports,** Mifos will generate a list of all currently available reports. This will appear in alphabetical order, but you may filter the results by using the **Filter by Name** field at the top of the list.

![](https://mifosforge.jira.com/wiki/download/thumbnails/67895354/reports1.png?version=1\&modificationDate=1403970943637\&cacheVersion=1\&api=v2\&width=743)

When the cursor is hovering over a report, it will appear in blue as above. Click on the report to open its detail page. From there you can **Edit** or **Delete** a report as well as see all of its attributes. Information included on this page include:

* Report Type
* Report Subtype (if applicable)
* Report Category
* is the report a Core Report?
* Is the report a User Report?

Below is an example of a report detail page:

![](https://mifosforge.jira.com/wiki/download/thumbnails/67895354/reports2.png?version=1\&modificationDate=1403971327334\&cacheVersion=1\&api=v2\&width=743)

### **Edit Report**

Once you have opened a report detail page, you may **edit** that report by clicking on the blue **Edit** button at the top-right of the screen. This will launch a new page from which you may change several facets of the report. Please note that the editing options for **Core** reports are much more limited.

When editing a **Core** report you may only change the **Report Details**:

* Report Name
* Report Category
* Description
* Report Type and subtype
* Is this a **User Report**?

![](https://mifosforge.jira.com/wiki/download/thumbnails/67895354/reportedit1.png?version=1\&modificationDate=1403974483345\&cacheVersion=1\&api=v2\&width=743)

If the report is not a **Core** report, there are two more sections for potential editing:

**SQL** (Structured Query Language)

![](https://mifosforge.jira.com/wiki/download/thumbnails/67895354/reportedit2.png?version=1\&modificationDate=1403975516035\&cacheVersion=1\&api=v2\&width=743)

**Report Parameters**

![](https://mifosforge.jira.com/wiki/download/thumbnails/67895354/reportedit3.png?version=1\&modificationDate=1403975540715\&cacheVersion=1\&api=v2\&width=743)

**Add Report**

To add new custom report, click the blue **Create Report** button at the top-right of the screen.

![](https://mifosforge.jira.com/wiki/download/thumbnails/67895354/createreport.png?version=1\&modificationDate=1405198105762\&cacheVersion=1\&api=v2\&width=743)

&#x20;**Note:** To create a new report, you will require knowledge of **SQL** (Structured Query Language).

* Report Details&#x20;
* Report name
* Report type
* Report sub-type
* Report category
* Description
  * SQL
  * Report parameters - drop-down

&#x20;**Submit**&#x20;

### **Delete Report**

Once you have opened a report detail page you may delete it. Please note that **Core Reports** may not be deleted, whereas a **User Report** may be. To delete a report:

1. Click on the report name in the list of available reports.
2. Click on the red **Delete** button at the top-right of the screen - this will launch a pop-up window to confirm the deletion as shown

![](https://mifosforge.jira.com/wiki/download/thumbnails/67895354/Screenshot%20from%202019-06-04%2019-07-46.png?version=1\&modificationDate=1559671745167\&cacheVersion=1\&api=v2\&height=250)

&#x20;   **3.** Click the blue **Confirm** button to delete the report.

Related articles

* Page:[Manage Funds](/mifosx/user-manual/for-administrators-mifos-x-platform/administration/organization/manage-funds)
* Page:[Manage Reports](/mifosx/user-manual/for-administrators-mifos-x-platform/administration/system/manage-reports)
* Page:[XBRL Reporting](/mifosx/user-manual/for-all-users/reports/xbrl-reporting)
* Page:[Standard Reports Shipped in Mifos X](/mifosx/user-manual/for-all-users/reports/standard-reports-shipped-in-mifos-x)
* Page:[Custom Reports](/mifosx/user-manual/for-all-users/reports/custom-reports)


# Manage Roles and Permissions

Roles and Permissions allow the administrator to control access to Mifos based on what roles are assigned to **Users** and what **Permissions** are assigned to roles. The **Roles and Permissions** page is the place to customize roles and select permissions.

### What are Roles and **Permissions?**

**Roles:** Roles are assigned to users. A user's role will determine what functions a user is allowed to perform within the Mifos system. A user may have more than one role assigned to him, thus giving him access to different functions.

**Permissions:** Permissions are assigned to roles. These determine what functions are assigned to a role - which in turn determine what tasks a user is able to complete within the Mifos system.

### **How to navigate?**

Navigate through  **Admin>> System>>** click on **Manage Roles and Permissions**&#x20;

![](https://mifosforge.jira.com/wiki/download/thumbnails/67895364/Manage%20roles.jpg?version=1\&modificationDate=1504953788440\&cacheVersion=1\&api=v2\&height=400)

### View Roles

Once you have navigated to **Manage Roles and Permissions,** you will see a list of roles defined within the organization. One can **click** on these roles and view the permissions that are defined in each role and can even **edit** or **delete** the role if he has super user privileges.&#x20;

![](https://mifosforge.jira.com/wiki/download/thumbnails/67895364/Manage%20roles%201.jpg?version=1\&modificationDate=1504953828803\&cacheVersion=1\&api=v2\&height=400)

### View Permissions

On selecting the appropriate role, you will be navigated to a page where details of the role are defined. Additionally all current permissions associated with this role can be seen - they are marked with a check mark to the right of each permission.

![](https://mifosforge.jira.com/wiki/download/attachments/67895364/Manage%20roles%202.jpg?version=1\&modificationDate=1504953996225\&cacheVersion=1\&api=v2)

### **How to assign Roles and Permission?**

To assign roles and permission navigate to **Admin>> System>>** click on **Manage Roles and Permissions>>Add Role**

### i) Create a new role

&#x20;   To create a new role, click on **Add Role** button at the top right of the screen as shown in screenshot below:&#x20;

![](https://mifosforge.jira.com/wiki/download/thumbnails/67895364/add%20role.jpg?version=1\&modificationDate=1504954047875\&cacheVersion=1\&api=v2\&height=400)

&#x20;This will pop-up a new window to create new role:

1. **Name** the role.
2. Give the role a **description.**
3. Click **Submit.**

&#x20;   Now you will be navigated to **View Permissions** page for the new role. Next **Add Permissions** assigned to a **Role.**&#x20;

![](https://mifosforge.jira.com/wiki/download/attachments/67895364/add%20role%201.jpg?version=1\&modificationDate=1504954152514\&cacheVersion=1\&api=v2)

### ii) Add Permissions to a role

If a new role has been created or permissions for an existing role require changes, you may edit a role's permissions. When you create a new role you will be automatically taken to the permissions page for that role.

If you would like to edit an existing role, navigate to the **View Roles** screen and select the role you would like to edit. In both cases, you will be taken to the permissions page for that role. Click the blue **Edit** button at the top-right to change the permissions for the role:

![](https://mifosforge.jira.com/wiki/download/thumbnails/67895364/permissionsedits.png?version=1\&modificationDate=1404190166340\&cacheVersion=1\&api=v2\&width=743)

Permissions are indicated by a check mark in the box to their right. To add a permission, check the empty box. To remove a permission un-check the box - it will be empty.

Once everything is correct, click **Submit**.

![](https://mifosforge.jira.com/wiki/download/thumbnails/67895364/permissions%20aa.png?version=2\&modificationDate=1404189094032\&cacheVersion=1\&api=v2\&width=600)

### How to Configure Different Permission?

1. Mifos provides a feature for configuring multiple types of permission for a given role under different criteria. In the image below, you can see different sets of permissions that can be given to a role.

![](https://mifosforge.jira.com/wiki/download/attachments/67895364/Manage%20roles%203.jpg?version=1\&modificationDate=1504954649721\&cacheVersion=1\&api=v2)

&#x20; 2\. Lets say if I want to provide certain permissions on **Accounting, I** click on it then a set of permissions under accounting are displayed on the right side of the permissions list. Select different permissions that are required for that particular role.

![](https://mifosforge.jira.com/wiki/download/attachments/67895364/Manage%20roles%204.jpg?version=2\&modificationDate=1504954810100\&cacheVersion=1\&api=v2)

3\. Next if you want to provide permissions under **Cash Management,** click on **Cash\_mgmt** then select the required permissions under it.

![](https://mifosforge.jira.com/wiki/download/attachments/67895364/cash_mgmt.jpg?version=1\&modificationDate=1504954926110\&cacheVersion=1\&api=v2)

4.Similarly you can configure for the rest of the permissions based upon your requirements

5\. Click ![](https://mifosforge.jira.com/wiki/download/thumbnails/67895364/4.png?version=1\&modificationDate=1472208439613\&cacheVersion=1\&api=v2\&width=50)

Related articles

* Page:[Configure Maker-Checker Tasks](/mifosx/user-manual/for-administrators-mifos-x-platform/administration/system/configure-maker-checker-tasks)
* Page:[Manage Roles and Permissions](/mifosx/user-manual/for-administrators-mifos-x-platform/administration/system/manage-roles-and-permissions)
* Page:[Audit Trails](/mifosx/user-manual/for-administrators-mifos-x-platform/administration/system/audit-trails)
* Page:[Users](/mifosx/user-manual/for-administrators-mifos-x-platform/administration/users)


# Manage Scheduler Jobs

By using Scheduler Jobs, you can set batch jobs to be completed at regular intervals. From this page you can schedule, modify or delete jobs. You may also manually run selected jobs by accessing the list of Scheduler Jobs.

Beginning at the main screen, select [**Admin**](/mifosx/user-manual/for-administrators-mifos-x-platform/administration), then **System** from the drop-down menu. This will launch the [**System**](/mifosx/user-manual/for-administrators-mifos-x-platform/administration/system) menu.

Select **Scheduler Jobs**.

![](https://mifosforge.jira.com/wiki/download/thumbnails/67895356/Scr.png?version=1\&modificationDate=1528971322376\&cacheVersion=1\&api=v2\&height=250)

### View Scheduler Jobs

Once you have navigated to the **Scheduler Jobs** page, Mifos will generate a list of all scheduled batch jobs. You may select a job from the list by clicking on it in the list, it will be highlighted in blue when the cursor is hovering over it.

![](https://mifosforge.jira.com/wiki/download/thumbnails/67895356/schedjobs2.png?version=1\&modificationDate=1405393461166\&cacheVersion=1\&api=v2\&width=743)

Once you have opened the job's detail page you may **Edit** the job and/or **View History** for the selected job.

To **Edit** a job click the blue **Edit** button at the top-right of the job description screen.

![](https://mifosforge.jira.com/wiki/download/thumbnails/67895356/editjob.png?version=1\&modificationDate=1415741277664\&cacheVersion=1\&api=v2\&width=450)

At this screen you may:

* **Change** the job's name
* **Alter** the Cron expression from the selected job
* **Activate** or **Deactivate** the selected job

**Activate** or **deactivate** a job by clicking on the box to the right of "Is job active?"

![](https://mifosforge.jira.com/wiki/download/thumbnails/67895356/activejob.png?version=1\&modificationDate=1415741721844\&cacheVersion=1\&api=v2\&width=150)

If there is a check mark in the box - it is active. If not, click on the empty box to activate the selected job.

### Explanation of each Scheduler Job &#x20;

| Job Name                                                              | Purpose/Description                                                                                                                                                                                                                                                                                                                                                                                                                                                                                                                                                                                                                                                                                  | Scheduled Frequency for Execution              |
| --------------------------------------------------------------------- | ---------------------------------------------------------------------------------------------------------------------------------------------------------------------------------------------------------------------------------------------------------------------------------------------------------------------------------------------------------------------------------------------------------------------------------------------------------------------------------------------------------------------------------------------------------------------------------------------------------------------------------------------------------------------------------------------------- | ---------------------------------------------- |
| Add Accrual Transactions                                              | All the interest will be accrued till the 'Due date' of the job run and can be viewed under 'Transactions' tab (Uncheck 'Hide Accruals')                                                                                                                                                                                                                                                                                                                                                                                                                                                                                                                                                             | Daily                                          |
| Add Accrual Transactions For Loans With Income Posted As Transactions | Similar to 'Add Accrual Transactions', except that Compounded interest will be accrued once this job is ran. In other words, this job should be run if compounded interests have to accrued.                                                                                                                                                                                                                                                                                                                                                                                                                                                                                                         | Daily                                          |
| Add Periodic Accrual Transactions                                     | Similar to 'Add Accrual Transactions' except that all the interest will be accrued till the current date (i.e... Job run date and time)                                                                                                                                                                                                                                                                                                                                                                                                                                                                                                                                                              | Daily                                          |
| Apply Annual Fee for Savings                                          | It applies recurrent fee- that is annual fee for all savings accounts of the clients which are attached with annual fee. You can create annual fee (or any other recurrent fee like monthly fee) for savings account in Admin>Products>Charges and later add it either directly to savings product or at the time of submission of savings application.                                                                                                                                                                                                                                                                                                                                              | Daily                                          |
| Apply Holidays to Loans                                               | f new 'future' holiday is created (say, February 1) and if this job is ran successfully (say on January 15), it should affect all the repayments scheduled on February 1 and must be postponed to the date described by holiday definition. bAdd Periodic Accrual Transactions.                                                                                                                                                                                                                                                                                                                                                                                                                      | Daily                                          |
| Apply penalty to overdue loans                                        | This job once ran successfully applies penalty to all overdue loans based on the penalty definition. The penalties could be daily, weekly or monthly based penalty charge definition.                                                                                                                                                                                                                                                                                                                                                                                                                                                                                                                | Daily                                          |
| Execute Email                                                         | This job is run to send Emails (without reports) with given template email formats.                                                                                                                                                                                                                                                                                                                                                                                                                                                                                                                                                                                                                  | Daily/Weekly/Monthly                           |
| Execute Report Mailing Jobs                                           | This job is run to mail the reports regularly or recurrently to the given mail ids. It has no UI and mail ids and reports are configured in database level.                                                                                                                                                                                                                                                                                                                                                                                                                                                                                                                                          | Daily/Weekly/Monthly                           |
| Execute standing instruction                                          | <p>Standing instructions are created in client level whenever - For Example, A Client has one savings account and one loan account and let's say he has loan repayment first of every month and he expects that the repayments of his loan account must be done through deducting from his savings account on the first of every month automatically.</p><p>Once this job is ran successfully, standing instruction of all clients for the particular date (i.e .. job run date) will be applied. That is, as given in the example above, if standing instruction is ran on the first of every month, the savings account will be debited and the loan account will be credited with repayment. </p> | Daily                                          |
| Generate Adhoc Client Schedule                                        |                                                                                                                                                                                                                                                                                                                                                                                                                                                                                                                                                                                                                                                                                                      |                                                |
| Generate Loan Loss Provisioning                                       | This job updates provisioning entries (Accounting>Provisioning Entries) with type (Standard, Sub Standard, etc) defined by Loan Provisioning Criteria (Admin>Organization)                                                                                                                                                                                                                                                                                                                                                                                                                                                                                                                           | Frequency will be defined by the organization. |
| Generate Mandatory Savings Schedule                                   |                                                                                                                                                                                                                                                                                                                                                                                                                                                                                                                                                                                                                                                                                                      |                                                |
| Get Delivery Reports from SMS Gateway                                 | This job is run to get delivery reports from SMS gateway in order to check how many SMSs are successfully delivered.                                                                                                                                                                                                                                                                                                                                                                                                                                                                                                                                                                                 | Daily/Manually                                 |
| Pay Due Savings Charges                                               | Savings account can have 'Specified Due Date' charge. And if this job is run, all the due date charges prior to the job run date will be applied and the charge amount will be deducted from the savings account.                                                                                                                                                                                                                                                                                                                                                                                                                                                                                    | Daily                                          |
| Post Dividend for Shares                                              | This job is run to post dividends of shares to linked savings account. It can be run monthly/quarterly/half-yearly in order to post dividend to savings account.                                                                                                                                                                                                                                                                                                                                                                                                                                                                                                                                     | Daily/Weekly/Monthly                           |
| Post Interest for Savings                                             | This job is run to post interest to savings account. It can be run monthly/quarterly/half-yearly in order to post interest to savings account. Interest could be based on 'Average Daily Balance' of Savings Account or 'Daily Balance' of the savings account.                                                                                                                                                                                                                                                                                                                                                                                                                                      | Monthly                                        |
| Recalculate Interest For Loans                                        | <p>If loan accounts enabled with Interest Recalculation and if the clients make more repayment, the new interest will be automatically calculated.</p><p>On the other hand, if the client makes less repayment or late repayment, this job is run to update the repayment schedule. </p>                                                                                                                                                                                                                                                                                                                                                                                                             | Daily                                          |
| Send Messages to SMS Gateway                                          | This job is run to send SMSs from platform to 'Message-Gateway' server.                                                                                                                                                                                                                                                                                                                                                                                                                                                                                                                                                                                                                              | Daily/Manually                                 |
| Transfer fee for Loans from Savings                                   | Some loans could have 'Installment Fee' (or due date fee) and some amount as a fee will be charged from savings account and paid for loan account. If this job is run, Fees will be transferred from savings account and will be paid for loan account if loan account is linked with savings account and Fee transfer is configured.                                                                                                                                                                                                                                                                                                                                                                | Daily                                          |
| Transfer Interest to Savings                                          | If this job is run successfully, the interest from, let's say, FDs or RDs can be transferred to Savings account. The FD or RD account must be pre-configured with Savings account                                                                                                                                                                                                                                                                                                                                                                                                                                                                                                                    | Monthly                                        |
| Update Accounting Running Balances                                    | This job once ran successfully, updates all the running balances based on the branch (office) level.                                                                                                                                                                                                                                                                                                                                                                                                                                                                                                                                                                                                 | Monthly                                        |
| Update Deposit Accounts Maturity details                              | <p>This job is specifically for Fixed Deposits and Recurring Deposits. Once this job is ran, all the FDs, RDs which are in 'ready for maturity state' will be matured and could be closed by </p><p>i) Withdrawing the matured amount.</p><p>ii) Transferring the matured amount to Savings</p><p>iii)  Reinvesting matured amount for next fixed period (in case of RDs)</p>                                                                                                                                                                                                                                                                                                                        | Monthly                                        |
| Update Email Outbound with campaign message                           | This job is run to send all emails from email server to customer mail account.                                                                                                                                                                                                                                                                                                                                                                                                                                                                                                                                                                                                                       | Daily                                          |
| Update Loan Arrears Ageing                                            | <p>This job updates all the loan accounts into 'Arrears Stage' based on Arrears definition of the loan accounts. </p><p>The loan accounts could have different arrears ageing based on the definition (It's generally defined in loan product level).</p>                                                                                                                                                                                                                                                                                                                                                                                                                                            | Daily                                          |
| Update Loan Paid in Advance                                           | The loan paid in advance immediately updates after the transaction in which loan repayment is done prior to scheduled date. This job is no longer required.                                                                                                                                                                                                                                                                                                                                                                                                                                                                                                                                          | -                                              |
| Update Loan Summary                                                   | This job updates loan summary of each loan account of the clients. However this job is no longer required as loan summary is updated instantly after each transaction.                                                                                                                                                                                                                                                                                                                                                                                                                                                                                                                               | -                                              |
| Update non-Performing Assets                                          | This job updates loan accounts to 'NPA' based on NPA definition in the loan product. Generally, first loans move into arrears and arrears ageing exceeds certain limit, they move into NPA based on the definition.                                                                                                                                                                                                                                                                                                                                                                                                                                                                                  | Daily                                          |
| Update Savings Dormant Accounts                                       | If dormant account definition is, let's say 6 months during which no transactions (deposit or withdrawal) are done on savings account, This job updates all such savings accounts to 'Dormant state'.                                                                                                                                                                                                                                                                                                                                                                                                                                                                                                | Daily                                          |
| Update SMS Outbound with Campaign Message                             | This job is run to send all messages from 'Message Gateway' server to customer mobile premises.                                                                                                                                                                                                                                                                                                                                                                                                                                                                                                                                                                                                      | Daily                                          |

### Manually run a scheduler job

Scheduler Jobs run automatically based on configuration and cron job, but we can manually run it at current time. Select the scheduler job by checking and scrolling to the bottom and click on 'Run Selected Jobs'.&#x20;

![](https://mifosforge.jira.com/wiki/download/thumbnails/67895356/runjob1.png?version=1\&modificationDate=1405394345122\&cacheVersion=1\&api=v2\&width=743)

![](https://mifosforge.jira.com/wiki/download/attachments/67895356/runjob2.png?version=1\&modificationDate=1405394365168\&cacheVersion=1\&api=v2)

### Check status of scheduler jobs

If you check the 'Current Running' column, if it's saying 'No' then the job is not in running state. It's already run or it's schedule for  next run has not yet happened.  If 'Current Running' column is saying 'Yes', the job is still in running state and we have to wait until it's finished so that we can see it's results.&#x20;

![](https://mifosforge.jira.com/wiki/download/thumbnails/67895356/st.png?version=3\&modificationDate=1528972449040\&cacheVersion=1\&api=v2\&height=250)

### Suspend a scheduler job

![](https://mifosforge.jira.com/wiki/download/thumbnails/67895356/st1.png?version=2\&modificationDate=1528972195491\&cacheVersion=1\&api=v2\&height=250)

Select the job by checking on it and then click on 'Suspend' button. Generally, this feature is used to suspend a particular job in unwanted scenarios as jobs are generally run automatically.

{% hint style="info" %}
You may also want to use visual panels to communicate related information, tips or things users need to be aware of.
{% endhint %}

Related articles

* Page:[Global Configuration](/mifosx/user-manual/for-administrators-mifos-x-platform/administration/system/global-configuration)
* Page:[Configure Maker-Checker Tasks](/mifosx/user-manual/for-administrators-mifos-x-platform/administration/system/configure-maker-checker-tasks)
* Page:[Manage Scheduler Jobs](/mifosx/user-manual/for-administrators-mifos-x-platform/administration/system/manage-scheduler-jobs)
* Page:[Manage Codes](/mifosx/user-manual/for-administrators-mifos-x-platform/administration/system/manage-codes)


# Configure Maker-Checker Tasks

The “Maker-Checker” principle requires every tasks to be completed by two people to reduce the chance of errors and misuse. One person initiates the process and the second completes it. Mifos provides a “best-practice” standard with download. Make changes to it in this section. Please note that Maker Checker may be enabled or disabled using [**Global Configuration**](/mifosx/user-manual/for-administrators-mifos-x-platform/administration/system/global-configuration)**.**

Beginning at the main screen, select [**Admin**](/mifosx/user-manual/for-administrators-mifos-x-platform/administration), then **System** from the drop-down menu. This will launch the [**System**](/mifosx/user-manual/for-administrators-mifos-x-platform/administration/system) menu.

Select **Configure Maker-Checker** **Tasks**.

![](https://mifosforge.jira.com/wiki/download/thumbnails/67895359/configure.png?version=1\&modificationDate=1552930502251\&cacheVersion=1\&api=v2\&width=1080)

#### **Edit Maker-Checker Tasks**

Once you have selected Configure Maker-Checker Tasks, a list of all available Maker-Checker tasks will be generated. The tasks currently enabled for Maker-Checker have a check mark in the box to their right.

![](https://mifosforge.jira.com/wiki/download/thumbnails/67895359/mctasks.png?version=2\&modificationDate=1405386128209\&cacheVersion=1\&api=v2\&width=743)

To add or remove a task from the Maker-Checker list, first click the blue **Edit** button at the top-right of the page. From the page you are able to check or un-check boxes based on what tasks your organization would like to use Maker-Checker for. When everything is correct, click **Submit**.

#### **Setup**

**Maker Checker Inbox**

The Maker-Checker Inbox is found among the shortcuts on the left side of the the Mifos homepage and is labeled "Checker Inbox & Tasks."&#x20;

<div align="left"><img src="https://mifosforge.jira.com/wiki/download/thumbnails/67895359/check.png?version=1&#x26;modificationDate=1552930626338&#x26;cacheVersion=1&#x26;api=v2&#x26;width=200" alt=""></div>

From your Checker inbox you may:

* Approve or Reject the completion of tasks
* Delete tasks

#### Enable Maker-Checker Global Configuration

Navigate to the **Configurations** page:

1. Click on **Admin.**
2. Select **System**.
3. Click on the **Configurations** link.

This will launch a list of all Global Configuration options, including whether **Maker-Checker** is enabled or disabled. If it is disabled the chart will read false and the box will be **green** with a small flag inside it - as seen below.

![](https://mifosforge.jira.com/wiki/download/thumbnails/67895359/mcdisabled.png?version=1\&modificationDate=1405387146781\&cacheVersion=1\&api=v2\&width=743)

To enable **Maker-Checker** click on the **green box**, when it is enabled the chart will say true and have a **red** box with an 'x' inside it - as seen below.

![](https://mifosforge.jira.com/wiki/download/thumbnails/67895359/mcenabled.png?version=1\&modificationDate=1405386983829\&cacheVersion=1\&api=v2\&width=743)

To learn more about **Configurations** please see the [**Global Configuration**](/mifosx/user-manual/for-administrators-mifos-x-platform/administration/system/global-configuration) section of this manual.


# Global Configuration

The **Configurations** page allows you to further customize the way your organization uses the Mifos system. From here several global settings are defined. These are typically set up at the initial system installation and are rarely changed. &#x20;

Beginning at the main screen, select [**Admin**](/mifosx/user-manual/for-administrators-mifos-x-platform/administration), then **System** from the drop-down menu. This will launch the [**System**](/mifosx/user-manual/for-administrators-mifos-x-platform/administration/system) menu.

Select **Configurations**.

![](https://mifosforge.jira.com/wiki/download/thumbnails/67895362/Screenshot%20from%202019-07-02%2017-16-53.png?version=2\&modificationDate=1562084497040\&cacheVersion=1\&api=v2\&width=850)

Once you have selected configurations, Mifos will display all Global Configuration options and their current status in a chart:

![](https://mifosforge.jira.com/wiki/download/thumbnails/67895362/Screenshot%20from%202019-06-05%2017-39-18.png?version=1\&modificationDate=1559752798961\&cacheVersion=1\&api=v2\&width=1000)

#### Explanation of each global configuration setting

Some global configurations are simply a Boolean setting, specifying if its true (enabled) or false (disabled). Others are numerical settings in which the value corresponds to a month of the year, number of days, etc. Please read the purpose/description closely to understand.&#x20;

| Name                                                   | Purpose/Description                                                                                                                                                                                                                                                                                         | Default  | Values |
| ------------------------------------------------------ | ----------------------------------------------------------------------------------------------------------------------------------------------------------------------------------------------------------------------------------------------------------------------------------------------------------- | -------- | ------ |
| Allow transactions on holidays                         | Determines if transactions will be permitted on holidays.                                                                                                                                                                                                                                                   | Enabled  | 0/1    |
| Allow transactions on non-working day                  | Determines if transactions will be permitted on non-working days such as weekends.                                                                                                                                                                                                                          | Enabled  | 0/1    |
| Amazon S3                                              | Determines if file and image uploads will be handled by alternative Amazon S3 cloud storage.                                                                                                                                                                                                                | Disabled | 0/1    |
| Backdate-penalties-enabled                             | Determines whether backdated penalties are applied                                                                                                                                                                                                                                                          | Enabled  | 0/1    |
| Change-EMI-if-repayment date-same-as-disbursement date | Helps in changing EMI if repayment date is same as that of disbursement date                                                                                                                                                                                                                                | Enabled  | 0/1    |
| Constraint approach for data tables                    | Determines whether the Code Value Name or the Code Value ID will be stored in the generated data table. If disabled, the Code Value Name will be stored in the generated data table. If enabled, the Code Value ID will be stored in the generated data table.                                              | Disabled | 0/1    |
| daily-tpt-limit                                        | Enabling this it will limit third party transfer to mentioned amount. Used mainly for self service user.                                                                                                                                                                                                    | Disabled |        |
| Enable-Address                                         | Helps in adding address field at the time of client creation.                                                                                                                                                                                                                                               | Disabled | 0/1    |
| Financial Year Beginning Month                         | This should be set at the database level before any savings interest is posted. Allowed values 1 - 12 (January - December). Interest posting periods are evaluated based on this configuration.                                                                                                             | Enabled  | 1 - 12 |
| Force password reset days                              | Determines if passwords expire and whether or not users will be required to reset their passwords after a certain number of days. Allowed values are 0 - 30. Values of 0 means they are not enabled and passwords will not expire.                                                                          | Disabled | 0 - 30 |
| Grace on penalty posting                               | Determines whether Moratorium functionality is permitted. If enabled, Moratorium functionality is allowed; if disabled, Moratorium functionality is not allow.                                                                                                                                              | Enabled  | 0/1    |
| Interest-charged-from-date-same-as-disbursal-date      | By enabling it, interest will be charged from the same date of disbursement date                                                                                                                                                                                                                            | Disabled | 0/1    |
| Is cache enabled                                       | Determines if caching is enabled in the platform to improve performance.                                                                                                                                                                                                                                    | Disabled | 0/1    |
| Maker-checker                                          | Determines if the maker-checker system will be used.                                                                                                                                                                                                                                                        | Disabled | 0/1    |
| max-clients-in-group                                   | Determines the maximum number of clients that can be added to the group.                                                                                                                                                                                                                                    | Disabled |        |
| meetings-mandatory-for-jlg-loans                       | Enabling this makes meetings mandatory for JLG loans                                                                                                                                                                                                                                                        | Disabled | 0/1    |
| min-clients-in-group                                   | Determines the minimum number of clients that can be added to the group.                                                                                                                                                                                                                                    | Disabled |        |
| office-opening-balances-Contra-account                 | Enabling this helps in setting up opening GL balances for a given organisation.                                                                                                                                                                                                                             | Disabled | 0/1    |
| office-specific-products-enabled                       | Helps in enabling entity to entity mapping for a given organisation                                                                                                                                                                                                                                         | Disabled | 0/1    |
| Organization start Date                                | On enabling and providing organization start date, all the calculations will effect from this date. It's recommended to enable this entity if you want to use accounting module. You could set the start date from the database under table "c\_configuration" and provide start date under date value row. | Disabled | 0/1    |
| payment-type-applicable-for-disbursement-charges       | Helps in enabling payment types for charges.                                                                                                                                                                                                                                                                | Disabled | 0/1    |
| Penalty wait period                                    | Defined in terms of days. Defines how many days overdue before an overdue penalty will be charged.                                                                                                                                                                                                          | Enabled  | 0 - 30 |
| Reschedule future repayments                           | If enabled, reschedules repayments which fall on a non-working day to configured repayment [rescheduling rule](https://demo.openmf.org/api-docs/apiLive.htm#nw_repayment_schedule_rule).                                                                                                                    | Disabled | 0/1    |
| Reschedule repayments on holidays                      | Determines if repayments that occur on holidays will be rescheduled.                                                                                                                                                                                                                                        | Enabled  | 0/1    |
| restrict-products-to-user-office                       | Helps in restricting products for users in a given office                                                                                                                                                                                                                                                   | Disabled | 0/1    |
| rounding-mode                                          | <p>Enabling this rounding of amount is performed. Values that can be given are:</p><p>0 - UP<br>1 - DOWN<br>2 - CEILING<br>3 - FLOOR<br>4 - HALF\_UP<br>5 - HALF\_DOWN<br>6 - HALF\_EVEN</p>                                                                                                                | Enabled  | 0 - 6  |
| Savings Interest Posting Current Period End            | Recommended to be changed only once during the start of production. When set as false (default), interest will be posted on the first date of the next period. If set as true, interest will be posted on last date of current period. There is no difference in the interest amount posted.                | Disabled | 0/1    |
| skip-repayment-on-first-day-of-month                   | Enabling this skips the repayment date if the repayment is scheduled on the first day of the month                                                                                                                                                                                                          | Disabled | 0 - 31 |

#### Enable or Disable a Global Configuration Setting

Once you have navigated to the **Configurations** page, you can easily enable or disable your organization's Global Configuration settings. When a setting is **Enabled** it will have "True" in the **Enabled?** column.&#x20;

To disable a setting click on the **Red Square** with a **'Disable'** on it. The setting will be disabled.

<div align="left"><img src="https://mifosforge.jira.com/wiki/download/attachments/67895362/4.png?version=1&#x26;modificationDate=1479281609631&#x26;cacheVersion=1&#x26;api=v2" alt=""></div>

When a setting is **Disabled** it will have "False" in the **Enabled?** column.&#x20;

To enable a setting click on the **Blue Square** with a **Enable** written on it. The setting will be enabled.

<div align="left"><img src="https://mifosforge.jira.com/wiki/download/attachments/67895362/5.png?version=1&#x26;modificationDate=1479281728342&#x26;cacheVersion=1&#x26;api=v2" alt=""></div>

**Note:** There is no Submit or Save for this screen. When satisfied with the settings, you may navigate to another page.


# Manage Hooks

Hooks are a mechanism to trigger custom code on the occurrence of events. In other words, Hooks are notifications sent to any external application (which can be accessed through a web address) from Mifos X in the format the external application wants.  Each template during hook creation represents custom behavior on what actions should be taken on the triggering of a registered event for a hook. The action taken might be firing an HTTP request to another server or executing an internal code.

&#x20;In order for Mifos X to send webhook payloads, your server needs to be accessible from the Internet. Mifos X will send along a few HTTP headers to differentiate between event types.

X-Mifos-Entity - The entity type that was triggered. \
X-Mifos-Action - The action triggered on the entity type. \
X-Mifos-Platform-TenantId - The tenant which experienced the event.

You can create two types of Hooks using **Hook Templates**.

* &#x20;Web
* &#x20;SMS Bridge

#### Create a Web Hook

1. Go to Admin >> System and click on Manage Hooks.

&#x20;    2\. Click on 'Manage Hooks' and then click on '+Create a Hook' to see  the following window. (Here, select Hook Template as "Web" from drop-down menu)

![](https://mifosforge.jira.com/wiki/download/thumbnails/82706605/w4.jpg?version=2\&modificationDate=1415605609268\&cacheVersion=1\&api=v2\&width=900)

&#x20;  3\. "Create a Web Hook" Fields:

| SI.No | Field Name    | Drop-Down Parameters                                                                                                                                                                                                                                                                                                         | Description                                                                                                                                                                                                                                                                                        |
| ----- | ------------- | ---------------------------------------------------------------------------------------------------------------------------------------------------------------------------------------------------------------------------------------------------------------------------------------------------------------------------- | -------------------------------------------------------------------------------------------------------------------------------------------------------------------------------------------------------------------------------------------------------------------------------------------------- |
| 1     | Hook template | <p></p><ul><li>Web</li><li>SMS Bridge</li></ul>                                                                                                                                                                                                                                                                              | Select the 'Web' hook in this case.                                                                                                                                                                                                                                                                |
| 2     | Display Name  | None                                                                                                                                                                                                                                                                                                                         | The name of the template that is being called.                                                                                                                                                                                                                                                     |
| 3     | Active        | None                                                                                                                                                                                                                                                                                                                         | Please Check it to trigger the hook.                                                                                                                                                                                                                                                               |
| 4     | Content Type  | None                                                                                                                                                                                                                                                                                                                         | The format in which the external application is expecting the notifications to come in. JSON ([application/json](http://en.wikipedia.org/wiki/JSON#Data_types.2C_syntax_and_example)) or FORM ([application/x-www-form-urlencoded](http://www.w3.org/TR/html401/interact/forms.html#h-17.13.4.1)). |
| 5     | PayLoad URL   | None                                                                                                                                                                                                                                                                                                                         | The web address at which the external application is expecting notifications to come in from Mifos X.                                                                                                                                                                                              |
| 6     | Events        | <p></p><ul><li>Account Transfer</li><li>Accounting</li><li>Authorization</li><li>Configuration</li><li>Data table</li><li>Jobs</li><li>Organization</li><li>Portfolio</li><li>Portfolio\_Center</li><li>Portfolio\_Group</li><li>Survey</li><li>Transaction Loan</li><li>Transaction Savings</li><li>XBRL Mapping.</li></ul> | You can select any one of the event for which the hook is triggered for.                                                                                                                                                                                                                           |
| 7     | Select Entity |                                                                                                                                                                                                                                                                                                                              | For each selected event (Example: Portfolio), you have to select the entity from drop-down list like, Loan, Center, Client etc (for Portfolio event)                                                                                                                                               |
| 8     | Select Action |                                                                                                                                                                                                                                                                                                                              | For each selected Event and Entity, you have to select the specific action from the drop-down list.                                                                                                                                                                                                |

&#x20;   4\. Click on "Submit" button to create a 'Web' Hook.&#x20;

#### Create an SMS Bridge Hook

**Note :**&#x69;)  You need to clone <https://github.com/mgeiss/mifos-twilio-bridge> and do a gradlew bootRun to start the application which will act as a bridge between Mifos X and Twilio.

&#x20;        ii) Your mobile number should be registered to twilio. (See the link for more information: <http://www.twilio.com/help/faq/phone-numbers> )

1. Go to Admin >> System >> Manage Hooks.
2. &#x20;Click on 'Manage Hooks' and then click on '+Create a Hook' to see  the following window. (Here, select Hook Template as "SMS Bridge" from drop-down menu).

![](https://mifosforge.jira.com/wiki/download/thumbnails/82706605/w3.jpg?version=1\&modificationDate=1415605431176\&cacheVersion=1\&api=v2\&width=900)

'   3. Create SMS Bridge Hook' Fields:

| SI.No | Field Name              | Drop-Down Parameters                                                                                                                                                                                                                                                                                                        | Description                                                                                                                                                                                                                                                                              |
| ----- | ----------------------- | --------------------------------------------------------------------------------------------------------------------------------------------------------------------------------------------------------------------------------------------------------------------------------------------------------------------------- | ---------------------------------------------------------------------------------------------------------------------------------------------------------------------------------------------------------------------------------------------------------------------------------------- |
| 1     | Hook Template           | <p></p><ul><li>Web</li><li>SMS Bridge</li></ul>                                                                                                                                                                                                                                                                             | Select the 'SMS Bridge' hook in this case.                                                                                                                                                                                                                                               |
| 2     | Display Name            | None                                                                                                                                                                                                                                                                                                                        | The name of the template that is being called.                                                                                                                                                                                                                                           |
| 3     | Active                  | None                                                                                                                                                                                                                                                                                                                        | Please Check it to trigger the hook.                                                                                                                                                                                                                                                     |
| 4     | Payload URL             | None                                                                                                                                                                                                                                                                                                                        | <http://localhost:9191/modules/sms>, Provide this as Payload URL only for "SMS Bridge", not for "Web" hook template.                                                                                                                                                                     |
| 5     | Phone Number            | None                                                                                                                                                                                                                                                                                                                        | This field has to be the phone number with which the person registered for the SMS service provider (Example: Twilio) and not some random number.                                                                                                                                        |
| 6     | SMS Provider            | None                                                                                                                                                                                                                                                                                                                        | The only value this field supports right now is Twilio. (In the future, it can be other providers as well).                                                                                                                                                                              |
| 7     | SMS Provider Account Id | None                                                                                                                                                                                                                                                                                                                        | It is obtained from the SMS Provider website when you register there. Example:- When you pay and register for an account in Twilio.                                                                                                                                                      |
| 8     | SMS Provider Token      | None                                                                                                                                                                                                                                                                                                                        | SMS Provider Token is the token generated by the [bridge ](https://github.com/mgeiss/mifos-twilio-bridge)(required to communicate with the SMS provider) on starting the application.                                                                                                    |
| 9     | Events                  | <p></p><ul><li>Account Transfer</li><li>Accounting</li><li>Authorization</li><li>Configuration</li><li>Datatable</li><li>Jobs</li><li>Organization</li><li>Portfolio</li><li>Portfolio\_Center</li><li>Portfolio\_Group</li><li>Survey</li><li>Transaction Loan</li><li>Transaction Savings</li><li>XBRL Mapping.</li></ul> | You can select any one of the event for which the hook is triggered for. (Note: The only 2 events in Mifos X currently supported by the bridge application are CREATE CLIENT and REPAYMENT LOAN. The bridge application won't react to other events registered for the SMS Bridge Hook.) |
| 10    | Select Entity           |                                                                                                                                                                                                                                                                                                                             | For each selected event, (Example: Portfolio), you have to select the entity from drop-down list like, Loan, Center, Client, etc ( for Portfolio event)                                                                                                                                  |
| 11    | Select Action           |                                                                                                                                                                                                                                                                                                                             | For each selected Event and Entity, you have to select the specific action from the drop-down list.                                                                                                                                                                                      |

&#x20;  4\. Click on 'Submit' button to create a "SMS Bridge" hook.

**Associate a UGD template with an SMS Bridge Hook**: [Click Here](http://youtu.be/JxLNy2W8I2U) to watch the tutorial video.

**Note:** i. Do not create an SMS Bridge hook with your own mobile number if you have not registered for Twilio.&#x20;

&#x20;         ii. If you create multiple clients in Mifos X with the same mobile number for testing (by deleting the client and creating a new one), that might not be supported by the bridge application because of unique mobile number constraints.

&#x20;         iii. If you somehow lose/clear the database contents for bridge application, it is better to delete the hook in Mifos X and create a new one.


# Steps for creating sms bridge

1: Go to **URL** on internet browser:- <https://github.com/mgeiss/mifos-twilio-bridge>.

&#x20;   \>> Click on copy to clipboard i.e <https://github.com/mgeiss/mifos-twilio-bridge.git>.

2: On your **system,** Create a folder as "sms" path example: C:\sms.

3: Open **gitbash** on your system, then go to path C:\sms and clone url i.e:- &#x20;

&#x20;  ***git clone <https://github.com/mgeiss/mifos-twilio-bridge.git>.***

4: Go to the path **c:/sms/mifos-twilio-bridge,** through **git bash.** Then execute the following in git bash:- &#x20;

&#x20;    **gradlew bootrun.**

5: Signup for **Twilio** account:- <https://www.twilio.com/>.

6: Go to <https://www.twilio.com/>, sign in >>Account setting, then copy necessary details as shown in image below:-&#x20;

<div align="left"><img src="https://mifosforge.jira.com/wiki/download/thumbnails/111673356/12.png?version=1&#x26;modificationDate=1452607585533&#x26;cacheVersion=1&#x26;api=v2&#x26;width=600" alt=""></div>

7: Go to Mifos X >>Admin>>System>>Manage hooks>>Create hook, then update necessary fields as shown in the example below:-&#x20;

&#x20;   **Hook template** - Select **SMS Bridge.**

&#x20;   **Display Name** - Provide any display name.

&#x20;   **Active** - Check the check box to make it active.&#x20;

&#x20;   **Payload URL** - **<http://localhost:9191/modules/sms>**

&#x20;   **Phone Number -** Provide the same number, which was updated in twilio at the time of signup.

&#x20;   **SMS Provider -** Provide name of example: twilio.

&#x20;   **SMS Provider Account Id -** Paste above copied account id as shown in the step 5.&#x20;

&#x20;   **SMS Provider Token -** Paste above mentioned token id as shown in the step 5.&#x20;

&#x20;   **Events - Select Grouping -** Example: Portfolio.&#x20;

&#x20;   **Events - Select entity -** Example: Client.

&#x20;   **Events - Select action -** Example: Create.&#x20;

&#x20;Then click on S**ubmit** button.&#x20;

8\. Now you can login into mifos x and create a new client by providing a phone number, the sms gets sent.&#x20;

**Note:-**&#x20;

a) Provide example is for using it on local system only. If you are looking for any other instance type like cloud, you should update the configurations in application.yml respectively.

b) If it is a free twilio account, you need to provide senders sms phone numbers.&#x20;

Related articles

* Page:[Steps for creating sms bridge](/mifosx/user-manual/for-administrators-mifos-x-platform/administration/system/manage-hooks/steps-for-creating-sms-bridge)


# Account Number Preferences

Account number preferences are used to describe custom formats for account numbers associated with Client, Loan and Savings accounts. This enables an organization to easily categorize or differentiate just by account number with respect to the prefixed Office name, Type or by product short name respectively.

### **Step 1:**&#x20;

Beginning at the main screen, select [**Admin**](/mifosx/user-manual/for-administrators-mifos-x-platform/administration), then **System** from the drop-down menu. This will launch the [**System**](/mifosx/user-manual/for-administrators-mifos-x-platform/administration/system) menu.

Select **Account Number Preferences**.

![](https://mifosforge.jira.com/wiki/download/thumbnails/85623191/Screenshot%20from%202019-06-06%2020-35-14.png?version=1\&modificationDate=1559851850610\&cacheVersion=1\&api=v2\&width=850)

This will launch the Account Number Preferences page as shown below:

![](https://mifosforge.jira.com/wiki/download/thumbnails/85623191/Screenshot%20from%202019-06-06%2022-07-08.png?version=1\&modificationDate=1559855334154\&cacheVersion=1\&api=v2\&width=850)

### **Step 2:**

To start adding preferences, Click on  ![](https://mifosforge.jira.com/wiki/download/thumbnails/85623191/8.png?version=1\&modificationDate=1420209618197\&cacheVersion=1\&api=v2\&width=100)

**Creating Preferences for Client Account Number**

For **Client** (Select Account Type)**,** Prefix can be added for: "**Client Type**" & "**Office Name**" (Select Prefix Field) then click on **submit**

<div align="left"><img src="https://mifosforge.jira.com/wiki/download/thumbnails/85623191/ap.png?version=7&#x26;modificationDate=1420198431777&#x26;cacheVersion=1&#x26;api=v2&#x26;width=550" alt=""></div>

**Prefix Field as "CLIENT\_TYPE"** - Depending upon the organization needs, client can be categorized using Client type in Mifos.

<div align="left"><img src="https://mifosforge.jira.com/wiki/download/thumbnails/85623191/okoko.png?version=3&#x26;modificationDate=1420266026614&#x26;cacheVersion=1&#x26;api=v2&#x26;width=300" alt=""></div>

### **Step 3:**&#x20;

To define the Client type's :

Go to Admin>>System>>Manage Codes>>ClientType>> then Add Code Values.

![](https://mifosforge.jira.com/wiki/download/thumbnails/85623191/ijihn.png?version=2\&modificationDate=1420268958910\&cacheVersion=1\&api=v2\&height=250)

### **Step 4:**

While creating a client, defined Client types will be available for selection.&#x20;

<div align="left"><img src="https://mifosforge.jira.com/wiki/download/thumbnails/85623191/uuu.png?version=2&#x26;modificationDate=1420269282415&#x26;cacheVersion=1&#x26;api=v2&#x26;height=400" alt=""></div>

Here for example,

Client: **Anna White**'s client type is "**General**" The client account number is generated as "**General0000000010**" instead of "0000000010"

![](https://mifosforge.jira.com/wiki/download/attachments/85623191/12112.png?version=1\&modificationDate=1420269997374\&cacheVersion=1\&api=v2)

**Prefix Field as** "**Office Name**" - Office name will be prefixed for Loan account number

For Example -&#x20;

Client a): **Daniel Fernandes** associated office is "**Church street BO** -" The client account number will be generated as "**Church street BO -0000000009**" instead of "0000000009"

Client b): **John Smith** associated office is "**11th street BO** -" The client account number will be generated as "**11th street BO -0000000008**" instead of "0000000008"

![](https://mifosforge.jira.com/wiki/download/thumbnails/85623191/121.png?version=2\&modificationDate=1420384571918\&cacheVersion=1\&api=v2\&height=400)

**Creating Preferences for Loan Account Number**

In the same way, Prefix can be added

* For **Loan** (Select Account Type)**,** :

&#x20;         "**Loan Product Short Name**" - Loan product short name will be prefixed for Loan account number.&#x20;

&#x20;         & "**Office Name**" - Office name will be prefixed for Loan account number (Select Prefix Field)  then click on **submit**.

**Creating Preferences for Savings Account Number**

In the same way, Prefix can be added

* For **Savings** (Select Account Type)**,** :

&#x20;        "**Savings Product Short Name**" - Savings product short name will be prefixed for savings account number.&#x20;

&#x20;        & "**Office Name**" - Office name will be prefixed for Savings account number (Select Prefix Field) then click on **submit**.

Note: One can only configure one prefix for each account type with respect to the Client, Loan & Savings&#x20;

Related articles

* Page:[Overdraft account](/mifosx/user-manual/for-operational-users-mifos-x-web-app/accounts-and-transactions/overdraft-account)
* Page:[How to create overdraft account (Draft)](/mifosx/user-manual/for-operational-users-mifos-x-web-app/accounts-and-transactions/deposit-accounts/mifos-x-saving-accounts/how-to-create-overdraft-account-draft)
* Page:[Account Number Preferences](/mifosx/user-manual/for-administrators-mifos-x-platform/administration/system/account-number-preferences)
* Page:[Password preferences](/mifosx/user-manual/for-administrators-mifos-x-platform/administration/organization/password-preferences)


# Entity To Entity Mapping

Now using "Entity to entity mapping", one can restrict accessing the products with respect to Offices or Roles.

Beginning at the main screen, select **Admin,** then **System** from the drop down menu. This will launch the **System** menu.

Select **Entity To Entity Mapping** to set the preferences.&#x20;

![](https://mifosforge.jira.com/wiki/download/thumbnails/92504226/Screenshot%20from%202019-06-07%2005-38-55.png?version=1\&modificationDate=1559882468455\&cacheVersion=1\&api=v2\&width=850)

### Offices --> Loan Products&#x20;

![](https://mifosforge.jira.com/wiki/download/thumbnails/92504226/2.png?version=1\&modificationDate=1431000180896\&cacheVersion=1\&api=v2\&width=700)

Setting up of Office access to loan products:

1\) Click on "**Office --> Loan Products**": Office access to loan products page would be displayed.&#x20;

2\) Click on "**Filter**": This displays the defined Office access to loan products. Then "Add" would be displayed.&#x20;

3\) Click on "**Add**": On clicking the Add button, it will display a page to Add New Entity Mapping as shown below.          &#x20;

Here, i) Need to select Office for which loan products should be accessed.                  &#x20;

&#x20;         ii) Need to select the loan product for which selected office can be accessed.                  &#x20;

&#x20;          iii) This is an optional field, Provided start date will be the effective access date for the mapped products.                  &#x20;

&#x20;          iv) This is an optional field, Provided end date will be the ending date of the provided restricted access.&#x20;

Then click on **Submit.** Now clicking on the Filter>>search button,  you would be able to see added entity mappings.&#x20;

<div align="left"><img src="https://mifosforge.jira.com/wiki/download/thumbnails/92504226/4.png?version=1&#x26;modificationDate=1431071460713&#x26;cacheVersion=1&#x26;api=v2&#x26;width=589" alt=""></div>

### Offices --> Savings Products&#x20;

![](https://mifosforge.jira.com/wiki/download/thumbnails/92504226/5.png?version=1\&modificationDate=1431074972027\&cacheVersion=1\&api=v2\&width=650)

Setting up of Office access to savings products:

1\) Click on "**Office --> Savings Products**": Office access to savings products page would be displayed.&#x20;

2\) Click on "**Filter**": This displays the defined Office access to savings products. Then "Add" would be displayed.&#x20;

3\) Click on "**Add**": On clicking the Add button, it will display a page to Add New Entity Mapping as shown below.          &#x20;

Here, i) Need to select Office for which savings products should be accessed.                    &#x20;

ii) Need to select the savings product for which selected office can be accessed.                    &#x20;

iii) This is an optional field, Provided start date will be the effective access date for the mapped products.                    &#x20;

iv) This is an optional field, Provided end date will be the ending date of the provided restricted access. Then click on **Submit.** Now clicking on the Filter>>search button, you would be able to see added entity mappings.&#x20;

![](https://mifosforge.jira.com/wiki/download/thumbnails/92504226/6.png?version=1\&modificationDate=1431075217053\&cacheVersion=1\&api=v2\&width=634)

### Offices --> Charges

![](https://mifosforge.jira.com/wiki/download/thumbnails/92504226/7.png?version=1\&modificationDate=1431075448053\&cacheVersion=1\&api=v2\&width=650)

Setting up of Office access to charges:

1\) Click on "**Office --> charges**": Office access to charges page would be displayed.&#x20;

2\) Click on "**Filter**": This displays the defined Office access to charges. Then "Add" would be displayed.

&#x20;3\) Click on "**Add**": On clicking the Add button, it will display a page to Add New Entity Mapping as shown below.          &#x20;

Here, i) Need to select Office for which charges should be accessed.                    &#x20;

ii) Need to select the charges for which selected office can be accessed.                    &#x20;

iii) This is an optional field, Provided start date will be the effective access date for the mapped charges.                    &#x20;

iv) This is an optional field, Provided end date will be the ending date of the provided restricted access.&#x20;

Then click on **Submit.** Now clicking on the Filter>>search button, you would be able to see added entity mappings.&#x20;

![](https://mifosforge.jira.com/wiki/download/thumbnails/92504226/8.png?version=1\&modificationDate=1431075670161\&cacheVersion=1\&api=v2\&width=627)

### Roles --> Loan products&#x20;

![](https://mifosforge.jira.com/wiki/download/thumbnails/92504226/9.png?version=1\&modificationDate=1431076205355\&cacheVersion=1\&api=v2\&width=650)

Setting up of Role access to Loan products:

1\) Click on "**Roles --> Loan products**": Role access to loan products page would be displayed.&#x20;

2\) Click on "**Filter**": This displays the defined Role access to loan products. Then "Add" would be displayed.&#x20;

3\) Click on "**Add**": On clicking the Add button, it will display a page to Add New Entity Mapping as shown below.          &#x20;

Here, i) Need to select Role for which loan products should be accessed.                   &#x20;

ii) Need to select the loan products for which the selected role can be accessed.                    &#x20;

iii) This is an optional field, Provided start date will be the effective access date for the mapped charges.                    &#x20;

iv) This is an optional field, Provided end date will be the ending date of the provided restricted access.&#x20;

Then click on **Submit.** Now clicking on the Filter>>search button, you would be able to see added entity mappings.&#x20;

![](https://mifosforge.jira.com/wiki/download/thumbnails/92504226/10.png?version=1\&modificationDate=1431078005760\&cacheVersion=1\&api=v2\&width=631)

### Roles --> Savings products&#x20;

![](https://mifosforge.jira.com/wiki/download/thumbnails/92504226/11.png?version=1\&modificationDate=1431078780444\&cacheVersion=1\&api=v2\&width=650)

Setting up of Role access to Savings products:

1\) Click on "**Roles --> Savings products**": Role access to savings products page would be displayed.

&#x20;2\) Click on "**Filter**": This displays the defined Role access to savings products. Then "Add" would be displayed.&#x20;

3\) Click on "**Add**": On clicking the Add button, it will display a page to Add New Entity Mapping as shown below.          &#x20;

Here, i) Need to select Role for which savings products should be accessed.                    &#x20;

ii) Need to select the savings products for which selected role can be accessed.                    &#x20;

iii) This is an optional field, Provided start date will be the effective access date for the mapped charges.                    &#x20;

iv) This is an optional field, Provided end date will be the ending date of the provided restricted access.&#x20;

Then click on **Submit.** Now clicking on the Filter>>search button, you would be able to see added entity mappings.&#x20;

![](https://mifosforge.jira.com/wiki/download/thumbnails/92504226/12.png?version=1\&modificationDate=1431078939141\&cacheVersion=1\&api=v2\&width=633)

### Editing or Deleting - Created Entity&#x20;

In the page shown in the example below, you can Edit or Delete as mentioned below:&#x20;

1\) Click on the required Entity to entity mapping.&#x20;

2\) Click on Filter button, Created entity mapping would be displayed.&#x20;

3\) To **Edit** - Click on "**Edit"** button, Edit page would be displayed wherein you can make any necessary modification.&#x20;

4\) To **Delete** - Click on "**X**" button, It will ask for the delete confirmation, by clicking on the yes button it gets deleted.&#x20;

![](https://mifosforge.jira.com/wiki/download/thumbnails/92504226/13.png?version=1\&modificationDate=1431079863025\&cacheVersion=1\&api=v2\&width=700)

{% hint style="info" %}
To enable this feature, you need to go to Admin>>System>>Configuration and enable:-

office-specific-products-enable, only then you would be able to restrict office specific products.

restrict-products-to-user-office, only then you would be able to restrict products to users.
{% endhint %}

Related articles

* Page:[Accounts linked to Financial Activities](/mifosx/user-manual/for-administrators-mifos-x-platform/accounting/accounts-linked-to-financial-activities)
* Page:[Entity To Entity Mapping](/mifosx/user-manual/for-administrators-mifos-x-platform/administration/system/entity-to-entity-mapping)
* Page:[Fund Mapping](/mifosx/user-manual/for-administrators-mifos-x-platform/administration/organization/fund-mapping)
* Page:[Failed Upgrade Tips Mifos X](https://mifosforge.jira.com/wiki/spaces/docs/pages/97615907/Failed+Upgrade+Tips+Mifos+X)


# External Services

External Services Configuration related to set up supported configurations for third party services like Amazon S3 and SMTP:

Beginning at the main screen, select **Admin,** then **System** from the drop down menu. This will launch the **System** menu.

Select **External Services** to configure.&#x20;

![](https://mifosforge.jira.com/wiki/download/thumbnails/102039554/Screenshot%20from%202019-06-07%2005-52-39.png?version=1\&modificationDate=1559883283523\&cacheVersion=1\&api=v2\&width=850)

### **S3 Amazon Service Configuration**&#x20;

<div align="left"><img src="https://mifosforge.jira.com/wiki/download/thumbnails/102039554/21.png?version=2&#x26;modificationDate=1442213390771&#x26;cacheVersion=1&#x26;api=v2&#x26;width=516" alt=""></div>

Enables configuring S3 Amazon services.

### **Email Service Configuration**&#x20;

<div align="left"><img src="https://mifosforge.jira.com/wiki/download/thumbnails/102039554/22.png?version=1&#x26;modificationDate=1442213344634&#x26;cacheVersion=1&#x26;api=v2&#x26;width=533" alt=""></div>

Enables configuring Email services. This is interlinked to the User - Auto generate password, whenever the email is provided at user page. It sends the mail using these set configurations.

![](https://mifosforge.jira.com/wiki/download/thumbnails/102039554/23.png?version=1\&modificationDate=1442218306320\&cacheVersion=1\&api=v2\&width=952)

Provide **User name, Password, host, port number & useTLS** details and click on save button.&#x20;

Related articles

* Page:[External Services](/mifosx/user-manual/for-administrators-mifos-x-platform/administration/system/entity-to-entity-mapping/external-services)


# Products

### About Products

A product is a financial offering by a financial institution to its clients. Products are set up once and are then available to qualifying clients (individuals, groups, and centers).

Financial institutions can set up and configure:

* [Loan Products](/mifosx/user-manual/for-administrators-mifos-x-platform/administration/products/loan-products)
* Deposit Products:
  * [Savings Products](/mifosx/user-manual/for-administrators-mifos-x-platform/administration/products/untitled) (current and saving accounts)
  * [Share products](/mifosx/user-manual/for-administrators-mifos-x-platform/administration/products/share-products)
  * Term deposit products
    * [Fixed Deposit Products](/mifosx/user-manual/for-administrators-mifos-x-platform/administration/products/fixed-deposit-products)
    * [Recurring Deposit](/mifosx/user-manual/for-administrators-mifos-x-platform/administration/products/recurring-deposit)

Each product may have one or more associated charges (i.e. fees and penalties). These charges need to be defined before they can be associated with a product. To learn about charges see [Charges](/mifosx/user-manual/for-administrators-mifos-x-platform/administration/products/charges).

Your system administrator will define which users are able to define products, charges and product mix.<br>


# Loan Products

Loan products define the rules, default settings, and constraints for a financial institution's lending offerings. A loan product provides a template for multiple loan accounts for the financial institution's clients.

The information required to set up a loan product includes:

* Identifying or descriptive information&#x20;
* Currency information&#x20;
* Terms
* Settings
* Tranche
* Charges
* Accounting

Beginning at the main screen, select [**Admin**](/mifosx/user-manual/for-administrators-mifos-x-platform/administration), then **Products** from the drop-down menu. This will launch the **Products** menu.

Select **Loan Products.**&#x20;

![](https://mifosforge.jira.com/wiki/download/thumbnails/102039585/Screenshot%20from%202019-06-11%2015-08-43.png?version=1\&modificationDate=1560262578283\&cacheVersion=1\&api=v2\&width=850)

The Loan Products page will be displayed as shown below;

![](https://mifosforge.jira.com/wiki/download/thumbnails/102039585/Screenshot%20from%202019-06-07%2006-01-41.png?version=1\&modificationDate=1559883725060\&cacheVersion=1\&api=v2\&width=850)

#### Click on the blue "Create Loan Product" shown on the image above.

### **Details**&#x20;

![](https://mifosforge.jira.com/wiki/download/thumbnails/102039585/32.png?version=1\&modificationDate=1442232040310\&cacheVersion=1\&api=v2\&width=953)

Note: All red colored asterisk mark are mandatory fields.

Please refer to the above **Details - Image**, Mentioned details below are updated with respect to the provided fields numbers.  &#x20;

1 - Provide **Loan Product name** .(Mandatory)&#x20;

2 - Provide **Short name**. (Mandatory)&#x20;

&#x20;3 - Provide description of this product.          &#x20;

4 - Select Fund source. Need to have defined required funds: [Manage Funds](/mifosx/user-manual/for-administrators-mifos-x-platform/administration/organization/manage-funds).          &#x20;

5 - Provide Loan product Start date.         &#x20;

6 - Provide Loan product Close date. Note - Loan product cannot be used after this date.          &#x20;

7 - On checking the check box, it captures the number of loans taken by the customer.

### **Currency**&#x20;

![](https://mifosforge.jira.com/wiki/download/thumbnails/102039585/40.png?version=3\&modificationDate=1442316475876\&cacheVersion=1\&api=v2\&width=960)

* 8 - Select **Currency** (Mandatory). Need to have defined required currency: [Currency Configuration](/mifosx/user-manual/for-administrators-mifos-x-platform/administration/organization/currency-configuration)
* 9 - Provide **Decimal places** (Mandatory).&#x20;
* 10 - Provide **Currency in multiples of** (Mandatory). This is to provide total amount rounding off. For example: 10, so Total amount gets rounded off to 10's.&#x20;
* 11 - Provide I**nstallment in multiples of** (Mandatory). This is to provide installment rounding off. For example: 10, so Installment amount gets rounded off to 10's.&#x20;

### **Terms**

![](https://mifosforge.jira.com/wiki/download/thumbnails/102039585/41.png?version=1\&modificationDate=1442317490666\&cacheVersion=1\&api=v2\&width=905)

**Section A: Defining Loan term for normal loan product.** Note: - If your loan product is based on Loan cycle - Jump to **Section B.**

* 12 - Provide **Principal** (Loan) amount, Default field is a mandatory field. Minimum and Maximum are optional fields wherein the loan amount cannot be provided beyond the min & max value.

&#x20;          Example: Minimum: 5000, Default: 10000 & Maximum: 15000. At the loan account level default values will be shown.&#x20;

* 13 - Provide **Number of repayments**, Default field is a mandatory field. Minimum and Maximum are optional fields wherein the number of repayments cannot be provided beyond the min & max value.

&#x20;          Example: Minimum: 5, Default: 10 & Maximum: 15. At the loan account level default values will be shown.&#x20;

* 14 - Provide **Rate of Interest**, Default field is a mandatory field. Minimum and Maximum are optional fields wherein the rate of interest cannot be provided beyond the min & max value.

&#x20;         Example: Minimum: 18, Default: 22 & Maximum: 24. At the loan account level default values will be shown.&#x20;

* 15 - Select **Per month** or **Per year** for Rate of Interest.&#x20;

&#x20;         Example: Per year.&#x20;

* 16 - Provide **Repaid Every** value

&#x20;         Example: 1&#x20;

* 17 - Select **Day** or **Week** or **Bi-weekly** or **Month**&#x20;

&#x20;         Example: Week

18 - This is an optional field. This could be used in case you want to set "Minimum days between disbursal and first repayment date".Example: 10 (Days), So if the loan disbursement is on January 1st and normal expected first repayment is on 8th January,If you are providing 10 days as minimum days between disbursal and first repayment date, the first repayment will happen on 11th Jan. Or**Section B:** If your loan product is based on Loan cycle.&#x20;

![](https://mifosforge.jira.com/wiki/download/thumbnails/102039585/42.png?version=1\&modificationDate=1442324747381\&cacheVersion=1\&api=v2\&width=912)

19 - Check the check box to enable "**Terms vary based on loan cycle**".&#x20;

20 - Provide values in principal section. Click on Add button to define Principal by loan cycle.In the image above:&#x20;

21 - Equals - Loan cycle as 1 with Principal Default amount of 10000. (Had there been one more cycle, it could be defined as Equals - loan cycle as 2 with principal amount)&#x20;

22 - Greater than -  Loan cycle as 1 with Principal Default amount of 20000. Greater than should always be used for the last cycle.&#x20;

23 - Define Number of repayments by loan cycles in the same way. Then continue defining other steps from Section A - 14 to 18.&#x20;

### **Settings**

![](https://mifosforge.jira.com/wiki/download/thumbnails/102039585/43.png?version=1\&modificationDate=1442821901586\&cacheVersion=1\&api=v2\&width=902)

* 24 - Select **Amortization**: Depending upon the type of amortization you practice, select one.  Equal Installments - All repayment amounts will be equal but the principal and interest amounts will vary with each repayment.            Or Equal Principal Payments - All principal amounts will be equal but the repayment and interest amounts will vary with each repayment.
* 25 - Select **Interest method**: Depending upon the type of interest method you practice, select one.Flat, For formula reference - [Flat interest calculation](/mifosx/user-manual/for-administrators-mifos-x-platform/administration/products/loan-products/loan-product-fields/flat-interest-calculation) Or Declining Balance, For formula reference - [Declining Balance Interest Calculation](/mifosx/user-manual/for-administrators-mifos-x-platform/administration/products/loan-products/loan-product-fields/declining-balance-interest-calculation)
* 26 - Select **Repayment strategy**: The repayment strategy determines the sequence in which each of the components is paid. For more information on Repayment strategies: [Loan Product Fields](/mifosx/user-manual/for-administrators-mifos-x-platform/administration/products/loan-products/loan-product-fields) - Repayment strategy.&#x20;
* 27 - Select **Interest calculation period**: Daily - Will Calculate the interest on DAILY basis example: Month of February has 28 days and it will calculate interest for 28 days, Or SAME AS REPAYMENT PERIOD - it calculates for the month, that is, 30 days.         &#x20;
* 28 - Provide Moratorium (Optional):&#x20;
* * On Principal Payment is '6' and the client's Repayment Frequency is every month, then for the first six months, the client has to pay Interest only and after six months the client starts paying principal amount too.
  * On Interest Payment is '6' and the client's Repayment Frequency is every month, then for the first six months, the client has to pay Principal only and after six months the client starts paying Interest amount too.
  * 29 - Provide Interest free period (Optional): If the Interest Free Period is '4' and the client's Repayment Frequency is every week, then for the first four weeks the client need not to pay interest, he has to pay principal due for that week only.          &#x20;
* 30 - Provide Arrears tolerance (Optional): With 'Arrears tolerance' you can specify a tolerance amount and if the loan is behind (in arrears), but within the tolerance, it won't be classified as 'in arrears' and part of the portfolio at risk.
* 31 - Select **Days in year**: Depending upon your organizations financial days select accordingly.

  &#x20;                 Actual - Will consider number of days with respect to actual calendar. Or 360 days Or 364 days Or 365 days.  &#x20;
* 32 - Select **Days in Months:** Depending upon your organizations financial practice select accordingly.&#x20;

  &#x20;                 Actual - Will consider number of days with respect to actual calendar. Or 30 days.          &#x20;
* 33 - Provide "Allow fixing of installment amount" (Optional): On checking the check box it enables providing the installment amount manually at the loan account level.                   Example: If the repayment amount every installment is 107 and you want to it to be 105. On providing 105 amount manually, it automatically adjusts the schedule for all the repayments.          &#x20;
* 34 - Number of days a loan may be overdue before moving into arrears (Optional): [Loan Product Fields](/mifosx/user-manual/for-administrators-mifos-x-platform/administration/products/loan-products/loan-product-fields)         &#x20;
* 35 - Maximum number of days a loan may be overdue before becoming a NPA - non performing asset (Optional): [Loan Product Fields](/mifosx/user-manual/for-administrators-mifos-x-platform/administration/products/loan-products/loan-product-fields)           &#x20;
* 36 - Account moves out of NPA only after all arrears have been cleared?: On checking the check box, Loans which are NPA will only move out of NPA only after all arrears have been cleared.          &#x20;
* 37 - Principal Threshold (%) for Last Installment:&#x20;

### Interest Recalculation

![](https://mifosforge.jira.com/wiki/download/thumbnails/102039585/44.png?version=1\&modificationDate=1442831822668\&cacheVersion=1\&api=v2\&width=918)

38 - On checking the check box for "Recalculate Interest" - It will enable Interest recalculation. For more information on Interest recalculation refer - [Interest Amount Recalculation for Loan Accounts](http://mifosforge.jira.com/wiki/spaces/MIFOSX/pages/70910144/Interest+Amount+Recalculation+for+Loan+Accounts).&#x20;

#### Guarantee Requirements

![](https://mifosforge.jira.com/wiki/download/thumbnails/102039585/45.png?version=2\&modificationDate=1442837632312\&cacheVersion=1\&api=v2\&width=1088)

39 - On checking the check box will enable "Place Guarantee Funds On-Hold".&#x20;

40 - Mandatory Guarantee (%): This is to provide total % of loan amount as mandatory guarantee. Example: 20 %.&#x20;

41 - Minimum Guarantee from Own Funds (%):\
Example: 10 % of loan amount from Own funds.&#x20;

42 - Minimum Guarantee from Guarantor Funds (%): Example: 10 % of loan amount from Guarantor Funds.

### Loan Tranche Details

![](https://mifosforge.jira.com/wiki/download/thumbnails/102039585/46.png?version=1\&modificationDate=1442837650154\&cacheVersion=1\&api=v2\&width=1097)

**Note: If your loan product is tranche loan, then providing the details you could create product.**&#x20;

43 - Checking the check box will enable Multiple disbursal's.&#x20;

44 - Provide the maximum number of disbursements allowed for a loan account.&#x20;

45 - Provide maximum outstanding loan account balance at a point in time. &#x20;

### Configurable terms & settings&#x20;

![](https://mifosforge.jira.com/wiki/download/thumbnails/102039585/47.png?version=1\&modificationDate=1442838357325\&cacheVersion=1\&api=v2\&width=823)

46 - By default "Allow overriding select terms and settings in loan accounts" is checked (Enabled). If you don't want to allow over ridding for the mentioned categories, then you could un-check the box.

### Charges

![](https://mifosforge.jira.com/wiki/download/thumbnails/102039585/48.png?version=1\&modificationDate=1442838829716\&cacheVersion=1\&api=v2\&width=1089)

In order to use Add charge, you should have already defined it in charges. For more information on charges refer here: [Charges](/mifosx/user-manual/for-administrators-mifos-x-platform/administration/products/charges)

### Overdue Charges

![](https://mifosforge.jira.com/wiki/download/thumbnails/102039585/49.png?version=1\&modificationDate=1442839162535\&cacheVersion=1\&api=v2\&width=1083)

In order to use Add overdue charge, you should have already defined it in charges. For more information on charges refer here: [Charges](/mifosx/user-manual/for-administrators-mifos-x-platform/administration/products/charges)

### Accounting&#x20;

![](https://mifosforge.jira.com/wiki/download/thumbnails/102039585/50.png?version=1\&modificationDate=1442839539048\&cacheVersion=1\&api=v2\&width=1085)

**By default Accounting will be disabled - None:-** Meaning If you are using this product for various transactions like disbursement, repayment etc. These transactions are not passed in journal entry.  \
**Enabling accounting for the loan product**:->> You should have created chart of accounts, for info refer: [https://mifosforge.jira.com/wiki/display/docs/Chart+of+Accounts+and+General+Ledger+Setup](/mifosx/user-manual/for-administrators-mifos-x-platform/accounting/chart-of-accounts-general-ledger-setup).>> To enable Accounting, you need to select either one of the account type below, depending upon your organization accounting practice. &#x20;

* Cash&#x20;
* Accrual (periodic)&#x20;
* Accrual (upfront) <br>

\>> Map accounts with respect to the loan product accounts. For information on these accounts refer: [A Possible accounting Spec](http://mifosforge.jira.com/wiki/spaces/MIFOSX/pages/25821280/A+Possible+accounting+Spec) - Accounting rules for loans

![](https://mifosforge.jira.com/wiki/download/thumbnails/102039585/51.png?version=1\&modificationDate=1442897783948\&cacheVersion=1\&api=v2\&width=976)

**Advanced Accounting Rule**&#x20;

On clicking on the show button, it enables Advanced accounting rule.&#x20;

![](https://mifosforge.jira.com/wiki/download/thumbnails/102039585/52.png?version=1\&modificationDate=1442898476639\&cacheVersion=1\&api=v2\&width=708)

If you click on Add button, it will expand and show up selection drop-downs.&#x20;

* Configure Fund sources for Payment Channels. \
  Example: In the shown image above, Payment type - Cheque is mapped to Fund source - Bank. So whenever payment type is used for transaction, journal entry for Account - Bank will be passed.&#x20;
* Map Fees to Income Accounts.&#x20;
* Map Penalties to Specific Income Accounts.

**Click on Submit button to Save/Create loan product.**

![](https://mifosforge.jira.com/wiki/download/thumbnails/102039585/53.png?version=1\&modificationDate=1442899049294\&cacheVersion=1\&api=v2\&width=128)

### View Loan Product&#x20;

&#x20;Go to Admin>>Product>>Loan Products

![](https://mifosforge.jira.com/wiki/download/thumbnails/102039585/54.png?version=1\&modificationDate=1442901251813\&cacheVersion=1\&api=v2\&width=908)

In the image above showing Loan products list.&#x20;

### Edit Loan Product

Go to Admin>>Product>>Loan Products>>Select loan product (Example: Agriculture loan) >> then click on Edit button.&#x20;

![](https://mifosforge.jira.com/wiki/download/thumbnails/102039585/55.png?version=1\&modificationDate=1442901798454\&cacheVersion=1\&api=v2\&width=929)

In the image above, View - Loan products details as well as you can Edit Loan product.

Mifos X provides the ability to restrict loan account holding combinations not allowed by a financial institution. Use the [Product Mix](/mifosx/user-manual/for-administrators-mifos-x-platform/administration/products/loan-products/product-mix) capability to define your financial institutions restrictions.&#x20;

{% hint style="warning" %}
A loan account is a specific instance of a loan product, with a specified interest rate and an account number, and it is owned by a financial institution client.
{% endhint %}

Related articles

* Page:[Savings Products](/mifosx/user-manual/for-administrators-mifos-x-platform/administration/products/untitled)
* Page:[Loan Products](/mifosx/user-manual/for-administrators-mifos-x-platform/administration/products/loan-products)
* Page:[Share products](/mifosx/user-manual/for-administrators-mifos-x-platform/administration/products/share-products)
* Page:[Fixed Deposit Products](/mifosx/user-manual/for-administrators-mifos-x-platform/administration/products/fixed-deposit-products)
* Page:[Loan with term vary based on loan cycle](/mifosx/user-manual/for-operational-users-mifos-x-web-app/accounts-and-transactions/loan-accounts/loan-with-term-vary-based-on-loan-cycle)


# Loan Product Fields

### **Loan Product Fields**

**Details Section**

| Field Name (attribute)        | Description                                                                                                                                                                                                                                                                                                                                                                                                                                                                                                                                                                                                                                                                                                                                                                                                                                                                                                                                                                                                                                                                                                                                                                  | Example                                                     | Validations (if applicable)                                           |
| ----------------------------- | ---------------------------------------------------------------------------------------------------------------------------------------------------------------------------------------------------------------------------------------------------------------------------------------------------------------------------------------------------------------------------------------------------------------------------------------------------------------------------------------------------------------------------------------------------------------------------------------------------------------------------------------------------------------------------------------------------------------------------------------------------------------------------------------------------------------------------------------------------------------------------------------------------------------------------------------------------------------------------------------------------------------------------------------------------------------------------------------------------------------------------------------------------------------------------- | ----------------------------------------------------------- | --------------------------------------------------------------------- |
| Product Name                  | <p></p><p>The product name is a unique identifier for the lending product. The product name is used:</p><ul><li>In <strong>Product</strong> lists (depending on where the product list appears, it may contain a list of all loan products or a list of active loan products).</li><li>As the <strong>Loan Account</strong> identifier in the <strong>Loan Account Overview</strong> section on the client <strong>General</strong> tab.</li><li>In the <strong>Name</strong> column in the list of loan products displayed when <strong>Loan Products</strong> is clicked on the Products page.</li><li>In <strong>Product</strong> drop-down list on the <strong>Loan Reports</strong>' <strong>Run Report</strong> page.</li><li>In the <strong>Product</strong> column in some Loan Reports.</li><li>As the <strong>Loan Account</strong> identifier at the top of the detail loan product page displayed when a specific loan product is selected from the list of loan products displayed when <strong>Loan Products</strong> is clicked on the Products page.</li><li>In the <strong>Product name</strong> field to create a <strong>Loan Product.</strong></li></ul> | Home Building Loan A                                        | <p>Required field</p><p>Alphanumeric</p><p>Maximum 100 characters</p> |
| Short name                    | <p></p><p>The short name is a unique identifier for the lending product. The short name is used:</p><ul><li>In the <strong>Short name</strong> column in the list of loan products displayed when <strong>Loan Products</strong> is clicked on the Products page.</li><li>On the Collection Sheet, to identify the loan product a loan account is based on.</li><li>In the <strong>Short name</strong> field on the detail savings product page displayed when a specific loan product is selected from the list of loan products displayed when <strong>Loan Products</strong> is clicked on the Products page.</li><li>In the <strong>Short name</strong> field to create a <strong>Loan Product.</strong></li></ul>                                                                                                                                                                                                                                                                                                                                                                                                                                                       | BldA                                                        | <p>Required field</p><p>Alphanumeric</p><p>Maximum 4 characters</p>   |
| Description                   | <p></p><p>The description is used to provide additional information regarding the purpose and characteristics of the loan product. The description is used:</p><ul><li>To create a <strong>Loan Product.</strong></li><li>In the <strong>Description</strong> field on the detail savings product page displayed when a specific saving product is selected from the list of savings products displayed when <strong>Saving Products</strong> is clicked on the Products page.</li><li>In the <strong>Description</strong> field to create a <strong>Loan Product.</strong></li></ul>                                                                                                                                                                                                                                                                                                                                                                                                                                                                                                                                                                                        | Home Building Loan A is available for new construction only | <p>Alphanumeric</p><p>Maximum 500 characters</p>                      |
| Fund                          | Loan products may be assigned to a fund set up by your financial institution. If available, the fund field can be used for tracking and reporting on groups of loans. If your financial institution has set up funds, the **Fund** list will be populated and you will be able to select a fund.                                                                                                                                                                                                                                                                                                                                                                                                                                                                                                                                                                                                                                                                                                                                                                                                                                                                             |                                                             | May be left blank or select from list.                                |
| Start date                    | <p>The date that the loan product will be active and available to clients. If blank, the loan product will be active as soon as it is created.</p><p>Select the date from the calendar popup.</p>                                                                                                                                                                                                                                                                                                                                                                                                                                                                                                                                                                                                                                                                                                                                                                                                                                                                                                                                                                            | 01 Jan 2013                                                 | <p>Date</p><p>dd mm yyyy</p>                                          |
| Close date                    | <p>The date that the loan product will become inactive and unavailable to clients. If blank, the load product will never become inactive.</p><p>Select the date from the calendar popup.</p>                                                                                                                                                                                                                                                                                                                                                                                                                                                                                                                                                                                                                                                                                                                                                                                                                                                                                                                                                                                 | 31 Dec 2020                                                 | <p>Date</p><p>dd mm yyyy</p>                                          |
| Include borrower loan counter | <p>A borrower loan counter (cycle) is used for tracking how many time the client has taken this particular product. This is useful for measuring social indicators with each loan a client has taken. It is used for PPI related reporting.</p><p>Check this checkbox to include a loan counter for a borrower (<em>client</em>). Uncheck this checkbox to not include a loan counter for a borrower (<em>client</em>).</p>                                                                                                                                                                                                                                                                                                                                                                                                                                                                                                                                                                                                                                                                                                                                                  |                                                             |                                                                       |

**Currency Section**

| Field Name (attribute)   | **Description**                                                                                                                                                       | Example | Validations (if applicable)                                           |
| ------------------------ | --------------------------------------------------------------------------------------------------------------------------------------------------------------------- | ------- | --------------------------------------------------------------------- |
| Currency                 | The currency in which the loan will be disbursed. Currencies are set up by your financial institution. Select the loan product's currency from the **Currency** list. |         | Required field                                                        |
| Decimal places           | The number of decimal places to be used to track and report on loans.                                                                                                 | 2       | The number of decimal places to be used to track and report on loans. |
| Currency in multiples of | You can enter multiples of currency value. For example, if you put "multiples of 100", the currency value will be rounded off to 200, 300, 400, etc.                  | 0       | <p>Required field</p><p>Numeric</p>                                   |

**Terms Section**

| **Field Name (attribute)**                                                           | Description                                                                                                                                                                                                                                                                                                                                                                                                                                                                                                                                                                                                                                                                                                                                                                                                                                                                                                                    | Example                                                                            | Validations (if applicable)                               |
| ------------------------------------------------------------------------------------ | ------------------------------------------------------------------------------------------------------------------------------------------------------------------------------------------------------------------------------------------------------------------------------------------------------------------------------------------------------------------------------------------------------------------------------------------------------------------------------------------------------------------------------------------------------------------------------------------------------------------------------------------------------------------------------------------------------------------------------------------------------------------------------------------------------------------------------------------------------------------------------------------------------------------------------ | ---------------------------------------------------------------------------------- | --------------------------------------------------------- |
| Terms vary based on Loan Cycle                                                       | <p>A loan cycle tracks the number of times a borrower has taken a particular loan.</p><p>Leave this checkbox unchecked if the terms do not vary based on the Loan Cycle.</p><p>Check this checkbox if terms vary based on the Loan Cycle. See <a href="/pages/-Ljq13N84LxGmoc5ZJrp"><em>additional fields</em> </a>for additional information required for this type of loan product.</p>                                                                                                                                                                                                                                                                                                                                                                                                                                                                                                                                      |                                                                                    |                                                           |
| <p>Principal:</p><p>Minimum</p><p>Default</p><p>Maximum</p>                          | <p>These fields are used to define the minimum, default and maximum principal allowed for the loan product.</p><p>When a client applies for a loan account, the loan account application will be populated with the default principal amount. The lending officer may modify the default within the minimum to maximum range.</p><p>Using the example values (see column to the right), a new loan account application for this loan product would default to a principal amount of 100 (in the selected currency). The lending officer may modify the principal as low as 25 and as high as 250.</p>                                                                                                                                                                                                                                                                                                                          | <p>Minimum: 25</p><p>Default: 100</p><p>Maximum: 250</p>                           | <p>Required fields</p><p>Numeric whole numbers</p>        |
| <p>Number of repayments:</p><p>Minimum</p><p>Default</p><p>Maximum</p>               | <p>These fields are used to define the minimum, default and maximum number of repayments allowed for the loan product.</p><p>When a client applies for a loan account, the loan account application will be populated with the default number of repayments. The lending officer may modify the default within the minimum to maximum range.</p><p>Using the example values (see column to the right), a new loan account application for this loan product would default to 12 repayments. The lending officer may modify the number of repayments as low as 6 and as high as 60.</p>                                                                                                                                                                                                                                                                                                                                         | <p>Minimum: 6</p><p>Default: 12</p><p>Maximum: 60</p>                              | <p>Required fields</p><p>Numeric whole numbers</p>        |
| <p>Nominal interest rate:</p><p>Minimum</p><p>Default</p><p>Maximum</p><p>Period</p> | <p>These fields are used to define the minimum, default, maximum period for the nominal interest rate allowed for the loan product. The minimum, default, and maximum nominal interest rates are expressed as percentages. The period value is selected from the choices in the list (Per Month, Per Year). The period value is not modifiable on individual loan accounts.</p><p>When a client applies for a loan account, the loan account application will be populated with the nominal interest rate. The lending officer may modify the default within the minimum to maximum range.</p><p>Using the example values (see column to the right), a new loan account application for this loan product would default to a nominal interest rate of 1.5. The lending officer may modify the nominal interest rate as low as 1.25 and as high as 2.0. In this example, the nominal interest rate will be applied monthly.</p> | <p>Minimum: 1.25</p><p>Default: 1.5</p><p>Maximum: 2.0</p><p>Period: Per Month</p> | <p>Required fields</p><p>Numeric with decimals</p>        |
| Repaid every                                                                         | <p>These fields are input to calculate the repayment schedule for a loan account and are used to determine when payments are due. Enter a number into the first field and then select the frequency from the list (Days, Weeks, Months).</p><p>Using the example values (see column to the right), a new loan account application for this product would be initially set for repayments every 2 weeks. The lending officer may change the payment timing during the loan application process.</p>                                                                                                                                                                                                                                                                                                                                                                                                                             | 2 weeks                                                                            | <p>Required fields</p><p>Numeric and select from list</p> |

**Setting Section**

| **Field name (attribute)**                                                                 | Description                                                                                                                                                                                                                                                                                                                                                                                                                                                                                                                                                                                                                                                                                                                                                                                                                                                                                                                                                                                                                                                                                                                                                                                                                                                                                                                                                                                                                                                                                                                                                                                                                                                                                                                                                                                                                                                                                                                                                                                                                                                                                                                                                                                                                                                                                                                                                                                                                                                                                                                                                                                                                                                                                                                                                                                                                                                                                                                                                                                                                                                                                                                                                                                                                                                                                                                                                                                                                                                                                                                                                                                                                                                                                                                                                                                                                                                                                                                                                                                                                                                                                                                                                                                                                                                                                                                                                                                                                                                                                                                                                                                                                                                                                                                                                                                                                                                                                                                                                                                                                                                                                                                                                                                                                                                                                                                                                                                                                                                                                                                                                                                                                                                                                                                                                                                                                                                                                                                                                                                                                                                                                                                                                                                                                                                                                                                                                                                                                                                                                                                                                                                                                                                                                                                                                                                                                                                                                                                                                                                                                                                                                                                                                                                                                                                                                                                                                                                                                                                                                                                                                                                                                                                                                                                                                                                                                                                                                                                                                                                                                                                                                                                                | Example                                                                              | Validations (if applicable) |
| ------------------------------------------------------------------------------------------ | ------------------------------------------------------------------------------------------------------------------------------------------------------------------------------------------------------------------------------------------------------------------------------------------------------------------------------------------------------------------------------------------------------------------------------------------------------------------------------------------------------------------------------------------------------------------------------------------------------------------------------------------------------------------------------------------------------------------------------------------------------------------------------------------------------------------------------------------------------------------------------------------------------------------------------------------------------------------------------------------------------------------------------------------------------------------------------------------------------------------------------------------------------------------------------------------------------------------------------------------------------------------------------------------------------------------------------------------------------------------------------------------------------------------------------------------------------------------------------------------------------------------------------------------------------------------------------------------------------------------------------------------------------------------------------------------------------------------------------------------------------------------------------------------------------------------------------------------------------------------------------------------------------------------------------------------------------------------------------------------------------------------------------------------------------------------------------------------------------------------------------------------------------------------------------------------------------------------------------------------------------------------------------------------------------------------------------------------------------------------------------------------------------------------------------------------------------------------------------------------------------------------------------------------------------------------------------------------------------------------------------------------------------------------------------------------------------------------------------------------------------------------------------------------------------------------------------------------------------------------------------------------------------------------------------------------------------------------------------------------------------------------------------------------------------------------------------------------------------------------------------------------------------------------------------------------------------------------------------------------------------------------------------------------------------------------------------------------------------------------------------------------------------------------------------------------------------------------------------------------------------------------------------------------------------------------------------------------------------------------------------------------------------------------------------------------------------------------------------------------------------------------------------------------------------------------------------------------------------------------------------------------------------------------------------------------------------------------------------------------------------------------------------------------------------------------------------------------------------------------------------------------------------------------------------------------------------------------------------------------------------------------------------------------------------------------------------------------------------------------------------------------------------------------------------------------------------------------------------------------------------------------------------------------------------------------------------------------------------------------------------------------------------------------------------------------------------------------------------------------------------------------------------------------------------------------------------------------------------------------------------------------------------------------------------------------------------------------------------------------------------------------------------------------------------------------------------------------------------------------------------------------------------------------------------------------------------------------------------------------------------------------------------------------------------------------------------------------------------------------------------------------------------------------------------------------------------------------------------------------------------------------------------------------------------------------------------------------------------------------------------------------------------------------------------------------------------------------------------------------------------------------------------------------------------------------------------------------------------------------------------------------------------------------------------------------------------------------------------------------------------------------------------------------------------------------------------------------------------------------------------------------------------------------------------------------------------------------------------------------------------------------------------------------------------------------------------------------------------------------------------------------------------------------------------------------------------------------------------------------------------------------------------------------------------------------------------------------------------------------------------------------------------------------------------------------------------------------------------------------------------------------------------------------------------------------------------------------------------------------------------------------------------------------------------------------------------------------------------------------------------------------------------------------------------------------------------------------------------------------------------------------------------------------------------------------------------------------------------------------------------------------------------------------------------------------------------------------------------------------------------------------------------------------------------------------------------------------------------------------------------------------------------------------------------------------------------------------------------------------------------------------------------------------------------------------------------------------------------------------------------------------------------------------------------------------------------------------------------------------------------------------------------------------------------------------------------------------------------------------------------------------------------------------------------------------------------------------------------------------------------------------ | ------------------------------------------------------------------------------------ | --------------------------- |
| Amortization                                                                               | The Amortization value is input to calculate the repayment amounts for repayment of the loan. Select **Equal installments** or **Equal principal payments** from the **Amortization** list. If **Equal installments** is selected, all repayment amounts will be equal but the interest, fees, penalties, and principal amounts will vary with each repayment. If **Equal principal payments** is selected, the repayments amounts will vary depending upon the interest, fees, and penalty amounts in the repayment and the principal amount will be the same for all repayments.                                                                                                                                                                                                                                                                                                                                                                                                                                                                                                                                                                                                                                                                                                                                                                                                                                                                                                                                                                                                                                                                                                                                                                                                                                                                                                                                                                                                                                                                                                                                                                                                                                                                                                                                                                                                                                                                                                                                                                                                                                                                                                                                                                                                                                                                                                                                                                                                                                                                                                                                                                                                                                                                                                                                                                                                                                                                                                                                                                                                                                                                                                                                                                                                                                                                                                                                                                                                                                                                                                                                                                                                                                                                                                                                                                                                                                                                                                                                                                                                                                                                                                                                                                                                                                                                                                                                                                                                                                                                                                                                                                                                                                                                                                                                                                                                                                                                                                                                                                                                                                                                                                                                                                                                                                                                                                                                                                                                                                                                                                                                                                                                                                                                                                                                                                                                                                                                                                                                                                                                                                                                                                                                                                                                                                                                                                                                                                                                                                                                                                                                                                                                                                                                                                                                                                                                                                                                                                                                                                                                                                                                                                                                                                                                                                                                                                                                                                                                                                                                                                                                                         |                                                                                      | Required field              |
| Interest method                                                                            | The Interest method value is input to calculate the payments amount for repayment of the loan. Select [**Flat**](/mifosx/user-manual/for-administrators-mifos-x-platform/administration/products/loan-products/loan-product-fields/flat-interest-calculation) or [**Declining balance**](/mifosx/user-manual/for-administrators-mifos-x-platform/administration/products/loan-products/loan-product-fields/declining-balance-interest-calculation).                                                                                                                                                                                                                                                                                                                                                                                                                                                                                                                                                                                                                                                                                                                                                                                                                                                                                                                                                                                                                                                                                                                                                                                                                                                                                                                                                                                                                                                                                                                                                                                                                                                                                                                                                                                                                                                                                                                                                                                                                                                                                                                                                                                                                                                                                                                                                                                                                                                                                                                                                                                                                                                                                                                                                                                                                                                                                                                                                                                                                                                                                                                                                                                                                                                                                                                                                                                                                                                                                                                                                                                                                                                                                                                                                                                                                                                                                                                                                                                                                                                                                                                                                                                                                                                                                                                                                                                                                                                                                                                                                                                                                                                                                                                                                                                                                                                                                                                                                                                                                                                                                                                                                                                                                                                                                                                                                                                                                                                                                                                                                                                                                                                                                                                                                                                                                                                                                                                                                                                                                                                                                                                                                                                                                                                                                                                                                                                                                                                                                                                                                                                                                                                                                                                                                                                                                                                                                                                                                                                                                                                                                                                                                                                                                                                                                                                                                                                                                                                                                                                                                                                                                                                                                        |                                                                                      | Required field              |
| Interest calculation period                                                                | <p></p><ul><li>Daily - Will Calculate the interest on DAILY basis example: Month of February has 28 days and it will calculate interest for 28 days </li><li>SAME AS REPAYMENT PERIOD - it calculates for the month, that is, 30 days.</li></ul>                                                                                                                                                                                                                                                                                                                                                                                                                                                                                                                                                                                                                                                                                                                                                                                                                                                                                                                                                                                                                                                                                                                                                                                                                                                                                                                                                                                                                                                                                                                                                                                                                                                                                                                                                                                                                                                                                                                                                                                                                                                                                                                                                                                                                                                                                                                                                                                                                                                                                                                                                                                                                                                                                                                                                                                                                                                                                                                                                                                                                                                                                                                                                                                                                                                                                                                                                                                                                                                                                                                                                                                                                                                                                                                                                                                                                                                                                                                                                                                                                                                                                                                                                                                                                                                                                                                                                                                                                                                                                                                                                                                                                                                                                                                                                                                                                                                                                                                                                                                                                                                                                                                                                                                                                                                                                                                                                                                                                                                                                                                                                                                                                                                                                                                                                                                                                                                                                                                                                                                                                                                                                                                                                                                                                                                                                                                                                                                                                                                                                                                                                                                                                                                                                                                                                                                                                                                                                                                                                                                                                                                                                                                                                                                                                                                                                                                                                                                                                                                                                                                                                                                                                                                                                                                                                                                                                                                                                           |                                                                                      |                             |
| Arrears tolerance                                                                          | With 'Arrears tolerance' you can specify a tolerance amount and if the loan is behind (in arrears), but within the tolerance, it won't be classified as 'in arrears' and part of the portfolio at risk.                                                                                                                                                                                                                                                                                                                                                                                                                                                                                                                                                                                                                                                                                                                                                                                                                                                                                                                                                                                                                                                                                                                                                                                                                                                                                                                                                                                                                                                                                                                                                                                                                                                                                                                                                                                                                                                                                                                                                                                                                                                                                                                                                                                                                                                                                                                                                                                                                                                                                                                                                                                                                                                                                                                                                                                                                                                                                                                                                                                                                                                                                                                                                                                                                                                                                                                                                                                                                                                                                                                                                                                                                                                                                                                                                                                                                                                                                                                                                                                                                                                                                                                                                                                                                                                                                                                                                                                                                                                                                                                                                                                                                                                                                                                                                                                                                                                                                                                                                                                                                                                                                                                                                                                                                                                                                                                                                                                                                                                                                                                                                                                                                                                                                                                                                                                                                                                                                                                                                                                                                                                                                                                                                                                                                                                                                                                                                                                                                                                                                                                                                                                                                                                                                                                                                                                                                                                                                                                                                                                                                                                                                                                                                                                                                                                                                                                                                                                                                                                                                                                                                                                                                                                                                                                                                                                                                                                                                                                                    | If 'Arrears Tolerance' is $ 100 then up to that amount is not considered as arrears. |                             |
| Repayment strategy (Payment Application Logic)                                             | <p>Repayments have up to four components:</p><ul><li>Principal</li><li>Interest</li><li>Fees</li><li>Penalties</li></ul><p>The repayment strategy determines the sequence in which each of the components is paid.</p><p><strong>Mifos Style</strong></p><p>Replicates the same payment order of our previous legacy mifos software.</p><p><strong>Payment order</strong>:</p><ol><li>Overdue and due penalties</li><li>Overdue and due fees</li><li>Overdue and due interest</li><li>Overdue and due principal</li></ol><p>For example taking a loan with two installments due (one current and one overdue) where installment will be 240 (200 principal + 20 interest + 10 fees + 10 Penalties ) each.</p><p>- A partial payment of 300 results in payment been broken up as 10 overdue penalties, 10 due penalties, 10 overdue fees, 10 due fees, 20 overdue interest, 20 due interest, 200 overdue principal and 20 due principal. Therefore installment #2 (remaining 180 due principal)</p><p><strong>Early payment</strong>: Any payment that pays off an installment that occurs before the due date of the installment. There is no incentive/advantage to making an early payment as there is no decrease in cost of the loan.</p><p><strong>On time payment</strong>: Any payment that pays off an installment that occurs exactly on the due date of the installment.</p><p><strong>Late payment</strong>: Any payment that pays off an installment that occurs after the due date of the installment. There is no penalization for late payment. The total cost of the loan does not automatically increase, no penalties are automatically applied to the loan.</p><p></p><p><strong>Principal Interest Penalties Fees Order</strong></p><p>The key aspect of this strategy is the payment order.</p><p><strong>Payment order</strong>:</p><ol><li>Overdue and due principal</li><li>Overdue and due interest</li><li>Overdue and due penalties</li><li>Overdue and due fees</li></ol><p>For example taking a loan with two installments due (one current and one overdue) where installment will be 240 (200 principal + 20 interest + 10 fees + 10 Penalties ) each.</p><p>- A partial payment of 300 results in payment been broken up as 200 overdue principal, 100 due principal. Therefore installment #1 (remaining 20 overdue interest, 10 overdue fee and 10 overdue penalties) and installment #2 (remaining 100 principal, 20 due interest, 10 due fee and 10 overdue penalties)</p><p><strong>Early payment</strong>: Any payment that pays off an installment that occurs before the due date of the installment. There is no incentive/advantage to making an early payment as there is no decrease in cost of the loan.</p><p><strong>On time payment</strong>: Any payment that pays off an installment that occurs exactly on the due date of the installment.</p><p><strong>Late payment</strong>: Any payment that pays off an installment that occurs after the due date of the installment. There is no penalization for late payment. The total cost of the loan does not automatically increase, no penalties are automatically applied to the loan.</p><p></p><p><strong>Interest Principal Penalties Fees Order</strong></p><p>The key aspect of this strategy is the payment order.</p><p><strong>Payment order</strong>:</p><ol><li>Overdue and due interest</li><li>Overdue and due principal</li><li>Overdue and due penalties</li><li>Overdue and due fees</li></ol><p>For example taking a loan with two installments due (one current and one overdue) where installment will be 240 (200 principal + 20 interest + 10 fees + 10 Penalties ) each.</p><p>- A partial payment of 300 results in payment been broken up as 20 overdue interest, 20 due interest, 200 overdue principal, 60 due principal. Therefore installment #1 (remaining 10 overdue fee and 10 overdue penalties) and installment #2 (remaining principal 140, due fee 10 and 10 overdue penalties)</p><p><strong>Early payment</strong>: Any payment that pays off an installment that occurs before the due date of the installment. There is no incentive/advantage to making an early payment as there is no decrease in cost of the loan.</p><p><strong>On time payment</strong>: Any payment that pays off an installment that occurs exactly on the due date of the installment.</p><p><strong>Late payment</strong>: Any payment that pays off an installment that occurs after the due date of the installment. There is no penalization for late payment. The total cost of the loan does not automatically increase, no penalties are automatically applied to the loan.</p><p></p><p><strong>RBI (India)</strong></p><p>Per RBI regulations, all overdue should be paid, only then can the due amount will be collected. When the overdue amount is paid, the payment order will be overdue penalties, overdue fees, overdue principal. Only after the payment of overdue, the due is collected and the payment order will be due fees, due interest and due principal.</p><p><strong>Payment order</strong>:</p><ol><li>Overdue (Penalties+Fees+Interest+Principal)</li><li>Due Fees</li><li>Due Interest</li><li>Due Principal</li></ol><p>For example taking a loan with two installments due (one current and one overdue) where installment will be 240 (200 principal + 20 interest + 10 fees + 10 Penalties ) each.</p><p>- A partial payment of 300 results in payment been broken up as 10 overdue penalties, 10 overdue fees, 20 overdue interest, 200 overdue principal on installment #1 and 10 due penalties, 10 due fees, 20 due interest, 20 due principal on installment #2 (remaining principal 180)</p><p><strong>Early payment</strong>: Any payment that pays off an installment that occurs before the due date of the installment. There is no incentive/advantage to making an early payment as there is no decrease in cost of the loan.</p><p><strong>On time payment</strong>: Any payment that pays off an installment that occurs exactly on the due date of the installment.</p><p><strong>Late payment</strong>: Any payment that pays off an installment that occurs after the due date of the installment. There is no penalization for late payment. The total cost of the loan does not automatically increase, no penalties are automatically applied to the loan.</p><p>This strategy works similar to the Interest Principal Penalties Fees Order for on-time and late payments, i.e</p><p><strong>Payment order</strong>:</p><ol><li>Overdue and due interest</li><li>Overdue and due principal</li><li>Overdue and due penalties</li><li>Overdue and due fees</li></ol><p>For example taking a loan with two installments due (one current and one overdue) where installment will be 240 (200 principal + 20 interest + 10 fees + 10 Penalties ) each.</p><p>- A partial payment of 300 results in payment been broken up as 20 overdue interest, 20 due interest, 200 overdue principal, 60 due principal. Therefore installment #1 (remaining 10 overdue fee and 10 overdue penalties) and installment #2 (remaining principal 140, due fee 10 and 10 overdue penalties).</p><p><strong>Early payment</strong>: Any payment that pays off an installment that occurs before the due date of the installment. There is no incentive/advantage to making an early payment as there is no decrease in cost of the loan. However, early payments are allocated only towards principal payments of future installments. Interest and fees/penalties of future installments are not paid and may be waived manually if required</p><p><strong>On time payment</strong>: Any payment that pays off an installment that occurs exactly on the due date of the installment.</p><p><strong>Late payment</strong>: Any payment that pays off an installment that occurs after the due date of the installment. There is no penalization for late payment. The total cost of the loan does not automatically increase, no penalties are automatically applied to the loan.</p> |                                                                                      |                             |
| Interest free period                                                                       | If the Interest Free Period is '4' and the client's Repayment Frequency is every week, then for the first four weeks the client need not to pay interest, he has to pay principle due for that week only.                                                                                                                                                                                                                                                                                                                                                                                                                                                                                                                                                                                                                                                                                                                                                                                                                                                                                                                                                                                                                                                                                                                                                                                                                                                                                                                                                                                                                                                                                                                                                                                                                                                                                                                                                                                                                                                                                                                                                                                                                                                                                                                                                                                                                                                                                                                                                                                                                                                                                                                                                                                                                                                                                                                                                                                                                                                                                                                                                                                                                                                                                                                                                                                                                                                                                                                                                                                                                                                                                                                                                                                                                                                                                                                                                                                                                                                                                                                                                                                                                                                                                                                                                                                                                                                                                                                                                                                                                                                                                                                                                                                                                                                                                                                                                                                                                                                                                                                                                                                                                                                                                                                                                                                                                                                                                                                                                                                                                                                                                                                                                                                                                                                                                                                                                                                                                                                                                                                                                                                                                                                                                                                                                                                                                                                                                                                                                                                                                                                                                                                                                                                                                                                                                                                                                                                                                                                                                                                                                                                                                                                                                                                                                                                                                                                                                                                                                                                                                                                                                                                                                                                                                                                                                                                                                                                                                                                                                                                                  |                                                                                      |                             |
| <p>Moratorium</p><p>On principal payment</p><p>On interest payment</p>                     | <p></p><p>Suppose, If Moratorium</p><ul><li>On Principle Payment is '6' and the client's Repayment Frequency is every month, then for the first six months, the client has to pay Interest only and after six months the client starts paying principal amount too.</li><li>On Interest Payment is '6' and the client's Repayment Frequency is every month, then for the first six months, the client has to pay Principal only and after six months the client starts paying Interest amount too.</li></ul>                                                                                                                                                                                                                                                                                                                                                                                                                                                                                                                                                                                                                                                                                                                                                                                                                                                                                                                                                                                                                                                                                                                                                                                                                                                                                                                                                                                                                                                                                                                                                                                                                                                                                                                                                                                                                                                                                                                                                                                                                                                                                                                                                                                                                                                                                                                                                                                                                                                                                                                                                                                                                                                                                                                                                                                                                                                                                                                                                                                                                                                                                                                                                                                                                                                                                                                                                                                                                                                                                                                                                                                                                                                                                                                                                                                                                                                                                                                                                                                                                                                                                                                                                                                                                                                                                                                                                                                                                                                                                                                                                                                                                                                                                                                                                                                                                                                                                                                                                                                                                                                                                                                                                                                                                                                                                                                                                                                                                                                                                                                                                                                                                                                                                                                                                                                                                                                                                                                                                                                                                                                                                                                                                                                                                                                                                                                                                                                                                                                                                                                                                                                                                                                                                                                                                                                                                                                                                                                                                                                                                                                                                                                                                                                                                                                                                                                                                                                                                                                                                                                                                                                                                               |                                                                                      |                             |
| Number of days a loan may be overdue before moving into arrears                            | <p>A loan is in arrears once the number of days entered into this field is exceeded. If this field is blank, the loan will be in arrears the day after a scheduled payment is missed. </p><p>If 5 is specified, as in the example value, the loan will be in arrears on the 6th day after a scheduled payment is missed.</p>                                                                                                                                                                                                                                                                                                                                                                                                                                                                                                                                                                                                                                                                                                                                                                                                                                                                                                                                                                                                                                                                                                                                                                                                                                                                                                                                                                                                                                                                                                                                                                                                                                                                                                                                                                                                                                                                                                                                                                                                                                                                                                                                                                                                                                                                                                                                                                                                                                                                                                                                                                                                                                                                                                                                                                                                                                                                                                                                                                                                                                                                                                                                                                                                                                                                                                                                                                                                                                                                                                                                                                                                                                                                                                                                                                                                                                                                                                                                                                                                                                                                                                                                                                                                                                                                                                                                                                                                                                                                                                                                                                                                                                                                                                                                                                                                                                                                                                                                                                                                                                                                                                                                                                                                                                                                                                                                                                                                                                                                                                                                                                                                                                                                                                                                                                                                                                                                                                                                                                                                                                                                                                                                                                                                                                                                                                                                                                                                                                                                                                                                                                                                                                                                                                                                                                                                                                                                                                                                                                                                                                                                                                                                                                                                                                                                                                                                                                                                                                                                                                                                                                                                                                                                                                                                                                                                               | 5                                                                                    |                             |
| Maximum number of days a loan may be overdue before becoming an NPA (non performing asset) | <p>A loan is an NPA (non performing asset) once the number of days entered into this field is exceeded. If this field is blank, the loan will be an NPA the day after a scheduled payment is missed.</p><p>If 35 is specified, as in the example value, the loan will be an NPA on the 36th day after a scheduled payment is missed.</p>                                                                                                                                                                                                                                                                                                                                                                                                                                                                                                                                                                                                                                                                                                                                                                                                                                                                                                                                                                                                                                                                                                                                                                                                                                                                                                                                                                                                                                                                                                                                                                                                                                                                                                                                                                                                                                                                                                                                                                                                                                                                                                                                                                                                                                                                                                                                                                                                                                                                                                                                                                                                                                                                                                                                                                                                                                                                                                                                                                                                                                                                                                                                                                                                                                                                                                                                                                                                                                                                                                                                                                                                                                                                                                                                                                                                                                                                                                                                                                                                                                                                                                                                                                                                                                                                                                                                                                                                                                                                                                                                                                                                                                                                                                                                                                                                                                                                                                                                                                                                                                                                                                                                                                                                                                                                                                                                                                                                                                                                                                                                                                                                                                                                                                                                                                                                                                                                                                                                                                                                                                                                                                                                                                                                                                                                                                                                                                                                                                                                                                                                                                                                                                                                                                                                                                                                                                                                                                                                                                                                                                                                                                                                                                                                                                                                                                                                                                                                                                                                                                                                                                                                                                                                                                                                                                                                   | 35                                                                                   |                             |
| Recalculate Interest                                                                       | Please check the box if you want to recalculate interest for each period based on outstanding for that month/week. Once you check it, it shows hidden fields to Recalculate Interest as shown[ here](/mifosx/user-manual/for-administrators-mifos-x-platform/administration/products/loan-products/loan-product-fields/recalculate-interest).                                                                                                                                                                                                                                                                                                                                                                                                                                                                                                                                                                                                                                                                                                                                                                                                                                                                                                                                                                                                                                                                                                                                                                                                                                                                                                                                                                                                                                                                                                                                                                                                                                                                                                                                                                                                                                                                                                                                                                                                                                                                                                                                                                                                                                                                                                                                                                                                                                                                                                                                                                                                                                                                                                                                                                                                                                                                                                                                                                                                                                                                                                                                                                                                                                                                                                                                                                                                                                                                                                                                                                                                                                                                                                                                                                                                                                                                                                                                                                                                                                                                                                                                                                                                                                                                                                                                                                                                                                                                                                                                                                                                                                                                                                                                                                                                                                                                                                                                                                                                                                                                                                                                                                                                                                                                                                                                                                                                                                                                                                                                                                                                                                                                                                                                                                                                                                                                                                                                                                                                                                                                                                                                                                                                                                                                                                                                                                                                                                                                                                                                                                                                                                                                                                                                                                                                                                                                                                                                                                                                                                                                                                                                                                                                                                                                                                                                                                                                                                                                                                                                                                                                                                                                                                                                                                                              |                                                                                      |                             |

**Tranche Details Section**

| **Field name (attribute)** | Description                                                                                                                                                                                                                                                            | Example | Validations (if applicable) |
| -------------------------- | ---------------------------------------------------------------------------------------------------------------------------------------------------------------------------------------------------------------------------------------------------------------------- | ------- | --------------------------- |
| Is Multi Disburse Loan     | <p>Leave this checkbox unchecked if the loan is a single disburse loan.</p><p>Check this checkbox if the loan is a multi disburse loan. See <a href="/pages/-Ljq13N84LxGmoc5ZJrp">additional fields</a> for additional information required for this type of loan.</p> |         |                             |

**Charges Section**

| **Field name (attribute)** | Description                                                                                                                                                                                    | Example | Validations (if applicable) |
| -------------------------- | ---------------------------------------------------------------------------------------------------------------------------------------------------------------------------------------------- | ------- | --------------------------- |
| Charges                    | Select a charge from the **Charges** list and click **Add**. If more charges apply to the loan product, select additional charges and click **Add** for each.                                  |         |                             |
| Overdue charges            | Select an overdue charge from the **Overdue Charges** list and click **Add**. If more overdue charges apply to the loan product, select additional overdue charges and click **Add** for each. |         |                             |

**Accounting Section**

| **Field name (attribute)** | Description                                                                                                                                                                                                                                            | Example | Validations (if applicable) |
| -------------------------- | ------------------------------------------------------------------------------------------------------------------------------------------------------------------------------------------------------------------------------------------------------ | ------- | --------------------------- |
| Accounting                 | <p>Select one from:</p><ul><li>None</li><li>Cash</li><li>Accrual (periodic)</li><li>Accrual (up front</li></ul><p>If Cash, Accrual (periodic), or Accrual (up front) is selected, see <a href="/pages/-Ljq13N84LxGmoc5ZJrp">additional fields</a>.</p> |         |                             |


# Accounting Loan Product Fields

### **Loan Product Fields—Additional Fields for Cash and Accrual Accounting**

**Assets**

| **Field name (attribute)** | Description                                                                                                                                                                               |
| -------------------------- | ----------------------------------------------------------------------------------------------------------------------------------------------------------------------------------------- |
| Fund source                | <p>An Asset account (typically Bank or Cash) that is debited during repayments/payments and credited using disbursal.</p><p>Applicable to Cash, Accrual (periodic), Accrual (upfront)</p> |
| Loan portfolio             | <p>An Asset account that is debited during disbursement and credited during principal repayment/write-off.</p><p>Applicable to Cash, Accrual (periodic), Accrual (upfront)</p>            |
| Interest Receivable        | <p>An Asset account that is used to accrue interest.</p><p>Applicable to Accrual (periodic), Accrual (upfront)</p>                                                                        |
| Fees Receivable            | <p>An Asset account that is used to accrue fees.</p><p>Applicable to Accrual (periodic), Accrual (upfront)</p>                                                                            |
| Penalties Receivable       | <p>An Asset account that is used to accrue penalties.</p><p>Applicable to Accrual (periodic), Accrual (upfront)</p>                                                                       |
| Transfer in suspense       | An Asset account that is used as a suspense account for tracking portfolios of loans under transfer.                                                                                      |

**Income**

| **Field name (attribute)**      | Description                                                                                                                                                          |
| ------------------------------- | -------------------------------------------------------------------------------------------------------------------------------------------------------------------- |
| Income from interest            | <p>An Income account that is credited during repayment.</p><p>Applicable to Cash, Accrual (periodic), Accrual (upfront)</p>                                          |
| Income from fees                | <p>An Income account that is credited when a fee is paid by account holder on this account.</p><p>Applicable to Cash, Accrual (periodic), Accrual (upfront)</p>      |
| Income from penalties           | <p>An Income account which is credited when a penalty is paid by account holder on this account.</p><p>Applicable to Cash, Accrual (periodic), Accrual (upfront)</p> |
| Income from Recovery Repayments | <p>An Income Account that is credited during recovery repayments</p><p>Applicable to Cash, Accrual (periodic), Accrual (upfront)</p>                                 |

**Expenses**

| **Field name (attribute)** | Description                                                                                                                                                                                                                                 |
| -------------------------- | ------------------------------------------------------------------------------------------------------------------------------------------------------------------------------------------------------------------------------------------- |
| Losses written off         | <p>An Expense account that is debited on principal write-off (also debited in the events of interest, fee and penalty written-off in case of accrual based accounting).</p><p>Applicable to Cash, Accrual (periodic), Accrual (upfront)</p> |

**Liabilities**

| **Field name (attribute)** | Description                                                                                                                                                               |
| -------------------------- | ------------------------------------------------------------------------------------------------------------------------------------------------------------------------- |
| Overpayment liabilities    | <p>A Liability account that is credited on overpayments and credited when refunds are made to client.</p><p>Applicable to Cash, Accrual (periodic), Accrual (upfront)</p> |

**Advanced accounting rules (optional)**

The advanced accounting rules allow for finer detail in mapping payment types to fund sources, fees to income accounts and penalties to income accounts.

Applicable to Cash, Accrual (periodic), Accrual (upfront)

| Field name (attribute)                                                                  | Description                                                                                                                                                                                                                                               |
| --------------------------------------------------------------------------------------- | --------------------------------------------------------------------------------------------------------------------------------------------------------------------------------------------------------------------------------------------------------- |
| <p>Configure Fund Sources for Payment Channels</p><p>Payment Type</p><p>Fund Source</p> | <p>A different Fund Source for each Payment Channel may be specified.</p><p>Select a Payment Type from the <strong>Payment Type</strong> list (e.g.,Cash, check, m-pesa, etc).</p><p>Select a Fund Source from the <strong>Fund Source</strong> list.</p> |
| <p>Map Fees to Income Accounts</p><p>Fees</p><p>Income Account</p>                      | <p>A different Income Account for each Fee type may be specified.</p><p>Select a Fee from the <strong>Fee</strong> list.</p><p>Select an Income Account from the <strong>Income Account</strong> list.</p>                                                |
| <p>Map Penalties to Specific Income Accounts</p><p>Penalty</p><p>Income Account</p>     | <p>A different Income Account for each Penalty type may be specified.</p><p>Select a Penalty from the <strong>Penalty</strong> list.</p><p>Select an Income Account from the <strong>Income Account</strong> list.</p>                                    |

* &#x20;   The following screenshots show an example of how to define Accrual (periodic) while defining the loan products:

![](https://mifosforge.jira.com/wiki/download/thumbnails/71565557/accraul1.jpg?version=1\&modificationDate=1414412782214\&cacheVersion=1\&api=v2\&width=795)

![](https://mifosforge.jira.com/wiki/download/thumbnails/71565557/accrual2.jpg?version=1\&modificationDate=1414412805913\&cacheVersion=1\&api=v2\&width=880)

* After this, Click on the 'Submit' button to create the loan product with Accrual (periodic) Accounting. The summary of the Accrual Accounting (periodic) done for the loan product can be seen in the following screenshot.&#x20;

![](https://mifosforge.jira.com/wiki/download/thumbnails/71565557/accrual3.jpg?version=1\&modificationDate=1414412978507\&cacheVersion=1\&api=v2\&width=766)


# Configuring and Disbursing of Top-Up Loan

A top-up loan allows borrower to take a loan amount on top of his/her existing loan, this loan is offered only after a certain number of repayments is made on existing loan amount as this gives a fair idea about the borrower’s repayment track record. Here the current loan will be paid-off using the balance of top-up loan once the loan is disbursed.

**Example:**&#x20;

Assume ‘Bob’ has taken a loan of 10,000$ and say he had made a repayment of 5000$, now he wants to top-up his loan by 10,000$. Once the top-up loan is approved his existing loan amount of 5000$ will be paid-off using balance of  top-up loan and a new loan of amount 15000$ is disbursed. This new loan amount is the combination 5000$ (Paid-off amount) and 10000$ (New top-up loan).

{% hint style="danger" %}

{% endhint %}

| Top-up loan amount should be greater than the previous loan balance (principal+Interest). |
| ----------------------------------------------------------------------------------------- |

#### How to configure Top-Up Loan?

1. Navigate to **Admin**>> **Products**>> **Loan Products**>> **Create Loan Product**, define the required fields and if the loan product supports top-up loans then select **“is allowed to be used for providing TopUp Loans?”** under Settings field.

![](https://mifosforge.jira.com/wiki/download/thumbnails/153387012/Screenshot%20from%202019-06-08%2011-14-40.png?version=1\&modificationDate=1559988975905\&cacheVersion=1\&api=v2\&width=850)

&#x20;2\. Click on the client to whom loan top-up has to be done, next select the **‘loan product’** that is associated with loan top-up feature. Now fill in the required fields in new loan application,  select

&#x20;        **“is Topup Loan?”** and choose the loan account number that has to be closed.

![](https://mifosforge.jira.com/wiki/download/thumbnails/153387012/Screenshot%20from%202019-07-02%2020-51-03.png?version=1\&modificationDate=1562097234812\&cacheVersion=1\&api=v2\&width=850)

#### How to Disburse Top-Up Loan?

1. Select a client who has taken a loan and had made some repayments

![](https://mifosforge.jira.com/wiki/download/thumbnails/153387012/Screenshot%20from%202019-07-02%2021-00-34.png?version=1\&modificationDate=1562097815139\&cacheVersion=1\&api=v2\&width=850)

&#x20;   2\. If the borrower wants to top-up his loan then click on ![](https://mifosforge.jira.com/wiki/download/thumbnails/153387012/5.png?version=1\&modificationDate=1472118945545\&cacheVersion=1\&api=v2\&width=65). Next select a loan product that is configured for **Top-Up** loan.

![](https://mifosforge.jira.com/wiki/download/thumbnails/153387012/Screenshot%20from%202019-07-05%2015-47-59.png?version=1\&modificationDate=1562338201716\&cacheVersion=1\&api=v2\&width=850)

&#x20;   3\. Select **"Is Topup Loan"** and  pick the appropriate loan account from "**Choose loan** **to close"** drop down that has to be closed (paid-off).

![](https://mifosforge.jira.com/wiki/download/thumbnails/153387012/Screenshot%20from%202019-07-05%2015-53-13.png?version=1\&modificationDate=1562339282605\&cacheVersion=1\&api=v2\&width=850)

&#x20;   4\. Click ![](https://mifosforge.jira.com/wiki/download/thumbnails/153387012/8.png?version=1\&modificationDate=1472120072832\&cacheVersion=1\&api=v2\&width=55)\
\
&#x20;   5\. Next "**Approve**" and "**Disburse**" the loan.

![](https://mifosforge.jira.com/wiki/download/thumbnails/153387012/9.png?version=1\&modificationDate=1472120293480\&cacheVersion=1\&api=v2\&width=819)

&#x20;   6\. Now in client's page you can see that the loan earlier has been **paid-off** and a new **Top-Up** loan is disbursed.

![](https://mifosforge.jira.com/wiki/download/thumbnails/153387012/10.png?version=1\&modificationDate=1472120617637\&cacheVersion=1\&api=v2\&width=819)

&#x20;    7\. Click on the loan to view loan **'Summary'**, **'Transactions'**, **'Repayment Schedule'**.

![](https://mifosforge.jira.com/wiki/download/thumbnails/153387012/summary.png?version=1\&modificationDate=1472122765593\&cacheVersion=1\&api=v2\&width=819)

&#x20;   8\. This is **Transaction** page.

![](https://mifosforge.jira.com/wiki/download/thumbnails/153387012/transaction.png?version=1\&modificationDate=1472122839786\&cacheVersion=1\&api=v2\&width=819)


# Declining Balance Interest Calculation

#### **Declining Balance—Equal installments**

The declining balance method calculates interest at periodic intervals on the amount of the principal not yet repaid. Repayment amounts, EMI are equal. The interest component of the EMI is larger in the initial repayments and gradually reduces over time when compared to the principal amount. The exact percentage allocated towards payment of the principal depends on the interest rate. Even though periodic EMI repayments amounts don’t change, the proportion of principal and interest components changes with time. With each successive repayment, more is allocated towards the principal and less towards interest.

The calculations is:

EMI = i\*P / \[1- (1+i)^-n]

Where,

P = loan amount (principal)\
r = rate of interest per year/per month\
n = term of the loan in periods\
l = length of a period (Fraction of a year, i.e., 1/12 = 1 month, 1/52 = Week; If Interest calculation period is Daily then 7/365 = Week)\
i = Interest rate per period (r\*l)

Note: Interest = Principal balance\*i

**Example**

A client borrows a loan of $1000 with an interest rate of 5% per year with 2 installments for every six months.

P=1000, r = 5/100, l = 6/12 & n = 2, i = 5/100 \* 6/12 = 0.025\
EMI = 0.025 \* 1000 / \[1-(1+0.025)^-2]\
EMI = $518.83

{% hint style="info" %}
The way to apply payments is as follows:

Calculate interest in the principal due: If balance = $1000, and i = 0.025, interest is $25\
Calculate the amount to principal which is the monthly payment minus the interest due: $518.83 - $25 = $493.83\
Calculate the principal remaining, which is the previous principal remaining minus the amount applied to principal: $1000 - $493.83 = $506.17 (remaining balance)\
Once next payment is received, repeat steps 1 to 3.
{% endhint %}

Related articles

* Page:[Loan Products](/mifosx/user-manual/for-administrators-mifos-x-platform/administration/products/loan-products)
* Page:[Loan with term vary based on loan cycle](/mifosx/user-manual/for-operational-users-mifos-x-web-app/accounts-and-transactions/loan-accounts/loan-with-term-vary-based-on-loan-cycle)
* Page:[Tranche loan process](/mifosx/user-manual/for-operational-users-mifos-x-web-app/accounts-and-transactions/loan-accounts/tranche-loan-process)
* Page:[How to create new loan - Interest Recalculation](/mifosx/user-manual/for-operational-users-mifos-x-web-app/accounts-and-transactions/loan-accounts/how-to-create-new-loan-interest-recalculation)
* Page:[How to provide floating rates](/mifosx/user-manual/for-operational-users-mifos-x-web-app/accounts-and-transactions/loan-accounts/how-to-provide-floating-rates)


# Enabling Floating Rate

### Defining Loan product - Floating rate&#x20;

**Go to Admin>>Product>>Loan Product>> Create Loan products**&#x20;

Provide all the necessary fields for creating a Loan product, refer [Loan Product Fields](/mifosx/user-manual/for-administrators-mifos-x-platform/administration/products/loan-products/loan-product-fields)

### Step I

&#x20;Go to the **Term** section and update fields respectively :-  &#x20;

![](https://mifosforge.jira.com/wiki/download/thumbnails/111673392/23.png?version=1\&modificationDate=1452745956858\&cacheVersion=1\&api=v2\&width=900)

**1 - Is Linked to Floating Interest Rates:** Check the check box, to enable floating rates and to define.&#x20;

**2 - Select Floating rate chart:** Select floating rate chart. *You can select floating rate chart from here:-* [*Floating Rate*](/mifosx/user-manual/for-administrators-mifos-x-platform/administration/products/floating-rate)*.*

**3 - Interest rate field:** Provide interest rate. Note this provided interest will be added on to the selected rate chart.&#x20;

**4 - Is floating calculation allowed:** Check the check box, to enable floating calculation. If this is unchecked, it will consider the flat rate i.e the disbursement date rate and it will remain same throughout the installments. For example please refer:- [How to provide floating rates](/mifosx/user-manual/for-operational-users-mifos-x-web-app/accounts-and-transactions/loan-accounts/how-to-provide-floating-rates)&#x20;

**5 - Minimum Floating interest rate allowed field:** Provide minimum floating interest rate allowed.&#x20;

**6 - Default Floating interest rate allowed field:** Provide default floating interest rate.&#x20;

**7 - Maximum Floating interest rate allowed field:** Provide maximum floating rate allowed.&#x20;

Then define other required fields like Principal, number of Installments and Repaid every. &#x20;

### Step II

&#x20;Go to the **Settings** section and update mandatory fields respectively :-  &#x20;

![](https://mifosforge.jira.com/wiki/download/thumbnails/111673392/24.png?version=1\&modificationDate=1452747835992\&cacheVersion=1\&api=v2\&width=800)

**8 - Interest Method -** Must Be Declining balance in order to use floating interest rate.&#x20;

**9 - Calculate interest for exact days in partial period -**  Must be checked box in order to use floating rate.&#x20;

### Step III

Go to the **Interest Recalculation** section and update mandatory fields respectively :- &#x20;

![](https://mifosforge.jira.com/wiki/download/thumbnails/111673392/25.png?version=1\&modificationDate=1452748350481\&cacheVersion=1\&api=v2\&width=800)

&#x20;**10 - Recalculate Interest -** Must be enabled by checking the check box, in order to use Floating rate.&#x20;

Then define other required fields for interest recalculations. Refer -[ Loan Products#InterestRecalculation ](/mifosx/user-manual/for-administrators-mifos-x-platform/administration/products/loan-products) &#x20;

### Step IV&#x20;

Once you are done with updating all the necessary fields which are required for creating loan product, click on the **Submit** button. &#x20;

### Viewing of Loan Product - Floating rate

**Go to Admin>>Product>>Loan Product>>** List of created loan products is displayed >> Select required product to view as shown below.&#x20;

**Screen shot 1 -** A defined example of a Loan product with Floating rate, without accounting enabled.&#x20;

![](https://mifosforge.jira.com/wiki/download/attachments/111673392/Screenshot%20from%202019-07-15%2015-16-07.png?version=2\&modificationDate=1563200322481\&cacheVersion=1\&api=v2)

Related articles

* Page:[Enabling Floating Rate](/mifosx/user-manual/for-administrators-mifos-x-platform/administration/products/loan-products/loan-product-fields/enabling-floating-rate)
* Page:[Loan Products](/mifosx/user-manual/for-administrators-mifos-x-platform/administration/products/loan-products)
* Page:[Loan with term vary based on loan cycle](/mifosx/user-manual/for-operational-users-mifos-x-web-app/accounts-and-transactions/loan-accounts/loan-with-term-vary-based-on-loan-cycle)
* Page:[Tranche loan process](/mifosx/user-manual/for-operational-users-mifos-x-web-app/accounts-and-transactions/loan-accounts/tranche-loan-process)
* Page:[How to create new loan - Interest Recalculation](/mifosx/user-manual/for-operational-users-mifos-x-web-app/accounts-and-transactions/loan-accounts/how-to-create-new-loan-interest-recalculation)


# Enabling Variable Installments

Many of the financial institutions using Mifos X need greater flexibility and control around the repayments schedule to support agricultural loans and other products that are more suited to the cash flows of the borrower. New support for variable installment loans allows for the dates, amounts, and number of installments in the repayment schedule to be manually configured prior to loan approval.

At the product level, one can now enable variable installments, and then specify the minimum and/or maximum gap that can be present between installments.

For each loan account with this setting enabled, the following can be manually configured in the repayment schedule prior to approving the loan:

* Adjust due dates of installments
* Add/remove installments
* Modify amount of the installments

### **Create loan account with variable installments**

**Go to Admin>>Product>>Loan Product>> Create Loan products**&#x20;

1. Provide all the necessary fields for creating a Loan product, refer [Loan Product Fields](/mifosx/user-manual/for-administrators-mifos-x-platform/administration/products/loan-products/loan-product-fields)
2. In the settings section, update fields mentioned below:\
   **a) Is variable installments allowed -** Check the check box to enable.  \
   **b) Minimum gap between days -** Provide minimum number of days.\
   **c) Maximum gap between days -** Provide maximum number of days.&#x20;

![](https://mifosforge.jira.com/wiki/download/thumbnails/111673395/31.png?version=1\&modificationDate=1452755430381\&cacheVersion=1\&api=v2\&width=559)

&#x20;   3\. Click **Submit**.&#x20;

Related articles

* Page:[How to provide variable installments](/mifosx/user-manual/for-operational-users-mifos-x-web-app/accounts-and-transactions/loan-accounts/how-to-provide-variable-installments)
* Page:[Enabling Variable Instalments](/mifosx/user-manual/for-administrators-mifos-x-platform/administration/products/loan-products/loan-product-fields/enabling-variable-installments)


# Flat interest calculation

#### Flat Interest Calculation <a href="#flatinterestcalculation-flatinterestcalculation" id="flatinterestcalculation-flatinterestcalculation"></a>

The flat interest method calculates interest on the loan amount (principal) for the term of the loan account. The interest and principal components of all repayments is the same for the life of the loan account.

The calculations are:&#x20;

Interest = P \* r/100 \* n\
Interest Installment = Interest / number of Repayments\
Principal Installment = P / number of Repayments \
Payments = Interest Installment + Principal Installment&#x20;

Where,

P = loan amount (principal)\
r = rate of interest per period (e.g., per year, per month)\
n = term of the loan

**Example**&#x20;

A client borrows $1000 (P) with a interest rate of 2% (r) per month for four (n) months with four monthly payments.

Interest: $1000 \* 2/100 \* 4 = $80\
Interest installment: $80 / 4 = $20\
Principal installment: $1000 / 4 = $250\
Monthly installment (principal and interest): $20 + $250 = $270&#x20;

Related articles

* Page:[Enabling Floating Rate](/mifosx/user-manual/for-administrators-mifos-x-platform/administration/products/loan-products/loan-product-fields/enabling-floating-rate)
* Page:[Loan Products](/mifosx/user-manual/for-administrators-mifos-x-platform/administration/products/loan-products)
* Page:[Loan with term vary based on loan cycle](/mifosx/user-manual/for-operational-users-mifos-x-web-app/accounts-and-transactions/loan-accounts/loan-with-term-vary-based-on-loan-cycle)
* Page:[Tranche loan process](/mifosx/user-manual/for-operational-users-mifos-x-web-app/accounts-and-transactions/loan-accounts/tranche-loan-process)
* Page:[How to create new loan - Interest Recalculation](/mifosx/user-manual/for-operational-users-mifos-x-web-app/accounts-and-transactions/loan-accounts/how-to-create-new-loan-interest-recalculation)

<br>


# Loan Product Fields—Additional Fields for Loans with Variable Terms based on Loan Cycle

#### **Loan Product Fields—Additional Fields for Loans with Variable Terms based on Loan Cycle** <a href="#loanproductfields-additionalfieldsforloanswithvariabletermsbasedonloancycle-loanproductfields-additi" id="loanproductfields-additionalfieldsforloanswithvariabletermsbasedonloancycle-loanproductfields-additi"></a>

*I raised an issue regarding the inconsistent use of terminology (i.e., loan cycle vs borrower cycle).*

Multiple variations for a Borrower Cycle can be set up for:

* Principal amounts (minimum, default, maximum)
* Number of Repayments (minimum, default, maximum)
* Interest rate (minimum, default, maximum)

See [Loan Product Fields—Additional Fields for Loans with Variable Terms based on Loan Cycle#Examples.](/mifosx/user-manual/for-administrators-mifos-x-platform/administration/products/loan-products/loan-product-fields/loan-product-fields-additional-fields-for-loans-with-variable-terms-based-on-loan-cycle)

#### **Principal Variation for Borrower Cycle**

To add Principal Variations, click **Add** until there are sufficient rows for the principal variations required.

Complete a row for each principal variation.

| Field name (attributes) | Description                                                                                                              | Example | Validations (if applicable) |
| ----------------------- | ------------------------------------------------------------------------------------------------------------------------ | ------- | --------------------------- |
| Logical operator        | Select **equals** or **greater than** from the drop-down list.                                                           |         |                             |
| Borrower cycle          | Identify the Borrower cycle (see [Glossary](/mifosx/user-manual/glossary-of-terms)) affected by the principal variation. |         |                             |
| Minimum                 | The minimum principal amount.                                                                                            |         |                             |
| Default                 | The default principal amount.                                                                                            |         |                             |
| Maximum                 | The maximum principal amount.                                                                                            |         |                             |

**Number of Repayments Variation for Borrower Cycle**

To add number of Repayments, click **Add** until there are sufficient rows for the number of repayments variations required.

Complete a row for each number of repayments variation.

| Field name (attribute) | Description                                                                                                                         | Example | Validations (if applicable) |
| ---------------------- | ----------------------------------------------------------------------------------------------------------------------------------- | ------- | --------------------------- |
| Logical operator       | Select **equals** or **greater than** from the drop-down list.                                                                      |         |                             |
| Borrower cycle         | Identify the Borrower cycle (see [Glossary](/mifosx/user-manual/glossary-of-terms)) affected by the number of Repayments variation. |         |                             |
| Minimum                | The minimum number of repayments.                                                                                                   |         |                             |
| Default                | The default number of repayments.                                                                                                   |         |                             |
| Maximum                | The maximum number of repayments.                                                                                                   |         |                             |

**Interest Rate Variation for Borrower Cycle**

To add Interest Rate variations, click **Add** until there are sufficient rows for the number of interest rate variations required.

Complete a row for each interest rate variation.

| Field name (attribute) | Description                                                                                                                  | Example | Validations (if applicable) |
| ---------------------- | ---------------------------------------------------------------------------------------------------------------------------- | ------- | --------------------------- |
| Logical operator       | Select **equals** or **greater than** from the drop-down list.                                                               |         |                             |
| Borrower cycle         | Identify the Borrower cycle (see [Glossary](/mifosx/user-manual/glossary-of-terms)) affected by the Interest Rate variation. |         |                             |
| Minimum                | The minimum interest rate.                                                                                                   |         |                             |
| Default                | The default interest rate                                                                                                    |         |                             |
| Maximum                | The maximum interest rate                                                                                                    |         |                             |

#### [**Loan Product Fields—Additional Fields for Loans with Variable Terms based on Loan Cycle#Examples**](/mifosx/user-manual/for-administrators-mifos-x-platform/administration/products/loan-products/loan-product-fields/loan-product-fields-additional-fields-for-loans-with-variable-terms-based-on-loan-cycle) <a href="#loanproductfields-additionalfieldsforloanswithvariabletermsbasedonloancycle-loanproductfields-additi" id="loanproductfields-additionalfieldsforloanswithvariabletermsbasedonloancycle-loanproductfields-additi"></a>

**Scenario One**: Variations will apply to the third and fourth loan accounts of this loan product for a client.

Implementation:

1. Principal Variations:
   1. Add two rows to the **Principal Variations for Borrow Cycle** section
   2. In the first row, select **equal** from the drop-down box
   3. Type the number 3 into the borrower cycle field
   4. Type the minimum, default, and maximum principal amounts for borrower cycle three
   5. In the second row, select **equal** from the drop-down box
   6. Type the number 4 into the borrower cycle field
   7. Type the minimum, default and maximum principal amounts for borrower cycle four&#x20;
2. Repeat the steps above for number of repayments and interest rate as applicable.

**Scenario Two**: Variations will apply to all loan accounts of this loan product after the first loan account for a client.

Implementation:

1. Principal Variations:
   1. Add one row to the **Principal Variations for Borrow Cycle** section
   2. In the first row, select **greater than** from the drop-down box
   3. Type the number 1 into the borrower cycle field
   4. Type the minimum, default, and maximum principal amounts for borrower cycle three
2. Repeat the steps above for number of repayments and interest rate, as applicable.


# Recalculate Interest

![](https://mifosforge.jira.com/wiki/download/attachments/82149390/recalculate_interest.jpg?version=1\&modificationDate=1414400245963\&cacheVersion=1\&api=v2)

As you can see all fields for 'Recalculate Interest' are mandatory fields.&#x20;

#### Recalculate Interest Fields:

| Field Name                                      | Drop-down Parameters                                                                                                 | Description                                                                                                                                                                                                                                                                                                                                                                                                                                                                                                                                                                                                                                                                                                                                                |
| ----------------------------------------------- | -------------------------------------------------------------------------------------------------------------------- | ---------------------------------------------------------------------------------------------------------------------------------------------------------------------------------------------------------------------------------------------------------------------------------------------------------------------------------------------------------------------------------------------------------------------------------------------------------------------------------------------------------------------------------------------------------------------------------------------------------------------------------------------------------------------------------------------------------------------------------------------------------- |
| Interest Recalculation Compounding on           | <p></p><ul><li>None</li><li>Fee</li><li>Interest</li><li>Fee and Interest</li></ul>                                  | <p>If you select None, next period (month or week) interest will be calculated on principal only.</p><p>If you select Fee, next period interest will be recalculated based on Principle + Fee .</p><p>If you select Interest, next period interest will be recalculated based on Principle + Interest</p><p>If you select 'Fee and Interest' next period interest will be recalculated based on Principle + Interest + Fee</p>                                                                                                                                                                                                                                                                                                                             |
| Advance Payment Adjustment Type                 | <p></p><ul><li>Reduce EMI Amount</li><li>Reduce Number of Installments</li><li>Reschedule next repayments.</li></ul> | <p>Whenever advanced payment for next installments is made by the client, we can either reduce EMI amount or we can reduce the number of installments. Otherwise we can reschedule next repayments</p><p>'Reduce EMI Amount' is selected when we want to keep the same number of installments as previous installments and EMI is reduced to fit into those number of installments.</p><p>'Reduce Number of Installments' is selected whenever a client makes advanced payments in order to close his loan account with less number of installments.</p><p>'Reschedule next repayments' is selected where advanced repayments from the client is applied/adjusted to the next scheduled repayments so that a client may only need to pay his interest.</p> |
| Frequency for recalculate outstanding principle | <p></p><ul><li>Daily</li><li>Weekly</li><li>Monthly</li></ul>                                                        | Once the client makes advance repayments, his outstanding principal may be recalculated weekly, fortnightly, monthly, quarterly and so on, thereby reducing the weekly, fortnightly, monthly outstanding balance.                                                                                                                                                                                                                                                                                                                                                                                                                                                                                                                                          |
| Frequency Interval for Recalculation            | (enter numbers) 1 or 2 or 3 , so on                                                                                  | This field is accompanied with previous field, that is, 'Frequency for recalculate outstanding principle'. If you enter 1 here and you select monthly, then outstanding balance (reduced) will be calculated for every month.                                                                                                                                                                                                                                                                                                                                                                                                                                                                                                                              |
| Frequency Date for Recalculation                | Date Picker                                                                                                          | Here you select the date on which reduced outstanding balance will be calculated.                                                                                                                                                                                                                                                                                                                                                                                                                                                                                                                                                                                                                                                                          |

The Client's Loan Account Overview has two types of schedules, namely 'Original Schedule' (the schedule at the time of disbursement) and 'Repayment Schedule' which is modified along with the way Client makes his repayments:

![](https://mifosforge.jira.com/wiki/download/thumbnails/82149390/oschedule.jpg?version=3\&modificationDate=1414406977870\&cacheVersion=1\&api=v2\&height=400)

![](https://mifosforge.jira.com/wiki/download/thumbnails/82149390/rschedule.jpg?version=3\&modificationDate=1414407002463\&cacheVersion=1\&api=v2\&height=400)

As you can observe, due to advance repayment on 2nd October 2014, the number of repayments are reduced by one. (Here, in Recalculate Interest, the 'Advanced Payment Adjustment Type' is selected as 'Reduced Number of Installments'.


# Tranche Loan Fields

#### **Loan Product Fields—Additional Fields for Tranche Loans** <a href="#trancheloanfields-loanproductfields-additionalfieldsfortrancheloans" id="trancheloanfields-loanproductfields-additionalfieldsfortrancheloans"></a>

A loan product of this type may be used to cover a situation, like construction, where the borrower is making progressive payments up to the total principal amount approved for the loan account. In the example in the table below, up to 5 disbursements may be made to a total outstanding balance of 1000 (in the loan currency). When a loan account is opened, the actual number of disbursements and its maximum outstanding balance (up to a maximum of 1000) will be fixed.<br>

| Field name (attribute)              | Description                                                              | Example | Validations (if applicable)                               |
| ----------------------------------- | ------------------------------------------------------------------------ | ------- | --------------------------------------------------------- |
| Maximum allowed outstanding balance | The maximum outstanding loan account balance allowed at a point in time. | 1000    | Numeric field (assumes the loan product currency applies) |
| Maximum Tranche count               | The maximum number of disbursements allowed for a loan account.          | 5       | Numeric field                                             |


# Setting up Minimum Days between Disbursal and First Repayment

#### How to Configure?

1\. Navigate to **Admin**>> **Products**>> **Loan Products**>>click on ![](https://mifosforge.jira.com/wiki/download/attachments/156106759/1.png?version=1\&modificationDate=1472634810352\&cacheVersion=1\&api=v2)

![](https://mifosforge.jira.com/wiki/download/thumbnails/156106759/Screenshot%20from%202019-06-11%2015-19-12.png?version=1\&modificationDate=1560262884191\&cacheVersion=1\&api=v2\&width=850)

2\. Define the loan product as per your requirement, while defining it, provide the number of days between disbursal date and first repayment in the field provided **"Minimum days between disbursal and first repayment date"** under the "**Terms**" field.

![](https://mifosforge.jira.com/wiki/download/thumbnails/156106759/Screenshot%20from%202019-06-11%2015-53-34.png?version=1\&modificationDate=1560264896654\&cacheVersion=1\&api=v2\&width=850)

3\. Click ![](https://mifosforge.jira.com/wiki/download/thumbnails/156106759/4.png?version=1\&modificationDate=1472634809441\&cacheVersion=1\&api=v2\&width=55)

4.Below you can see the defined loan product with **"Minimum days between disbursal and first repayment date".**&#x20;

![](https://mifosforge.jira.com/wiki/download/thumbnails/156106759/Screenshot%20from%202019-06-11%2015-56-01.png?version=1\&modificationDate=1560265030403\&cacheVersion=1\&api=v2\&width=850)

#### **How to Create?**

1.Navigate to **client's** page and click on ![](https://mifosforge.jira.com/wiki/download/attachments/156106759/6.png?version=1\&modificationDate=1472634808796\&cacheVersion=1\&api=v2)

![](https://mifosforge.jira.com/wiki/download/thumbnails/156106759/Screenshot%20from%202019-06-11%2016-04-10.png?version=1\&modificationDate=1560277704564\&cacheVersion=1\&api=v2\&width=850)

2\. Select the appropriate **Loan Product** that is configured for "**Minimum days between disbursal and first repayment date".**

![](https://mifosforge.jira.com/wiki/download/thumbnails/156106759/Screenshot%20from%202019-06-11%2018-50-32.png?version=1\&modificationDate=1560277746935\&cacheVersion=1\&api=v2\&width=850)

3\. Next, while filling the loan application make sure that **'Disbursement on'** under the "Details" field and **'First Repayment on'** under the "Terms" field are provided with the dates in such a way that it should meet the criteria of minimum days as defined in **Loan Product**.&#x20;

{% hint style="warning" %}
In **Loan product** if you have defined "**Minimum days between disbursal and first repayment date**" as 10 days, then at the time of filling loan application provide 10 days gap between **'Disbursement date'** and **'First Repayment date'.**
{% endhint %}

![](https://mifosforge.jira.com/wiki/download/thumbnails/156106759/Screenshot%20from%202019-06-11%2019-08-48.png?version=1\&modificationDate=1560278386117\&cacheVersion=1\&api=v2\&width=850)

![](https://mifosforge.jira.com/wiki/download/thumbnails/156106759/Screenshot%20from%202019-06-11%2019-09-27.png?version=1\&modificationDate=1560278422421\&cacheVersion=1\&api=v2\&width=850)

4\. Click ![](https://mifosforge.jira.com/wiki/download/attachments/156106759/4.png?version=1\&modificationDate=1472634809441\&cacheVersion=1\&api=v2)

5.In the next step **Approve** the loan.

![](https://mifosforge.jira.com/wiki/download/thumbnails/156106759/Screenshot%20from%202019-06-11%2020-04-50.png?version=1\&modificationDate=1560286709206\&cacheVersion=1\&api=v2\&width=850)

&#x20;  Click on the "**Submit**" button.

6\. Finally **Disburse** it.

![](https://mifosforge.jira.com/wiki/download/thumbnails/156106759/Screenshot%20from%202019-06-11%2022-01-32.png?version=1\&modificationDate=1560286964791\&cacheVersion=1\&api=v2\&width=850)


# Product Mix

The **Product Mix** function allows a financial institution to define rules that restrict the loan accounts that may be held by a client at once. Mifos X checks a client's active loan accounts when a new loan is being disbursed. If there is a conflict between the client's active loan accounts and the loan account to be disbursed, it will result in an error and the new loan account will not be disbursed.&#x20;

By default, the system does not restrict any product combinations.

### **Navigation**

1. From the [Welcome Page](/mifosx/user-manual/for-all-users/untitled/welcome-page), select [**Admin**](/mifosx/user-manual/for-administrators-mifos-x-platform/administration), then[ **Products**](/mifosx/user-manual/for-administrators-mifos-x-platform/administration/products) from the drop-down menu.

![](https://mifosforge.jira.com/wiki/download/thumbnails/103186467/admin_products.PNG?version=1\&modificationDate=1555878319898\&cacheVersion=1\&api=v2\&height=250)

This will launch the **Products** menu.\
Select **Product Mix.**&#x20;

![](https://mifosforge.jira.com/wiki/download/thumbnails/103186467/Capture%2014.PNG?version=1\&modificationDate=1484283034258\&cacheVersion=1\&api=v2\&width=1080)

**NOTE:** Before you can define a product mix, you must be logged in to Mifos X with a username that has permission to define product mixes.&#x20;

If you have the appropriate permissions, you can decide which types of products a given client or group can mix. In this way, you can restrict clients from having active loans or savings accounts of different products at the same time.

For example: if you have three different loan products (A, B, and C), you can make a rule that if a client has taken loan A, then the client can have loan B but not C.&#x20;

### **Creating a new Product Mix**

1. Navigate to **Admin** >> **Products** and click on '**Product Mix**' to see the following window:

![](https://mifosforge.jira.com/wiki/download/attachments/103186467/Capture%2015.PNG?version=1\&modificationDate=1484283122849\&cacheVersion=1\&api=v2)

&#x20;   **2.** Click on '**+Add**' ![](https://mifosforge.jira.com/wiki/download/thumbnails/103186467/image2019-4-22_1-58-24.png?version=1\&modificationDate=1555878505396\&cacheVersion=1\&api=v2\&width=50) button, and the following window will be displayed:

![](https://mifosforge.jira.com/wiki/download/thumbnails/103186467/Capture%2016.PNG?version=1\&modificationDate=1484283267708\&cacheVersion=1\&api=v2\&width=1080)

&#x20;  3\. Select the loan product from the drop-down menu (*for instance: Agriculture*). After choosing the loan product, you can decide which loan products a client can get (*Allowed Products*) and which loan products are prohibited for the client (*Restricted Products*). <br>

* Move loan products from the **Allowed Products** list to the **Restricted Products** list by clicking on the product name and clicking on **>>**.
* Move loan products from the **Restricted Products** list to the **Allowed Products** list by clicking on the product name and clicking on **<<**.

&#x20;   4\. Once you're done, click on the '**Submit**' button ![](https://mifosforge.jira.com/wiki/download/thumbnails/103186467/image2019-4-22_2-2-33.png?version=1\&modificationDate=1555878754331\&cacheVersion=1\&api=v2\&width=55) to create a product mix.&#x20;

### **Edit or Delete Product Mix**

1. To edit or delete a Product Mix, navigate to **Admin** >> **Products** >> **Product Mix.** The following window will be displayed:&#x20;

![](https://mifosforge.jira.com/wiki/download/thumbnails/103186467/Capture%2018.PNG?version=1\&modificationDate=1484283575779\&cacheVersion=1\&api=v2\&width=1080)

&#x20;   2\. Click on the loan product on which the Product Mix is defined (*in this example, 'Agricultural Loan'*) to view the Product Mix:

![](https://mifosforge.jira.com/wiki/download/thumbnails/103186467/Capture%2017.PNG?version=2\&modificationDate=1484283633560\&cacheVersion=1\&api=v2\&width=1080)

&#x20;    3\. Either click on '**Edit**' or the '**Delete**' button to modify or delete the product mix respectively.

<br>


# Charges

Mifos supports two types of charges—fees and penalties. Fees are charged for services—for example, membership fees, loan disbursement fees, withdrawal fees. Penalties are charged to discourage clients from deviating from the terms of a product—for example, late payment penalty for a loan account, early withdrawal penalty for a fixed deposit account.&#x20;

It supports Loan charges, Savings & deposits charges and Client charges.&#x20;

Charges may be associated with a product. When an account is opened based on a product that charges have been associated with, the account will include (inherit) all charges that are associated with the product. In addition, charges that are not defined for a product may be associated with individual client accounts.&#x20;

Beginning at the main screen, select [**Admin**](/mifosx/user-manual/for-administrators-mifos-x-platform/administration), **Products** from the drop-down menu. This will launch the **Products** menu.

Select **Charges**.

![](https://mifosforge.jira.com/wiki/download/thumbnails/72908813/Capture%2032.PNG?version=1\&modificationDate=1484285291786\&cacheVersion=1\&api=v2\&width=1080)

### **Creating a Charge**

Click on **+Create Charge**.

![](https://mifosforge.jira.com/wiki/download/thumbnails/72908813/Capture%2033.PNG?version=1\&modificationDate=1484285370559\&cacheVersion=1\&api=v2\&height=250)

**Loan charge**&#x20;

1. Select **Charges apply** to as **Loan**.&#x20;

![](https://mifosforge.jira.com/wiki/download/attachments/72908813/Screenshot%20from%202019-06-12%2019-06-14.png?version=2\&modificationDate=1560362994158\&cacheVersion=1\&api=v2)

&#x20;    2\. Fill in the charge fields described in the **Charge Fields table** below.

&#x20;    3\. Select **Charge time type**   &#x20;

![](https://mifosforge.jira.com/wiki/download/attachments/72908813/Capture%2034.PNG?version=1\&modificationDate=1484285658543\&cacheVersion=1\&api=v2)

&#x20; **Disbursement**: Gets charged at the time of loan disbursement, provide amount gets collected separately (Not from the loan amount). \
**Specified due date**: Gets charged on the provided date. \
**Installment Fee**: Gets charged on every loan installment. \
**Overdue Fees**: Gets charged if there is an overdue, this is a penalty charge. \
**Tranche Disbursement**: Gets charged for Tranche loan disbursement. &#x20;

&#x20;    4\. Click **Submit**.

### **Savings & deposit charge**&#x20;

1. Select **Charges apply** to as **Savings & deposit**.&#x20;
2. Fill in the charge fields described in the **Charge Fields table** below.
3. Select **Charge time type**

![](https://mifosforge.jira.com/wiki/download/attachments/72908813/42.png?version=1\&modificationDate=1462539438915\&cacheVersion=1\&api=v2)

**Specified due date**: Gets charged on the provided date. \
**Savings Activation:** Gets charged at the time of Savings activation. \
**Withdrawal Fee:** Gets charged at the withdrawal of savings amount. \
**Annual Fee:** Gets charged every annually. \
**Monthly Fee:** Gets charged every monthly. \
**Weekly Fee:** Gets charged every weekly. \
**Overdraft Fee:** Gets charged on Overdraft account.\
**Saving no activity fee:** Get charged on no savings account activity.

&#x20;   4\. Click **Submit**.

### **Client charge**&#x20;

1. Select **Charges apply** to as **Client charge**.&#x20;
2. Fill in the charge fields described in the **Charge Fields table** below.
3. Select **Charge time type**

![](https://mifosforge.jira.com/wiki/download/attachments/72908813/30.png?version=1\&modificationDate=1442228844676\&cacheVersion=1\&api=v2)

**Specified due date**: Gets charged on the provided date.&#x20;

&#x20;  4\. Click **Submit**.

#### Share charge&#x20;

1. Select **Charges apply** to as **Share charge**.&#x20;
2. Fill in the charge fields described in the **Charge Fields table** below.

**Select Charge time type**

![](/files/-LjwH1PYT2ocp2Ih0PuS)

**Share Account Activate:** Gets charged at the time of Share activation, charge calculation can be only be flat not % of amount.&#x20;

**Share Purchase:** Gets charged at the time of share purchase.&#x20;

**Share Redeem:** Gets charged at the time of redeeming of shares.&#x20;

&#x20;          3\. Click **Submit**.

### **Editing charge**

Select charge from the available charge list >> Click on Edit button&#x20;

![](https://mifosforge.jira.com/wiki/download/thumbnails/72908813/Capture%2035.PNG?version=1\&modificationDate=1484285961354\&cacheVersion=1\&api=v2\&width=1080)

Then click on **Submit** button.&#x20;

### Viewing charges&#x20;

Click on Admin>>Products>>Charges&#x20;

![](https://mifosforge.jira.com/wiki/download/thumbnails/72908813/Capture%2036.PNG?version=1\&modificationDate=1484286032413\&cacheVersion=1\&api=v2\&width=1080)

### **Charge Fields**

| **Field name (attribute)**                                                                   | Description                                                                                                                                                                                                                                                                                                                                                                                                                       | Example                              | Validations (if applicable)                                                                                                                                                      |
| -------------------------------------------------------------------------------------------- | --------------------------------------------------------------------------------------------------------------------------------------------------------------------------------------------------------------------------------------------------------------------------------------------------------------------------------------------------------------------------------------------------------------------------------- | ------------------------------------ | -------------------------------------------------------------------------------------------------------------------------------------------------------------------------------- |
| Name                                                                                         | A descriptive name for the charge. The name provided in this field will populate charge selection lists on applicable product and account forms.                                                                                                                                                                                                                                                                                  | Service Fee                          | <p>Required field</p><p>Alphanumeric</p>                                                                                                                                         |
| Currency                                                                                     | <p>Select the currency to be used when the charge is applied. The product and charge currency must be the same to be valid. Set up multiple charges if the same charge is required for products set up in different currencies.</p><p>(Note: If you don't find the currency type you need from drop-down menu, you need to define it. <a href="/pages/-LjGp51oS-SA3nZOWTgA">Click Here </a>to see How to define the currency)</p> | Indian Rupee                         | <p>Required field</p><p>Select from list</p>                                                                                                                                     |
| Charge time type                                                                             | Select the desired charge time type from the list. There will be different charge time types in the list depending on the product type select in **Charges applies to**.                                                                                                                                                                                                                                                          | Specified due date                   | <p>Required field</p><p>Select from list</p>                                                                                                                                     |
| Charge calculation                                                                           | Select the desired charge calculation from the list. There will be different charge calculation options in the list depending on the product type selected in **Charges applies to**.                                                                                                                                                                                                                                             | Flat                                 | <p>Required field</p><p>Select from list</p>                                                                                                                                     |
| Charge payment by                                                                            | This field will display for loan product charges only. Select the desired charge payment method from the list.                                                                                                                                                                                                                                                                                                                    | Account transfer                     | <p>Required field for loan product charges</p><p>Select from list</p>                                                                                                            |
| <p>Add Fee Frequency (loan charges only)</p><p>Charge Frequency</p><p>Frequency Interval</p> | <p>This option will display for loan product charges only. To add a fee frequency, check <strong>Add Fee Frequency.</strong></p><p>If <strong>Add Fee Frequency</strong> is checked the <strong>Charge Frequency</strong> and <strong>Frequency Interval</strong> fields will appear and must be filled in.</p>                                                                                                                   | <p>Checked</p><p>monthly</p><p>1</p> | <p>Check <strong>Add Fee Frequency</strong> to add a fee frequency; uncheck to remove a fee frequency</p><p>Select <strong>Charge Frequency</strong> from list</p><p>Numeric</p> |
| Amount                                                                                       | <p>The value in this field is used with <strong>Charge calculation</strong> to calculate the amount to be charged to the client.</p><p>Example:</p><p>Apply a service fee of 25 rupees (flat calculation) monthly by transferring the funds from another account.</p>                                                                                                                                                             | 25                                   | <p>Required</p><p>Numeric</p>                                                                                                                                                    |
| Active                                                                                       | If checked, this charge is available to associate with products and accounts. If unchecked, this charge is not available to associate with products and accounts.                                                                                                                                                                                                                                                                 | Checked                              | Checked indicates an **Active** charge                                                                                                                                           |
| Is penalty?                                                                                  | If checked, this charge is marked as a penalty, rather than a fee.                                                                                                                                                                                                                                                                                                                                                                | Unchecked                            | Checked indicates that the charge is a penalty. Unchecked indicates that the charge is a fee.                                                                                    |

{% hint style="info" %}
If you select 'Charge Time Type' as Overdue Fees, then you have to check 'Is Penlty?' checker.
{% endhint %}


# Floating Rate

Floating Interest Rates adds the ability to define a base lending rate and interest rate differentials to raise or lower the rate. These differentials can be in time-based interest rate bands.

Beginning at the main screen, select [**Admin**](/mifosx/user-manual/for-administrators-mifos-x-platform/administration) **>> Products** from the drop-down menu. This will launch the **Products** menu.

Select **Floating Rate**.

![](https://mifosforge.jira.com/wiki/download/thumbnails/111673386/Capture%2037.PNG?version=1\&modificationDate=1484286218724\&cacheVersion=1\&api=v2\&width=1080)

This will launch the **floating Rate** page

![](https://mifosforge.jira.com/wiki/download/thumbnails/111673386/Screenshot%20from%202019-06-12%2019-19-21.png?version=1\&modificationDate=1560363593443\&cacheVersion=1\&api=v2\&width=1080)

### **Creating Floating Rate**

Click on **+Create Floating Rate.**&#x20;

![](https://mifosforge.jira.com/wiki/download/thumbnails/111673386/Capture%2038.PNG?version=1\&modificationDate=1484286392110\&cacheVersion=1\&api=v2\&width=1080)

**1 - Floating rate Name:** Provide name of the floating rate, for example - Base lending rate.&#x20;

**2 - Is base lending rate:** Check the check box if this is a base lending rate. Note for an organization it could have only one base lending rate irrespective of many interest rate and dates.&#x20;

**3 - Active:** Check the check box, if you want to activate this rate.&#x20;

**4 - Add:** Click on Add button, in order to add and define new From date, Interest rate and Is differential.&#x20;

**5 - From Date:** Provide start date from when you want to activate this rate. Note, date can't be on current date nor back date, it should be future date. Unless there is a next from date it will consider the date for ever.

**6 - Interest rate:** Provide rate of interest value.&#x20;

**7 - Is Differential:** Check the check box, if you want to give is a differential rate of interest. Note this can't be enabled on the same, if it is a "Is base lending rate is enabled". The differential rate provided here is on the Base lending rate chart.

For Example:- In "Is base lending rate chart" provided interest rate is 10% from date - 2nd July to 2nd August&#x20;

And in another chart you need to create a differential floating rate chart and provide the interest rate, example -1%,&#x20;

So It will be 10% (Base lending rate chart) + 1% (Differential rate chart) = 11% total. Please refer screen shots below - 2 & 3 for clarity.&#x20;

Note: So provided rate for this will be added on to the is base lending defined rates. Base lending rate chart should have been defined to create this chart.&#x20;

**8 - Actions:** Click on the x button, if you want to remove the row.&#x20;

**9 - Submit:** Click on Submit button.&#x20;

### **Viewing Floating Rate**

To view defined rate chart, Go to Admin>>Products>>Floating Rates

**Screen shot - 1:** showing list of created Floating rate charts &#x20;

![](https://mifosforge.jira.com/wiki/download/thumbnails/111673386/Capture%2039.PNG?version=1\&modificationDate=1484286452278\&cacheVersion=1\&api=v2\&width=1080)

**Screen shot - 2:** showing an example of Base lending rate chart. As you can see only "Is base lending rate" box is checked.&#x20;

![](https://mifosforge.jira.com/wiki/download/thumbnails/111673386/Capture%2040.PNG?version=1\&modificationDate=1484286516587\&cacheVersion=1\&api=v2\&width=1080)

**Screen shot - 3:** Showing an example of Differential rate chart. As you can see only "Is Differential" box is checked.

So provided rate for this will be added on to the "is base lending defined rates". &#x20;

![](https://mifosforge.jira.com/wiki/download/thumbnails/111673386/Capture%2041.PNG?version=1\&modificationDate=1484286628569\&cacheVersion=1\&api=v2\&width=1080)

**Screen shot - 4:** Showing an example of Absolute rate chart. As you can see only "Is Differential" and "Is differential" are not enabled (Unchecked).&#x20;

![](https://mifosforge.jira.com/wiki/download/thumbnails/111673386/Capture%2042.PNG?version=1\&modificationDate=1484286725539\&cacheVersion=1\&api=v2\&width=1080)

### **Editing Floating Rate**

To Edit defined rate chart, Go to Admin>>Products>>Floating Rates>>Select required chart for editing>> Click on Edit button>> Then make necessary changes and click on Submit.&#x20;

![](https://mifosforge.jira.com/wiki/download/thumbnails/111673386/Capture%2043.PNG?version=1\&modificationDate=1484286810325\&cacheVersion=1\&api=v2\&width=1080)

Related articles

* Page:[Enabling Floating Rate](/mifosx/user-manual/for-administrators-mifos-x-platform/administration/products/loan-products/loan-product-fields/enabling-floating-rate)
* Page:[How to create new loan - Interest Recalculation](/mifosx/user-manual/for-operational-users-mifos-x-web-app/accounts-and-transactions/loan-accounts/how-to-create-new-loan-interest-recalculation)
* Page:[How to provide floating rates](/mifosx/user-manual/for-operational-users-mifos-x-web-app/accounts-and-transactions/loan-accounts/how-to-provide-floating-rates)
* Page:[Floating Rate](/mifosx/user-manual/for-administrators-mifos-x-platform/administration/products/floating-rate)


# Savings Products

Savings products define the rules, default settings, and constraints for a financial institution's current/checking and passbook savings accounts. A saving product provides a template for multiple accounts that are or will be held by the financial institution's clients, groups and centers.

The categories of information required to set up a saving product includes:

* Identifying or descriptive information&#x20;
* Terms
* Settings
* Charges
* Accounting

Beginning at the main screen, select [**Admin**](/mifosx/user-manual/for-administrators-mifos-x-platform/administration), then select **Products** from the drop-down menu. This will launch the **Products** menu.

Select **Savings Products.** &#x20;

![](https://mifosforge.jira.com/wiki/download/thumbnails/102629497/Capture%201.PNG?version=1\&modificationDate=1484279338691\&cacheVersion=1\&api=v2\&width=1080)

Then click the blue **Create Saving Product** at the top-right of the lis&#x74;**.**

![](https://mifosforge.jira.com/wiki/download/thumbnails/102629497/Screenshot%20from%202019-06-11%2022-42-04.png?version=1\&modificationDate=1560289381526\&cacheVersion=1\&api=v2\&width=850)

### Create Savings Product&#x20;

### Details

![](https://mifosforge.jira.com/wiki/download/attachments/102629497/Capture%202.1.PNG?version=1\&modificationDate=1484280044274\&cacheVersion=1\&api=v2)

Please referring to the  **Details on the Image**  above, the details below are updated with respect to the provided fields number's.  &#x20;

* 1 - Provide Savings **Product name** .
* 2 - Provide **Short name**.&#x20;
* 3 - Provide **Description** of this product.

#### Currency&#x20;

![](https://mifosforge.jira.com/wiki/download/attachments/102629497/Capture%203.1.PNG?version=1\&modificationDate=1484280152987\&cacheVersion=1\&api=v2)

* 4 - Select **Currency**. Need to have defined required currency: [Currency Configuration](/mifosx/user-manual/for-administrators-mifos-x-platform/administration/organization/currency-configuration)
* 5 - Provide **Decimal places**.&#x20;
* 6 - Provide **Currency in multiples of**. This is to provide total amount rounding off. For example: 10, so total amount gets rounded of to 10's. &#x20;

### Terms

![](https://mifosforge.jira.com/wiki/download/thumbnails/102629497/Capture%204.PNG?version=1\&modificationDate=1484280380236\&cacheVersion=1\&api=v2\&height=250)

* 7 - Provide **Nominal annual interest** (Rate of interest)&#x20;
* 8 - Select **Interest compounding period.** For more info refer: [Savings Interest Calculation and Posting](http://mifosforge.jira.com/wiki/spaces/MIFOS/pages/5276125/Savings+Interest+Calculation+and+Posting)\
  &#x20;     Daily \
  &#x20;     Monthly\
  &#x20;     Quarterly \
  &#x20;     Semi-Annual \
  &#x20;     Annually&#x20;
* 9 - Select **Interest posting period** - Interest get posted for the selected frequency period. For more info refer to: [Savings Interest Calculation and Posting](http://mifosforge.jira.com/wiki/spaces/MIFOS/pages/5276125/Savings+Interest+Calculation+and+Posting)\
  &#x20;     Monthly \
  &#x20;     Quarterly \
  &#x20;     Semi-Annual \
  &#x20;     Annually&#x20;
* 10 - Select **Interest calculated using.** For more info refer: [Savings Interest Calculation and Posting](http://mifosforge.jira.com/wiki/spaces/MIFOS/pages/5276125/Savings+Interest+Calculation+and+Posting)\
  &#x20;       Daily Balance \
  &#x20;       Average daily balance&#x20;
* 11 - Select **Days in year** - depending upon your financial days in a year practice.  \
  &#x20;      365 Days\
  &#x20;      360 Days

### Settings

![](https://mifosforge.jira.com/wiki/download/thumbnails/102629497/Capture%205.PNG?version=1\&modificationDate=1484280921549\&cacheVersion=1\&api=v2\&width=1080)

**Note: All the settings fields are optional.**&#x20;

12 - Provide **Minimum opening balance** - This is to set minimum opening balance. So the provided amount at the time of new savings application submission, gets deposited into savings account once it is activated.  &#x20;

13 - Provide value for **Lock-in period**. This is to set lock-in period hence withdrawal wont be allowed for the selected period.&#x20;

14 - Select **frequency** for Lock-in period.         Days        Weeks        Months        Years

15 - Check the check box to enable **withdrawal fee for transfers**. To define withdrawal fee refer : [Charges](/mifosx/user-manual/for-administrators-mifos-x-platform/administration/products/charges)

16 - Provide **balance amount for calculating interest**. So if the available balance is below the provided minimum balance for calculation, interest wont get generated.&#x20;

17 - On checking the check box it is **enforcing minimum balance.**&#x20;

18 - Set up **minimum balance** to be maintained, by providing amount. Withdrawals wont be possible below the provided amount.&#x20;

19 - Checking the check box enables savings account based on savings product to have over draft. Enabling Savings dormancy:

![](https://mifosforge.jira.com/wiki/download/attachments/102629497/Capture%206.1.PNG?version=1\&modificationDate=1484282053154\&cacheVersion=1\&api=v2)

1 - **Enable dormancy tracking:** Check the check box to enable dormancy tracking for inactive savings account.All the fields 2,3 and 4 below needs a scheduler job to "Update savings dormant account" to be run so as to execute the below status/action.&#x20;

2 - **Number of days to inactive sub-status:** It is the consecutive number of days of inactive period to mark an account as inactive.For example - Assuming that the number of days is 10 days and that an account has become inactive. On running the respective schedule job on the 11th day, the account moves into inactive sub-status but the account doesn't get closed. The account will get reactivated on the transaction deposit or withdrawal. &#x20;

3 - **Number of days to dormant sub-status:** It is the consecutive number of days of inactivity to mark an account as dormant.

For example -Assuming that the number of days is 15 days and that a savings account has become inactive. On running the respective schedule job on the 16th day, the account moves into dormant sub-status but the account doesn't get closed. The account will get reactivated on the transaction deposit or withdrawal.

4 - **Number of days to Escheat:** It is the consecutive number of days of inactiivity to mark an account as Escheat.

For example - Assuming that the  number of days is 20 days and that a savings account has become  inactive. On running the respective schedule job on the 21st day, the account moves into Escheat and the account gets closed..

### Charges

![](https://mifosforge.jira.com/wiki/download/attachments/102629497/Capture%207.PNG?version=1\&modificationDate=1484281683917\&cacheVersion=1\&api=v2)

In order to use Add charge, you should have already defined it in charges. For more information on charges, refer here: [Charges ](/mifosx/user-manual/for-administrators-mifos-x-platform/administration/products/charges)

### Accounting&#x20;

![](https://mifosforge.jira.com/wiki/download/attachments/102629497/Capture%208.PNG?version=1\&modificationDate=1484282228887\&cacheVersion=1\&api=v2)

**By default Accounting will be disabled - None:-** Meaning If you are using this product for various transactions like deposits, withdrawals, etc. these transactions are not passed in the journal  entry.  \
**Enabling accounting for the savings product**:->> You should have created chart of accounts, for info refer: [https://mifosforge.jira.com/wiki/display/docs/Chart+of+Accounts+and+General+Ledger+Setup.](/mifosx/user-manual/for-administrators-mifos-x-platform/accounting/chart-of-accounts-general-ledger-setup)>> To enable Accounting, you need to select cash accounting. As of now, Mifos x supports only cash accounting for savings product.&#x20;

* &#x20;     Cash

\>> Map accounts with respect to the savings product accounts. For information on these accounts refer: [A Possible accounting Spec](https://mifosforge.jira.com/wiki/display/MIFOSX/A+Possible+accounting+Spec) - Accounting rules for savings.

![](https://mifosforge.jira.com/wiki/download/thumbnails/102629497/Screenshot%20from%202019-06-11%2022-58-18.png?version=1\&modificationDate=1560290368433\&cacheVersion=1\&api=v2\&width=1080)

**Advanced Accounting Rule**&#x20;

On clicking on the show button it enables Advanced Accounting Rule.&#x20;

![](https://mifosforge.jira.com/wiki/download/thumbnails/102629497/Capture%2010.PNG?version=1\&modificationDate=1484282369584\&cacheVersion=1\&api=v2\&width=1080)

If you click on Add button, it will expand and show selection drop-downs.&#x20;

* Configure Fund sources for Payment Channels. \
  For Example: In the image shown above, Payment type - Cheque is mapped to Fund source - Bank. So whenever payment type is used for transaction. Journal entry for Account - Bank will be passed.&#x20;
* Map Fees to Income Accounts.&#x20;
* Map Penalties to Specific Income Accounts

**Click on Submit button to Save/Create savings product.**

![](https://mifosforge.jira.com/wiki/download/attachments/102629497/Capture%2011.PNG?version=1\&modificationDate=1484282452218\&cacheVersion=1\&api=v2)

### View Savings Product&#x20;

&#x20;Go to Admin>>Product>>Savings Product

![](https://mifosforge.jira.com/wiki/download/thumbnails/102629497/Screenshot%20from%202019-06-11%2023-03-09.png?version=1\&modificationDate=1560290614243\&cacheVersion=1\&api=v2\&width=1080)

The image above shows the Savings products list.

### **Edit Savings Product**

Go to Admin>>Product>>savings Products>>Select savings product (Example: Agriculture Saving ) >> then click on Edit button.&#x20;

![](https://mifosforge.jira.com/wiki/download/thumbnails/102629497/Capture%2013.PNG?version=1\&modificationDate=1484282691659\&cacheVersion=1\&api=v2\&width=1080)

The image above shows savings products details and you can modify it by clicking on Edit

Related articles

* Page:[Savings Products](/mifosx/user-manual/for-administrators-mifos-x-platform/administration/products/untitled)
* Page:[Loan Products](/mifosx/user-manual/for-administrators-mifos-x-platform/administration/products/loan-products)
* Page:[Share products](/mifosx/user-manual/for-administrators-mifos-x-platform/administration/products/share-products)
* Page:[Fixed Deposit Products](/mifosx/user-manual/for-administrators-mifos-x-platform/administration/products/fixed-deposit-products)
* Page:[Deposit Accounts](/mifosx/user-manual/for-operational-users-mifos-x-web-app/accounts-and-transactions/deposit-accounts)


# Saving Product Fields

### **Saving Product Fields**

**Details Section**

| **Field name (attribute)** | Description                                                                                                                                                                                                                                                                                                                                                                                                                                                                                                                                                                                                                                                                                                                                                                                                                                                                                                                                                                                                                                                                  | Example                 | Validations (if applicable)                                               |
| -------------------------- | ---------------------------------------------------------------------------------------------------------------------------------------------------------------------------------------------------------------------------------------------------------------------------------------------------------------------------------------------------------------------------------------------------------------------------------------------------------------------------------------------------------------------------------------------------------------------------------------------------------------------------------------------------------------------------------------------------------------------------------------------------------------------------------------------------------------------------------------------------------------------------------------------------------------------------------------------------------------------------------------------------------------------------------------------------------------------------- | ----------------------- | ------------------------------------------------------------------------- |
| Product name               | <p></p><p>The product name is a unique identifier for the saving product. The product name is used:</p><ul><li>In <strong>Product</strong> lists (depending on where the product list appears, it may contain a list of all saving products or a list of active saving products)</li><li>As the <strong>Saving Account</strong> identifier in the <strong>Saving Account Overview</strong> section on the client <strong>General</strong> tab</li><li>In the <strong>Name</strong> column in the list of saving products displayed when <strong>Saving Products</strong> is clicked on the Products page</li><li>In <strong>Savings Reports</strong> headers to group product types</li><li>As the <strong>Saving Account</strong> identifier at the top of the detail savings product page displayed when a specific saving product is selected from the list of savings products displayed when <strong>Saving Products</strong> is clicked on the Products page</li><li>In the <strong>Product name</strong> field to create a <strong>Savings Product</strong></li></ul> | Monthly Interest Saving | <p>Required field</p><p>Alphanumeric</p><p>Maximum 100 characters<br></p> |
| Short name                 | <p></p><p>The short name is a unique identifier for the saving product. The short name is used:</p><ul><li>In the <strong>Short name</strong> column in the list of saving products displayed when <strong>Saving Products</strong> is clicked on the Products page</li><li>In the <strong>Short name</strong> field on the detail savings product page displayed when a specific saving product is selected from the list of savings products, displayed when <strong>Savings Products</strong> is clicked on the Products page</li><li>In the <strong>Short name</strong> field to create a <strong>Savings Product</strong></li><li><em>Where is it used in reports? - not used in any existing Savings Report</em></li></ul>                                                                                                                                                                                                                                                                                                                                             | Monthly Interest Saving | <p>Required field</p><p>Alphanumeric</p><p>Maximum 4 characters<br></p>   |
| Description                | <p></p><p>The description is used to provide additional information regarding the purpose and characteristics of the saving product. The description is used:</p><ul><li>To create a <strong>Savings Product</strong></li><li>In the <strong>Description</strong> field on the detail savings product page displayed when a specific saving product is selected from the list of savings products, displayed when <strong>Saving Products</strong> is clicked on the Products page</li><li>In the <strong>Description</strong> field to create a <strong>Savings Product</strong></li><li><em>Where is it used in reports? - not used in any existing Savings Report</em></li></ul>                                                                                                                                                                                                                                                                                                                                                                                          | Monthly Interest Saving | <p>Alphanumeric</p><p>Maximum 500 characters<br></p>                      |

**Currency Section**

| **Field name (attribute)** | Description                                                                                                                                          | Example | Validations (if applicable)         |
| -------------------------- | ---------------------------------------------------------------------------------------------------------------------------------------------------- | ------- | ----------------------------------- |
| Currency                   | The currency to be used for the saving product. Select the saving product's currency from the **Currency** list.                                     |         | Required field                      |
| Decimal places             | The number of decimal places to be used to track and report on saving accounts based on the saving product.                                          | 2       | <p>Required field</p><p>Numeric</p> |
| Multiples of               | You can enter multiples of currency value. For example, if you put "multiples of 100", the currency value will be rounded off to 200, 300, 400, etc. | 0       | <p>Required field</p><p>Numeric</p> |

**Terms Section**

| **Field name (attribute)**   | Description                                                                                                                                                                                     | Example               | Validations (if applicable)                                    |
| ---------------------------- | ----------------------------------------------------------------------------------------------------------------------------------------------------------------------------------------------- | --------------------- | -------------------------------------------------------------- |
| Nominal annual interest rate | The default interest rate set when creating savings accounts based on this saving product, e.g. **5**% per year. Nominal annual interest rate is expressed as the annual percentage rate (APR). | 5                     | <p>Required field</p><p>Numeric (percentage) with decimals</p> |
| Interest compounding period  | The period at which interest rate is compounded.                                                                                                                                                | Monthly               | <p>Required field</p><p>Select from list</p>                   |
| Interest posting period      | The period at which interest rate is posted or credited to a saving account based on this saving product.                                                                                       | Monthly               | <p>Required field</p><p>Select from list</p>                   |
| Interest calculated using    | The method used to calculate interest.                                                                                                                                                          | Average Daily Balance | <p>Required field</p><p>Select from list</p>                   |
| Days in years                | The setting for number of days in year to use to calculate interest. For example 360 days or 365 days.                                                                                          | 360                   | <p>Required field</p><p>Select from list</p>                   |

**Settings Section**

| **Field name (attribute)**                | Description                                                                                                                                                                                                                                                 | Example  | Validations (if applicable)                                 |
| ----------------------------------------- | ----------------------------------------------------------------------------------------------------------------------------------------------------------------------------------------------------------------------------------------------------------- | -------- | ----------------------------------------------------------- |
| Minimum opening balance                   | Sets the minimum deposit amount required to open a saving account of this saving product type.                                                                                                                                                              | 2000     | <p>Optional field</p><p>Numeric with decimals</p>           |
| Locking period frequency                  | Used to indicate the length of time that a savings account of this saving product type is locked-in and withdrawals are not allowed.                                                                                                                        | 6 Months | <p>Optional field</p><p>Numeric and select from list</p>    |
| Apply Withdrawal fee for transfers        | <p>Indicates whether the withdrawal fee should be applied when funds are transferred between accounts.</p><p>Note that the withdrawal field must have been defined in the system. See <a href="/pages/-Ljw3KKGDjSZKMkJg_mT">How to Create a Charge</a>.</p> |          | <p>Optional field</p><p>Check if true; Uncheck if false</p> |
| Balance Required For Interest Calculation | Sets the balance required for interest calculation.                                                                                                                                                                                                         |          | Optional field                                              |
| Enforce minimum balance                   | Indicates whether to enforce a minimum balance.                                                                                                                                                                                                             |          | <p>Optional field</p><p>Check if true; Uncheck if false</p> |
| Minimum balance                           | Sets the minimum balance allowed for a saving account.                                                                                                                                                                                                      |          | Optional field                                              |
| Is Overdraft allowed?                     | Indicates whether saving accounts based on this saving product may have an overdraft.                                                                                                                                                                       |          | <p>Optional field</p><p>Check if true; Uncheck if false</p> |
| Maximum overdraft amount limit            | Sets the maximum allowed overdraft amount for a saving account that is allowed to have an overdraft.                                                                                                                                                        | 5000     | Required if 'Is Overdraft Allowed' is checked               |

**Charges Section**

| **Field name (attribute)** | Description                                                                                                                                                     | Example | Validations (if applicable) |
| -------------------------- | --------------------------------------------------------------------------------------------------------------------------------------------------------------- | ------- | --------------------------- |
| Charges                    | Select a charge from the **Charges** list and click **Add**. If more charges apply to the saving product, select additional charges and click **Add** for each. |         |                             |

**Accounting Section**

| **Field name (attribute)** | Description                                                                                                                                            | Example | Validations (if applicable) |
| -------------------------- | ------------------------------------------------------------------------------------------------------------------------------------------------------ | ------- | --------------------------- |
| Accounting                 | <p>Select one from:</p><ul><li>None</li><li>Cash</li></ul><p>If Cash is selected, see <a href="/pages/-Ljq13N84LxGmoc5ZJrp">additional fields</a>.</p> |         |                             |


# Accounting Saving Product Fields

### **Saving Product Fields—Additional Fields for Cash Accounting**

**Assets**

| **Field name (attribute)** | Description                                                                                                                                                                          | Example | Validations (if applicable) |
| -------------------------- | ------------------------------------------------------------------------------------------------------------------------------------------------------------------------------------ | ------- | --------------------------- |
| Saving reference           | An Asset account (typically a Cash account), to which the amount is debited when a deposit is made by the account holder and is credited when the account holder makes a withdrawal. |         |                             |
| Overdraft portfolio        | An Asset account (typically a Cash account), that increases when a client makes an overdraft withdrawal.                                                                             |         |                             |

**Liabilities**

| **Field name (attribute)**    | Description                                                                                                                                                                 | Example | Validations (if applicable) |
| ----------------------------- | --------------------------------------------------------------------------------------------------------------------------------------------------------------------------- | ------- | --------------------------- |
| Saving control                | A Liability account which denotes the Savings deposit account portfolio and is credited when a deposit is made and debited when a withdrawal is done.                       |         |                             |
| Savings transfers in suspense | <p><em>tool tip text follows...doesn't make sense to me</em></p><p> An Asset account that is used as a suspense account for tracking Portfolio of Loans under transfer.</p> |         |                             |

**Expenses**

| **Field name (attribute)** | Description                                                                           | Example | Validations (if applicable) |
| -------------------------- | ------------------------------------------------------------------------------------- | ------- | --------------------------- |
| Interest on savings        | An Expense account, which is debited when interest is due to be paid to the customer. |         |                             |
| Write-off                  | An Expense account, which increases when a client does not repay overdraft balance.   |         |                             |

**Income**

| **Field name (attribute)** | Description                                                                                  | Example | Validations (if applicable) |
| -------------------------- | -------------------------------------------------------------------------------------------- | ------- | --------------------------- |
| Income from fees           | An Income account which is credited when a fee is paid by account holder on this account.    |         |                             |
| Income from penalties      | An Income account that is credited when a penalty is paid by account holder on this account. |         |                             |
| Income from interest       | An Income account, where income is generated when client pays interest on overdrafts.        |         |                             |

**Advanced accounting rules (optional)**

The advanced accounting rules allow for finer detail in mapping payment types to fund sources, fees to income accounts, and penalties to income accounts.

| Field name (attributes)                                                                 | Description                                                                                                                                                                                                                                               | Example | Validations (if applicable) |
| --------------------------------------------------------------------------------------- | --------------------------------------------------------------------------------------------------------------------------------------------------------------------------------------------------------------------------------------------------------- | ------- | --------------------------- |
| <p>Configure Fund Sources for Payment Channels</p><p>Payment Type</p><p>Fund Source</p> | <p>A different Fund Source for each Payment Channel may be specified.</p><p>Select a Payment Type from the <strong>Payment Type</strong> list (e.g.,Cash, check, m-pesa, etc).</p><p>Select a Fund Source from the <strong>Fund Source</strong> list.</p> |         |                             |
| <p>Map Fees to Income Accounts</p><p>Fees</p><p>Income Account</p>                      | <p>A different Income Account for each Fee type may be specified.</p><p>Select a Fee from the <strong>Fee</strong> list.</p><p>Select an Income Account from the <strong>Income Account</strong> list.</p>                                                |         |                             |
| <p>Map Penalties to Specific Income Accounts</p><p>Penalty</p><p>Income Account</p>     | <p>A different Income Account for each Penalty type may be specified.</p><p>Select a Penalty from the <strong>Penalty</strong> list.</p><p>Select an Income Account from the <strong>Income Account</strong> list.</p>                                    |         |                             |


# Fixed Deposit Products

Fixed Deposit Products defines the rules, default settings, and constraints for a financial institution's fixed deposit offerings (also referred to as term deposits). A fixed deposit product provides a template for multiple fixed deposit accounts for the financial institution's clients.

The information required to set up a fixed deposit product includes:

* Identifying descriptive information&#x20;
* Terms
* Settings
* Charges
* Accounting

Beginning at the main screen, select [**Admin**](/mifosx/user-manual/for-administrators-mifos-x-platform/administration), then **Products** from the drop-down menu. This will launch the **Products** menu.

Select **Fixed Deposit Products.**  &#x20;

![](https://mifosforge.jira.com/wiki/download/thumbnails/102629544/Capture%2019.PNG?version=1\&modificationDate=1484283809585\&cacheVersion=1\&api=v2\&width=1080)

### Now Select **Create Fixed Deposit Product**

![](https://mifosforge.jira.com/wiki/download/attachments/102629544/Capture%2020.PNG?version=1\&modificationDate=1484283899211\&cacheVersion=1\&api=v2)

### Details

![](https://mifosforge.jira.com/wiki/download/attachments/102629544/Capture%2021.PNG?version=1\&modificationDate=1484283979846\&cacheVersion=1\&api=v2)

Please refer above **Image for details**, Details mentioned below are updated with respect to the provided fields number's.  &#x20;

* 1 - Provide Savings **Product name** .
* 2 - Provide **Short name**.&#x20;
* 3 - Provide **Description** of this product.

### Currency&#x20;

![](https://mifosforge.jira.com/wiki/download/attachments/102629544/Capture%2022.PNG?version=1\&modificationDate=1484284054618\&cacheVersion=1\&api=v2)

* 4 - Select **Currency**. You need to have defined required currency: [Currency Configuration](/mifosx/user-manual/for-administrators-mifos-x-platform/administration/organization/currency-configuration)
* 5 - Provide **Decimal places**.&#x20;
* 6 - Provide **Currency in multiples of**. This is to provide the total rounding off amount. For example: 10, so Total amount gets rounded of to 10's. &#x20;

### Terms

![](https://mifosforge.jira.com/wiki/download/thumbnails/102629544/Capture%2023.PNG?version=1\&modificationDate=1484284197030\&cacheVersion=1\&api=v2\&width=1080)

7 - Provide **Default Deposit Amount**&#x20;

8 - Provide **Minimum Deposit Amount**         &#x20;

9 - Provide **Maximum Deposit Amount**&#x20;

10 - Select **Interest compounding period.** For more information refer: [Savings Interest Calculation and Posting](https://mifosforge.jira.com/wiki/display/MIFOS/Savings+Interest+Calculation+and+Posting)

&#x20;    Daily \
&#x20;     Monthly\
&#x20;     Quarterly \
&#x20;     Semi-Annual \
&#x20;     Annually &#x20;

* 11 - Select **Interest posting period** - Interest get posted for the selected frequency period. For more information refer: [Savings Interest Calculation and Posting](https://mifosforge.jira.com/wiki/display/MIFOS/Savings+Interest+Calculation+and+Posting)\
  &#x20;     Monthly \
  &#x20;     Quarterly \
  &#x20;     Semi-Annual \
  &#x20;     Annually&#x20;
* 12 - Select **Interest calculated using.** For more information refer: [Savings Interest Calculation and Posting](https://mifosforge.jira.com/wiki/display/MIFOS/Savings+Interest+Calculation+and+Posting)\
  &#x20;       Daily Balance \
  &#x20;       Average daily balance&#x20;
* 13 - Select **Days in year** - depending upon your financial days in a year practice.  \
  &#x20;      365 Days\
  &#x20;      360 Days

### Settings

For detailed information on Fields refer: [Fixed Deposit Product Fields](/mifosx/user-manual/for-administrators-mifos-x-platform/administration/products/fixed-deposit-products/fixed-deposit-product-fields)

![](https://mifosforge.jira.com/wiki/download/thumbnails/102629544/Capture%2024.PNG?version=1\&modificationDate=1484284429214\&cacheVersion=1\&api=v2\&width=1080)

14 - Provide Lock-in period value Example: 12 Months (\*15 - freq) so for the 12 months it doesn't allow withdrawal.&#x20;

15 - Select frequency: Days  Weeks    Months  Years

16 - Provide Minimum Deposit Term value Example: 12 months (\*17 - Freq), can set minimum deposit term.&#x20;

17 - Select frequency\
Days\
Weeks\
Months\
Years

18 - Provide thereafter in multiples of value Example: Lets say the provided deposit term is 12 months and Provide thereafter in multiples of value is 3 months. Then creation of Fixed Deposit account will only be allowed every after 2 months like 14, 16, 18th month.(\*19 - freq)&#x20;

19 - Select frequency:\
Days      Weeks         Months       Years

20 - Provide Maximum Deposit Term value Example: 36 months (\*21 - Freq), can set maximum deposit term.&#x20;

21 - Select frequency

&#x20;Days\
Weeks\
Months\
Years

22 - Check the check box to enable penalty, if there is a premature closure.&#x20;

23 - Provide the percentage - penalty for premature closure. Example: 1(%) will be deduced by the selected deduction type(\*24).&#x20;

24 - Select type of deduction Whole term - As originally defined term. Till premature withdrawal - Till the date of premature withdrawal.

### Interest Rate chart&#x20;

For info on amount range interest rate chart, please refer - [Interest rate chart with amount range](/mifosx/user-manual/for-administrators-mifos-x-platform/administration/products/fixed-deposit-products/interest-rate-chart-with-amount-range)

For detailed information on Fields refer: [Fixed Deposit Product Fields](/mifosx/user-manual/for-administrators-mifos-x-platform/administration/products/fixed-deposit-products/fixed-deposit-product-fields)

![](https://mifosforge.jira.com/wiki/download/thumbnails/102629544/Capture%2025.PNG?version=1\&modificationDate=1484284625309\&cacheVersion=1\&api=v2\&width=1080)

25 - Provide start date for the interest rate chart.&#x20;

26 - Provide end date, in case if you want to stop the provided interest rates for the chart.&#x20;

27 - Select period type\
Days    Weeks   Months     Years   &#x20;

Example: Month

28 - Provide **period value - From / To** Example: a) 1 - 12 months                 b) 13 - 18 Months

29 - Provide rate of **interest** for the period. Example: a) 8(%)                 b) 8.5(%)&#x20;

30 - Provide **description** for the table. Example: a) 1 - 12 mnt - 8%.                 b) 13 - 18 mnt - 8.5%.&#x20;

31 - To add more interest on the interest rate table, click on **Add** button. To remove, click on **remove** button.&#x20;

**32 - Incentives -** For detailed information on Fields refer: [Fixed Deposit Product Fields](/mifosx/user-manual/for-administrators-mifos-x-platform/administration/products/fixed-deposit-products/fixed-deposit-product-fields)

![](https://mifosforge.jira.com/wiki/download/thumbnails/102629544/Capture%2026.PNG?version=1\&modificationDate=1484284756729\&cacheVersion=1\&api=v2\&width=640)

33 - Select **Attribute** from the drop down. Example - Gender

34 - Select  either one depending upon your needs:- Less then or Equal or Greater then or Not equal.  Example - Female

35 - Select Type: Fixed - Provided value will be considered as the rate of interest. Example - 9%(\*36).  Incentive - Provided value will be added to the interest rate chart. For example in the chart if it is defined as 8% and incentive is provided as 2%(\*36) then the final interest value will be 10%.&#x20;

36 - Provide the rate of interest. Example: 9% as shown in (\*35).&#x20;

37 - Click on Add(+) button to define more.&#x20;

Example 1) Attribute - Gender, Equal, Value - Female, Type - Fixed, Interest - 9(%) then close the button to save.&#x20;

Example 2) Attribute - Age, Greater then, Value - 60, Type - Incentive, Interest - 2(%) then close the button to save.

### Charges

![](https://mifosforge.jira.com/wiki/download/attachments/102629544/Capture%2027.PNG?version=1\&modificationDate=1484284859776\&cacheVersion=1\&api=v2)

In order to use Add charge, you should have already defined it in charges. For more information on charges refer here: [Charges ](/mifosx/user-manual/for-administrators-mifos-x-platform/administration/products/charges)

### Accounting&#x20;

![](https://mifosforge.jira.com/wiki/download/attachments/102629544/Capture%2028.PNG?version=1\&modificationDate=1484284926690\&cacheVersion=1\&api=v2)

**By default, Accounting will be disabled - None:-** This means If you are using this product for various transactions like deposits, withdrawals,etc, these transactions are not passed in the journal entry.  <br>

**Enabling accounting for the savings product**:->> You should have created chart of accounts, for more information refer: [https://mifosforge.jira.com/wiki/display/docs/Chart+of+Accounts+and+General+Ledger+Setup](/mifosx/user-manual/for-administrators-mifos-x-platform/accounting/chart-of-accounts-general-ledger-setup).>> To enable Accounting, you need to select cash accounting. As of now, Mifos x supports only cash accounting for savings product.&#x20;

* &#x20;     Cash

\>> Map accounts with respect to the savings product accounts. For information on these accounts refer: [A Possible accounting Spec](https://mifosforge.jira.com/wiki/display/MIFOSX/A+Possible+accounting+Spec) - Accounting rules for savings.

![](https://mifosforge.jira.com/wiki/download/thumbnails/102629544/Capture%2029.PNG?version=1\&modificationDate=1484284990511\&cacheVersion=1\&api=v2\&width=900)

**Advanced Accounting Rule**&#x20;

On clicking on the show button it enables the Advanced accounting rule.&#x20;

![](https://mifosforge.jira.com/wiki/download/thumbnails/102629544/Capture%2030.PNG?version=1\&modificationDate=1484285070332\&cacheVersion=1\&api=v2\&height=250)

If you click on **Add** button, it will expand and show up selection drop-downs.&#x20;

* Configure Fund sources for Payment Channels. \
  Example: In the image shown above, Payment type - Cheque is mapped to Fund source - Bank. So whenever payment type is used for transaction. Journal entry for Account - Bank will be passed.&#x20;
* Map Fees to Income Accounts.&#x20;
* Map Penalties to Specific Income Accounts

Click on **Submit** button to Save/Create savings product.

![](https://mifosforge.jira.com/wiki/download/attachments/102629544/Capture%2031.PNG?version=1\&modificationDate=1484285113123\&cacheVersion=1\&api=v2)

Related articles

* Page:[Savings Products](/mifosx/user-manual/for-administrators-mifos-x-platform/administration/products/untitled)
* Page:[Loan Products](/mifosx/user-manual/for-administrators-mifos-x-platform/administration/products/loan-products)
* Page:[Recurring Deposit](/mifosx/user-manual/for-administrators-mifos-x-platform/administration/products/recurring-deposit)
* Page:[Share products](/mifosx/user-manual/for-administrators-mifos-x-platform/administration/products/share-products)
* Page:[Fixed Deposit Products](/mifosx/user-manual/for-administrators-mifos-x-platform/administration/products/fixed-deposit-products)


# Fixed Deposit Product Fields

#### **Fixed Deposit Product Fields** <a href="#fixeddepositproductfields-fixeddepositproductfields" id="fixeddepositproductfields-fixeddepositproductfields"></a>

**Details Section**

| **Field name (attribute)** | Description                                                                                                                                                                                                                                                                                                                                                                                                                                                                                                                                                                                                                                                             | Example                        | Validations (if applicable)                  |
| -------------------------- | ----------------------------------------------------------------------------------------------------------------------------------------------------------------------------------------------------------------------------------------------------------------------------------------------------------------------------------------------------------------------------------------------------------------------------------------------------------------------------------------------------------------------------------------------------------------------------------------------------------------------------------------------------------------------- | ------------------------------ | -------------------------------------------- |
| Product name               | <p></p><p>The product name is a unique identifier for the fixed deposit product. The product name is used:</p><ul><li>In <strong>Product</strong> lists (depending on where the product list appears, it may contain a list of all fixed deposit products or a list of active fixed deposit products)</li><li>As the <strong>Fixed Deposit Account</strong> identifier in the <strong>Fixed Deposit Account Overview</strong>section on the client <strong>General</strong> tab</li><li>In the <strong>Name</strong> column in the list of fixed deposit products displayed when <strong>Fixed Deposit Products</strong> is clicked on the Products page.<br></li></ul> | Monthly Interest fixed deposit | <p>Required field</p><p>Alphanumeric<br></p> |
| Short name                 | <p></p><p>The short name is a unique identifier for the fixed deposit product. The short name is used:</p><ul><li>In the <strong>Short name</strong> column in the list of fixed deposit products displayed when <strong>Fixed Deposit Products</strong> is clicked on the Products page</li><li>These short names are mainly useful in reporting.</li></ul>                                                                                                                                                                                                                                                                                                            | MIS                            | <p>Required field</p><p>Alphanumeric<br></p> |
| Description                | The description is used to provide additional information regarding the purpose and characteristics of the fixed deposit produc                                                                                                                                                                                                                                                                                                                                                                                                                                                                                                                                         | Monthly Interest fixed deposit | Alphanumeric                                 |

**Terms Section**

| **Field name (attribute)**  | Description                                                                                                                                                                                                                                                                               | Example               | Validations (if applicable)                  |
| --------------------------- | ----------------------------------------------------------------------------------------------------------------------------------------------------------------------------------------------------------------------------------------------------------------------------------------- | --------------------- | -------------------------------------------- |
| Currency                    | The currency to be used for the fixed deposit product. Select the fixed deposit product's currency from the **Currency** list.                                                                                                                                                            |                       | Required field                               |
| Decimal places              | The number of decimal places to be used to track and report on fixed deposit accounts based on the fixed deposit product.                                                                                                                                                                 | 2                     | <p>Required field</p><p>Numeric</p>          |
| Multiples of                | <p>Here you can provide multiple of currency, for example, if you provide "multiple of 10", then the currency values will be rounded off to 20, 30,.. 140, 150....</p><p>If you provide "multiple of 100", then the currency values will be 200, 300, 400.....1500, 1600, 1700.. etc.</p> | 0                     | <p>Required field</p><p>Numeric</p>          |
| Minimum Deposit Amount      | The minimum deposit amount required to open a fixed deposit account based on this fixed deposit product.                                                                                                                                                                                  | 200                   | <p>Optional field</p><p>Numeric</p>          |
| Deposit Amount              | The default deposit amount expected when a fixed deposit account based on this fixed deposit product is opened.                                                                                                                                                                           | 500                   | <p>Required field</p><p>Numeric</p>          |
| Maximum Deposit Amount      | The maximum deposit amount allowed when a fixed deposit account based on this fixed deposit product is opened.                                                                                                                                                                            | 10000                 | <p>Optional field</p><p>Numeric</p>          |
| Interest compounding period | The period at which interest rate is compounded. It is normally monthly, quarterly, etc..                                                                                                                                                                                                 | Monthly               | <p>Required field</p><p>Select from list</p> |
| Interest posting period     | The period at which interest rate is posted or credited to a fixed deposit account based on this fixed deposit product.                                                                                                                                                                   | Monthly               | <p>Required field</p><p>Select from list</p> |
| Interest calculated using   | The method used to calculate interest.                                                                                                                                                                                                                                                    | Average Daily Balance | <p>Required field</p><p>Select from list</p> |
| Days in years               | The setting for number of days in year used to calculate interest. Normally, it is 360 days or 365 days.                                                                                                                                                                                  | 360                   | <p>Required field</p><p>Select from list</p> |

**Setting Section**

| **Field name (attribute)**                                                | Description                                                                                                                                                                                                                                                                                                                                                                                                                                                                                                                                                                                                                                                                                                                                                                                                                                                                                                                                                                                                                                                                                                 | Example                                                           | Validations (if applicable)                                                                                       |
| ------------------------------------------------------------------------- | ----------------------------------------------------------------------------------------------------------------------------------------------------------------------------------------------------------------------------------------------------------------------------------------------------------------------------------------------------------------------------------------------------------------------------------------------------------------------------------------------------------------------------------------------------------------------------------------------------------------------------------------------------------------------------------------------------------------------------------------------------------------------------------------------------------------------------------------------------------------------------------------------------------------------------------------------------------------------------------------------------------------------------------------------------------------------------------------------------------- | ----------------------------------------------------------------- | ----------------------------------------------------------------------------------------------------------------- |
| Locking period frequency                                                  | A period of time during which a fixed deposit account based on this fixed deposit product will be locked-in after it is opened. During the lock-in period, the client will be unable to access any funds deposited in the account and premature close of FD Account is not possible if lock-in period is set.                                                                                                                                                                                                                                                                                                                                                                                                                                                                                                                                                                                                                                                                                                                                                                                               | 3 Months                                                          | <p>Optional</p><p>Number and select from list</p>                                                                 |
| Minimum Deposit Term                                                      | The minimum length of time the funds must remain in the fixed deposit account to earn the full interest income.                                                                                                                                                                                                                                                                                                                                                                                                                                                                                                                                                                                                                                                                                                                                                                                                                                                                                                                                                                                             | 6 Months                                                          | <p>Required?</p><p>Number and select from list</p>                                                                |
| And thereafter, in Multiples of                                           | After the minimum deposit term has passed, additional deposit duration may be specified. Each of these additional deposit duration must be complete for the fixed deposit account to earn the full interest income.                                                                                                                                                                                                                                                                                                                                                                                                                                                                                                                                                                                                                                                                                                                                                                                                                                                                                         | 1 Month                                                           | <p>Optional</p><p>Number and select from list</p>                                                                 |
| Maximum Deposit Term                                                      | The maximum length of time funds may be deposited in a fixed deposit account based on this fixed deposit product. If the client doesn't want to withdraw or transfer funds to any savings account, he can again extend it for another term.                                                                                                                                                                                                                                                                                                                                                                                                                                                                                                                                                                                                                                                                                                                                                                                                                                                                 |                                                                   |                                                                                                                   |
| <p>For Pre-mature Closure:</p><p>Apply penal interest (less)</p><p>On</p> | <p>Complete this section to define an interest penalty for pre-mature closure expressed as a percentage to deduct from the interest rate applicable to either:</p><ul><li>the interest applicable for the period up to the premature withdrawal</li><li>the interest applicable for the whole term</li></ul><p>The interest rates applicable for various time frames are defined in the Interest Rate Chart(s) for the fixed deposit product.</p><p>Example:</p><p>The fixed deposit product has a 6 month term. For the first 90 days, the interest rate is 4.5%, and for 91-180 days, the interest rate is 5% (based on the Interest Rate Chart in effect). The settings for Pre-mature closure are 1% penal interest and <strong>Till Premature Withdrawal</strong>. A client with a fixed deposit account based on the fixed deposit product, withdraws funds after 60 days. The interest that the client will be paid on withdrawing funds is 3.5% (4.5%-1%). If the settings had been 1% penal interest and <strong>Whole Term</strong> the client would be paid 4% (5%-1%) on withdrawing funds.</p> | <p>Check box checked</p><p>1%</p><p>Till Premature Withdrawal</p> | <p>Options</p><p>Check for True; uncheck for False (no interest penalty)</p><p>Numeric</p><p>Select from list</p> |

**Interest Rate Chart**

**For info on amount range interest rate chart, please refer -** [**Interest rate chart with amount range**](/mifosx/user-manual/for-administrators-mifos-x-platform/administration/products/fixed-deposit-products/interest-rate-chart-with-amount-range)

The interest rate chart provides the information required to calculate the interest payable on a fixed deposit account based on the fixed deposit product. When a fixed deposit product is defined you must set up only one interest rate chart. Additional interest rate charts can be set up after the fixed deposit product has been created.

When a fixed deposit product is initially created, the Interest Rate Chart table will be empty. Click **+Add** to create the first and any additional rows required.

**Example**

![](https://mifosforge.jira.com/wiki/download/thumbnails/72253549/image2014-5-30%2012:22:47.png?version=1\&modificationDate=1401477768210\&cacheVersion=1\&api=v2\&width=850)

| **Field name (attribute)** | Description                                                                                                                                                | Example                      | Validations (if applicable)                         |
| -------------------------- | ---------------------------------------------------------------------------------------------------------------------------------------------------------- | ---------------------------- | --------------------------------------------------- |
| Valide From Date           | The Valid From Date is the date from which the Interest Rate Chart will be in effect.                                                                      | 01 January 2012              | <p>Required field</p><p>Select from date picker</p> |
| End Date                   | The End Date is the date after which the Interest Rate Chart will not be in effect. Leave this field blank if the Interest Rate Chart end date is unknown. | blank                        | <p>Optional field</p><p>Select from date picker</p> |
| Period Type                | The period type may be expressed in Days, Weeks, Months, or Years                                                                                          | Days                         | <p>Required for each row</p><p>Select from list</p> |
| Period From / To           | The range expressed as from/to in the period type measure. When multiple rows are present, the periods cannot overlap.                                     | <p>1 - 90</p><p>91 - 180</p> | <p>Required for each row</p><p>Numeric</p>          |
| Interest                   | The interest rate that is to apply for the specified period.                                                                                               | 5                            | <p>Required for each row</p><p>Numeric—percent</p>  |
| Description                |                                                                                                                                                            |                              |                                                     |

**Charges Section**

| **Field name (attribute)** | Description                                                                                                                                                            | Example | Validations (if applicable) |
| -------------------------- | ---------------------------------------------------------------------------------------------------------------------------------------------------------------------- | ------- | --------------------------- |
| Charges                    | Select a charge from the **Charges** list and click **Add**. If more charges apply to the fixed deposit product, select additional charges and click **Add** for each. |         |                             |

**Accounting Section**

| **Field name (attribute)** | Description                                                                                                                                            | Example | Validations (if applicable) |
| -------------------------- | ------------------------------------------------------------------------------------------------------------------------------------------------------ | ------- | --------------------------- |
| Accounting                 | <p>Select one from:</p><ul><li>None</li><li>Cash</li></ul><p>If Cash is selected, see <a href="/pages/-Ljq13N84LxGmoc5ZJrp">additional fields</a>.</p> |         |                             |


# Accounting Fixed and Recurring Deposit Product Fields

**Fixed and Recurring Deposit Product Fields—Additional Fields for Cash Accounting**

**Assets**

| **Field name (attribute)** | Description                                                                                                                                                                          | Example | Validations (if applicable) |
| -------------------------- | ------------------------------------------------------------------------------------------------------------------------------------------------------------------------------------ | ------- | --------------------------- |
| Saving reference           | An Asset account (typically a Cash account), to which the amount is debited when a deposit is made by the account holder and is credited when the account holder makes a withdrawal. |         |                             |

**Liabilities**

| **Field name (attribute)**    | Description                                                                                                                                                                           | Example | Validations (if applicable) |
| ----------------------------- | ------------------------------------------------------------------------------------------------------------------------------------------------------------------------------------- | ------- | --------------------------- |
| Saving control                | A Liability account which denotes the Fixed Deposit account portfolio and is credited when a deposit is made and debited when a withdrawal is done.                                   |         |                             |
| Savings transfers in suspense | An Asset account that is used as a suspense account for tracking Portfolio of Fixed Deposit accounts under transfer. That is, the account is being transferred but not yet completed. |         |                             |

**Expenses**

| **Field name (attribute)** | Description                                                                           | Example | Validations (if applicable) |
| -------------------------- | ------------------------------------------------------------------------------------- | ------- | --------------------------- |
| Interest on savings        | An Expense account, which is debited when interest is due to be paid to the customer. |         |                             |

**Income**

| **Field name (attribute)** | Description                                                                                  | Example | Validations (if applicable) |
| -------------------------- | -------------------------------------------------------------------------------------------- | ------- | --------------------------- |
| Income from fees           | An Income account which is credited when a fee is paid by account holder on this account.    |         |                             |
| Income from penalties      | An Income account that is credited when a penalty is paid by account holder on this account. |         |                             |

**Advanced accounting rules (optional)**

The advanced accounting rules allow for finer detail in mapping payment types to fund sources, fees to income accounts, and penalties to income accounts

| Field name (attribute)                                                                  | Description                                                                                                                                                                                                                                               | Example | Validations (if applicable) |
| --------------------------------------------------------------------------------------- | --------------------------------------------------------------------------------------------------------------------------------------------------------------------------------------------------------------------------------------------------------- | ------- | --------------------------- |
| <p>Configure Fund Sources for Payment Channels</p><p>Payment Type</p><p>Fund Source</p> | <p>A different Fund Source for each Payment Channel may be specified.</p><p>Select a Payment Type from the <strong>Payment Type</strong> list (e.g.,Cash, check, m-pesa, etc).</p><p>Select a Fund Source from the <strong>Fund Source</strong> list.</p> |         |                             |
| <p>Map Fees to Income Accounts</p><p>Fees</p><p>Income Account</p>                      | <p>A different Income Account for each Fee type may be specified.</p><p>Select a Fee from the <strong>Fee</strong> list.</p><p>Select an Income Account from the <strong>Income Account</strong> list.</p>                                                |         |                             |
| <p>Map Penalties to Specific Income Accounts</p><p>Penalty</p><p>Income Account</p>     | <p>A different Income Account for each Penalty type may be specified.</p><p>Select a Penalty from the <strong>Penalty</strong> list.</p><p>Select an Income Account from the <strong>Income Account</strong> list.</p>                                    |         |                             |


---

[Next Page](/llms-full.txt/1)