> For the complete documentation index, see [llms.txt](https://docs.mifos.org/llms.txt). Markdown versions of documentation pages are available by appending `.md` to page URLs; this page is available as [Markdown](https://docs.mifos.org/mifosx/user-manual/data-import-tool/getting-started-with-data-import-tool.md).
# Getting started with - Data Import Tool
### **Getting started**
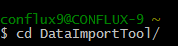
**Starting Data Import tool, Using Git bash** **>>** **Go to:**